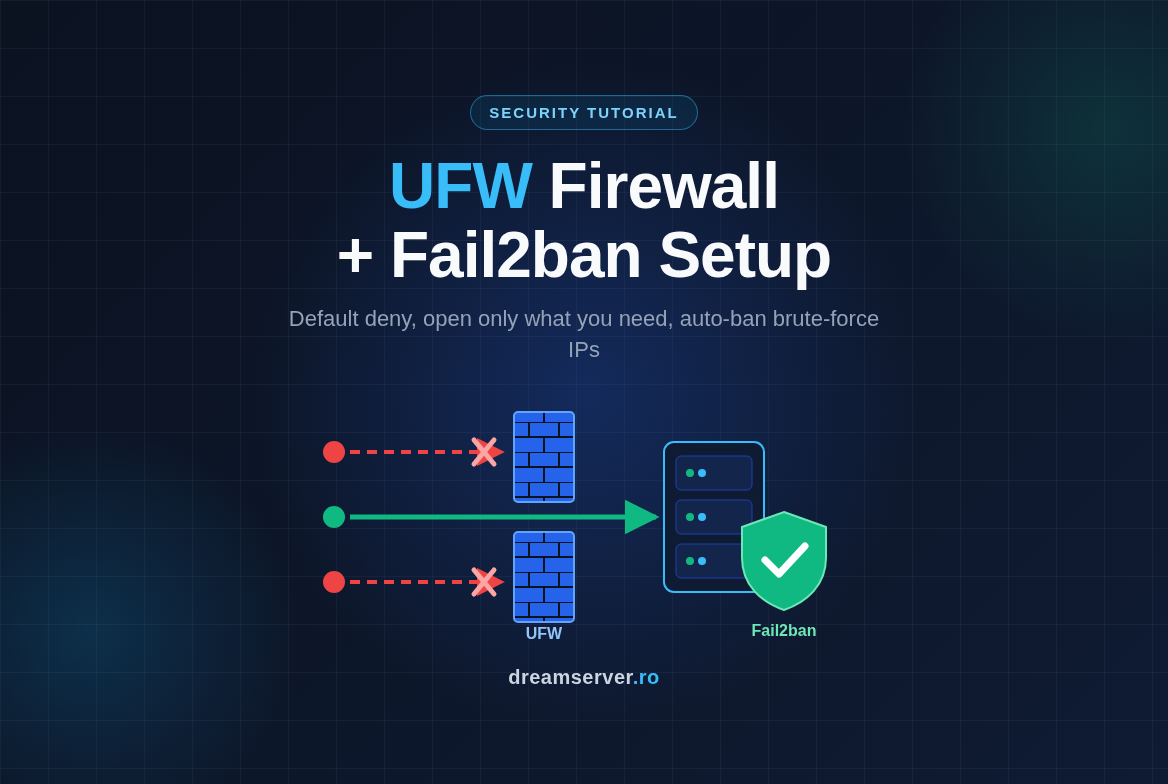
UFW Firewall Setup + Fail2ban: Stop SSH Brute-Force Attacks
Most people learn this the hard way: the moment a new VPS gets a public IP address, automated bots start trying to log in to it. This does not happen next week, or after you publish your website. It happens within minutes. Open the SSH log of any server that has been online for a day and you will find hundreds of failed logins for users like root, admin, ubuntu and test, coming from addresses all over the world. None of it is personal. It is the background noise of the internet, but it is noise you should deal with on day one.
In this tutorial we build two simple layers of defense that every Linux server should have. First comes a ufw firewall setup that blocks everything by default and opens only the ports you actually use. Second comes Fail2ban, a small service that watches your SSH logs and automatically bans IP addresses that keep guessing passwords. We do it on Debian 13 and Ubuntu 24.04, we explain every command, and we point out where the two distributions behave differently. Plan for about 20 minutes, most of it reading.
Why a fresh VPS needs a firewall
Before typing commands, it helps to understand what we are protecting and how. Three short concepts cover everything you need.
What a port actually is
A server has one IP address but runs many programs that talk to the network: the SSH server you log in with, a web server, maybe a database. To keep their traffic apart, every network connection targets a port, a number between 1 and 65535. By convention SSH listens on port 22, HTTP on port 80 and HTTPS on port 443. Ports also come in two flavors, TCP (reliable connections, used by SSH and websites) and UDP (lightweight packets, used by DNS, some VPNs and HTTP/3).
The problem is that software often listens on more ports than you realize. A database installed for testing, an admin panel, a monitoring agent: each one is a door, and every open door on a public IP is visible to the scanners that sweep the entire internet several times a day.
What a firewall does, and what “default deny” means
A firewall is a set of rules that decides, for every incoming packet, whether it is allowed in or not. The Linux kernel has a built-in firewall engine called netfilter, configured with the tools iptables or nftables. Those tools are powerful but verbose, so we will use a friendlier front end.
The most important idea in this article is default deny: everything incoming is blocked unless a rule explicitly allows it. The opposite approach, allowing everything and blocking known bad things, never works, because you cannot list everything bad. With default deny, a database you forgot about stays invisible from the internet, because nobody ever opened its port.
UFW: the Uncomplicated Firewall
UFW (Uncomplicated Firewall) is a command-line tool that turns short, readable commands like ufw allow 443/tcp into the correct netfilter rules, for both IPv4 and IPv6. It comes from the Ubuntu project, it is available on Debian too, and it stores its rules in plain files under /etc/ufw/. On both Debian 13 and Ubuntu 24.04 it works on top of the nftables backend, so you do not need to care about which engine runs underneath.
Where Fail2ban fits
A firewall cannot block SSH completely, because you need SSH to manage the server. That is where brute-force attacks come in: a bot connects to port 22 and tries thousands of username and password combinations, hoping one of them works. Fail2ban reads the SSH log, notices when the same IP fails to log in several times in a short window, and adds a temporary firewall rule that blocks that IP. Fail2ban uses three terms you will see in its config: a filter (the patterns that recognize a failed login in the log), an action (what to do, here: add a UFW rule) and a jail (a filter plus an action plus the thresholds, for one service).
What you need
- A DreamServer VPS running Debian 13 or Ubuntu 24.04, with a public IP. A KVM VPS is the easiest case (see the LXC note further down).
- A regular user with
sudorights. Every command below starts withsudo, so you do not need to log in as root. - An open SSH session to the server, and ideally a way to open a second one for testing.
- Access to the out-of-band console from your client area (the web console of the VPS), as a safety net in case you lock yourself out.
- Your own public IP address, if it is static. We show how to find it in step 7.
The plan: 8 steps in two parts
The procedure has two parts. Steps 1 to 5 build the firewall, steps 6 to 8 add Fail2ban on top of it. The order matters: we allow SSH before enabling the firewall, and we only enable it once all rules are in place.
Part 1: ufw firewall setup, step by step
Step 1: Update the system and install UFW
Start with an up-to-date system, so you are not protecting outdated packages:
sudo apt update && sudo apt upgrade -y
sudo apt install -y ufw
Here is the first difference between the two distributions. Ubuntu 24.04 ships with UFW already installed but inactive, so apt will simply say ufw is already the newest version. Debian 13 does not include it by default, so apt installs it together with its dependencies (the iptables package, which on Debian 13 uses the nftables backend).
If the upgrade installed a new kernel, reboot before continuing. On Ubuntu you can check with:
[ -f /var/run/reboot-required ] && echo "Reboot needed" || echo "No reboot needed"
Debian 13 does not create /var/run/reboot-required by default, so on Debian simply reboot with sudo reboot if you saw a linux-image package in the upgrade list.
Now confirm UFW is present but not yet active:
sudo ufw status
Expected output: Status: inactive. Good, nothing is being blocked yet, and nothing will be until step 5.
Step 2: Set the default policies
The default policies are the “everything else” rule: what happens to traffic that no specific rule matches. We want incoming traffic denied and outgoing traffic allowed, so the server can still download updates, resolve DNS and send email:
sudo ufw default deny incoming
sudo ufw default allow outgoing
UFW answers with Default incoming policy changed to 'deny' and a reminder to update your rules accordingly. These are actually UFW’s built-in defaults, but setting them explicitly makes your intention clear and protects you if someone changed them earlier.
While we are here, check that IPv6 is covered. Your VPS probably has an IPv6 address too, and a firewall that only filters IPv4 leaves a second door wide open:
grep '^IPV6' /etc/default/ufw
You should see IPV6=yes. If it says no, edit the file with sudo nano /etc/default/ufw, change it to yes and save. From now on, every rule you add is created for both IPv4 and IPv6, which is why UFW prints Rules updated and Rules updated (v6).
Step 3: Allow SSH before anything else
This is the step that prevents the classic mistake of locking yourself out. If you enable a default deny firewall without an SSH rule, your current session may survive for a while, but the next login will fail.
First, find out which port your SSH server really listens on:
sudo sshd -T | grep -i '^port'
The output is usually port 22. If you or your provider changed it, you will see the custom number. Now allow it, using limit instead of a plain allow:
sudo ufw limit 22/tcp comment 'SSH'
limit still allows SSH, but it adds rate limiting: an IP that opens 6 or more connections within 30 seconds gets its new connections denied. That alone slows down the dumbest bots before Fail2ban even sees them. If your port is not 22, replace the number, for example sudo ufw limit 2222/tcp comment 'SSH'.
If you have a static public IP (an office line, a VPN with a fixed exit address), you can go further and allow SSH only from that address, instead of the rule above:
sudo ufw allow from 203.0.113.10 to any port 22 proto tcp comment 'SSH from office'
Only do this if you are sure the IP does not change, otherwise you will need the web console to get back in.
A note about changing the SSH port later: on Debian 13 a sudo systemctl restart ssh applies the new port. On Ubuntu 24.04, SSH is started through systemd socket activation (ssh.socket), so after editing the port you need sudo systemctl daemon-reload followed by sudo systemctl restart ssh.socket. In both cases, add the UFW rule for the new port before restarting.
Step 4: Open only the ports you actually need
Now let us see what is actually listening on the server:
sudo ss -tulpn
This lists every listening TCP and UDP socket, with the program that owns it. The Local Address:Port column is the interesting one. 0.0.0.0:3306 or [::]:3306 means “listening on all interfaces”, so reachable from outside if the firewall allows it. 127.0.0.1:3306 means “only from the server itself”, which is what you want for databases.
For a typical web server, you need HTTP and HTTPS:
sudo ufw allow 80/tcp comment 'HTTP'
sudo ufw allow 443/tcp comment 'HTTPS'
If your web server supports HTTP/3 (QUIC), it also uses UDP on port 443: sudo ufw allow 443/udp comment 'HTTP/3'. If you are not sure, skip it, browsers fall back to TCP automatically.
For services that only you or another server should reach, allow them from a specific address instead of the whole world. For example, a PostgreSQL database that only your application server at 198.51.100.20 connects to:
sudo ufw allow from 198.51.100.20 to any port 5432 proto tcp comment 'Postgres from app'
The rule of thumb: if you cannot explain who needs a port and why, do not open it. Because UFW is still inactive, you can review everything you added so far with:
sudo ufw show added
Step 5: Enable UFW and check the rules
Double-check that the SSH rule appears in the show added list. Then enable the firewall:
sudo ufw enable
UFW warns you: Command may disrupt existing ssh connections. Proceed with operation (y|n)?. Type y. The answer should be Firewall is active and enabled on system startup. UFW now loads automatically at every boot, on both Debian and Ubuntu.
Do not close your current session yet. Open a new terminal on your computer and log in again with SSH. If it works, the SSH rule is correct. If it does not, go back to the old session (or the web console) and fix the rule, or run sudo ufw disable to start over.
Now look at the full picture:
sudo ufw status verbose
The output should look like this:
Status: active
Logging: on (low)
Default: deny (incoming), allow (outgoing), disabled (routed)
New profiles: skip

To                         Action      From
--                         ------      ----
22/tcp                     LIMIT IN    Anywhere                   # SSH
80/tcp                     ALLOW IN    Anywhere                   # HTTP
443/tcp                    ALLOW IN    Anywhere                   # HTTPS
22/tcp (v6)                LIMIT IN    Anywhere (v6)              # SSH
80/tcp (v6)                ALLOW IN    Anywhere (v6)              # HTTP
443/tcp (v6)               ALLOW IN    Anywhere (v6)              # HTTPS
To remove a rule, list them with numbers and delete by number:
sudo ufw status numbered
sudo ufw delete 3
Run status numbered again after each deletion, because the numbers shift. You can also delete by repeating the rule, for example sudo ufw delete allow 80/tcp.
UFW logs blocked packets at the low level by default. Where you read them depends on the distribution: Ubuntu 24.04 usually has rsyslog installed and writes them to /var/log/ufw.log, while Debian 13 has no rsyslog by default and keeps them in the systemd journal. On Debian use sudo journalctl -k | grep UFW, on Ubuntu sudo tail -f /var/log/ufw.log.
Part 2: blocking SSH brute-force attacks with Fail2ban
The firewall now hides everything except SSH and the web ports. SSH is still open to the world, though, and that is what Fail2ban protects.
How Fail2ban decides to ban someone
Three settings drive every jail. maxretry is the number of failures allowed, findtime is the time window in which they are counted, and bantime is how long the ban lasts. With maxretry = 5, findtime = 10m and bantime = 1h, an IP that fails 5 times within 10 minutes is blocked for one hour. We will also enable incremental bans, so an IP that comes back after its ban gets 2 hours, then 4, and so on up to a week.
Step 6: Install Fail2ban
sudo apt install -y fail2ban python3-systemd
sudo systemctl enable --now fail2ban
python3-systemd lets Fail2ban read the systemd journal directly. This matters on Debian 13, where there is no /var/log/auth.log file because rsyslog is not installed. On Ubuntu 24.04 auth.log usually exists, but reading the journal works the same and keeps our config identical on both systems.
Check that the service is running:
systemctl status fail2ban --no-pager
You want to see active (running). On Ubuntu 24.04, if the service fails with a Python error mentioning asynchat, your Fail2ban package is outdated: run sudo apt update && sudo apt upgrade to get the fixed version. Debian 13 ships Fail2ban 1.1.x, Ubuntu 24.04 ships 1.0.2 with distribution patches, and the config below works on both.
Step 7: Configure the SSH jail in jail.local
Fail2ban’s main configuration lives in /etc/fail2ban/jail.conf, but never edit that file: package upgrades overwrite it. Instead, create /etc/fail2ban/jail.local, which is read afterwards and overrides anything it redefines. Both Debian and Ubuntu also ship /etc/fail2ban/jail.d/defaults-debian.conf, which enables the sshd jail with distribution defaults. Our jail.local is loaded after it, so our values win.
First, find the IP address you are connecting from, so you never ban yourself:
echo "$SSH_CLIENT" | awk '{print $1}'
Note the address it prints. Now create the file:
sudo nano /etc/fail2ban/jail.local
Paste the following, replacing 203.0.113.10 with your own IP (or removing it if your home IP changes often):
[DEFAULT]
# Never ban these addresses: localhost and your own IP
ignoreip = 127.0.0.1/8 ::1 203.0.113.10

# 5 failures within 10 minutes = banned for 1 hour
bantime  = 1h
findtime = 10m
maxretry = 5

# Repeat offenders get longer bans each time, up to one week
bantime.increment = true
bantime.maxtime   = 1w

# Apply bans through UFW, so they appear in "ufw status"
banaction = ufw
banaction_allports = ufw

[sshd]
enabled  = true
port     = ssh
backend  = systemd
journalmatch = _SYSTEMD_UNIT=ssh.service + _COMM=sshd + _COMM=sshd-session
Save with Ctrl+O, Enter, and exit with Ctrl+X. A few lines deserve an explanation:
banaction = ufwmakes Fail2ban ban IPs by adding aREJECTrule at the top of the UFW rule list. The ban covers all ports for that IP, not just SSH, which is what you want for an attacker.backend = systemdtells Fail2ban to read the systemd journal instead of a log file.journalmatchselects which journal entries to read. The SSH service unit is calledssh.serviceon both Debian and Ubuntu, and the_COMMparts catch messages from thesshdprocess and fromsshd-session. That second name matters on Debian 13: since OpenSSH 9.8, login handling moved into a separatesshd-sessionprocess, and Debian 13 ships OpenSSH 10. Ubuntu 24.04 uses OpenSSH 9.6, where everything still comes fromsshd, and the same line works there too.
Test the configuration before applying it, then restart:
sudo fail2ban-client -t
sudo systemctl restart fail2ban
sudo fail2ban-client status
The test should print OK: configuration test is successful, and the status should list one jail:
Status
|- Number of jail:	1
`- Jail list:	sshd
Step 8: Test a ban and watch it work
The safest test does not involve locking anyone out. Ban a documentation IP address by hand and check that it reaches the firewall:
sudo fail2ban-client set sshd banip 198.51.100.23
sudo ufw status | head -n 8
You should see a new rule at the very top, before your allow rules:
Anywhere REJECT IN 198.51.100.23
Remove it again:
sudo fail2ban-client set sshd unbanip 198.51.100.23
Now look at the jail’s real statistics:
sudo fail2ban-client status sshd
Status for the jail: sshd
|- Filter
|  |- Currently failed:	2
|  |- Total failed:	57
|  `- Journal matches:	_SYSTEMD_UNIT=ssh.service + _COMM=sshd + _COMM=sshd-session
`- Actions
   |- Currently banned:	3
   |- Total banned:	12
   `- Banned IP list:	192.0.2.41 192.0.2.77 198.51.100.140
The Journal matches line confirms our override is active. On a server that has been online for a few hours, Total failed grows quickly, which is the best proof that detection works. If you want a live test, connect from a different network (a phone hotspot, for example, since your own IP is in ignoreip) using a username that does not exist, such as ssh fakeuser123@YOUR_VPS_IP, and fail five times. The sixth attempt should get Connection refused. Bans are also logged in /var/log/fail2ban.log on both distributions, with lines like NOTICE [sshd] Ban 192.0.2.41.
How much difference does this make?
Numbers vary a lot depending on the IP range and how long it has been in use, but the pattern is always the same. A fresh public IPv4 address typically sees a few thousand failed SSH logins per day. UFW’s limit rule cuts down the fastest bots, and Fail2ban cuts each attacking IP off after a handful of attempts.
Fail2ban does not stop the first few attempts from each new IP, and large botnets spread their attempts over thousands of addresses. That is why Fail2ban is a noise filter, not your main defense. The main defense is SSH key authentication, covered in the security notes below. With keys only, none of those attempts can succeed anyway, and Fail2ban keeps your logs readable and your CPU quiet.
Docker and UFW: the trap that catches almost everyone
If you run Docker on this server, read this carefully. When you publish a container port with -p 8080:80 or a ports: entry in Compose, Docker writes its own netfilter rules that forward the traffic to the container before UFW’s rules are evaluated. The result: the port is reachable from the internet even though ufw status does not mention it, and even if you add ufw deny 8080.
The simplest fix is to never publish container ports on all interfaces. Bind them to localhost and put a reverse proxy (Nginx, Caddy, Traefik) in front, which listens on ports 80 and 443 that UFW already controls:
services:
  app:
    image: louislam/uptime-kuma:1
    restart: unless-stopped
    ports:
      - "127.0.0.1:3001:3001"
    volumes:
      - app_data:/app/data

volumes:
  app_data:
With 127.0.0.1:3001:3001 the service is reachable only from the server itself. Run docker compose up -d after the change and verify from another machine that the port no longer answers.
A note on unprivileged LXC containers
Everything above works fully on a KVM VPS, which has its own kernel. In an unprivileged LXC container, the firewall is shared with the host kernel and the container has limited rights: UFW may fail to load kernel modules or apply its sysctl settings, and some rules may not work at all. Since Fail2ban’s ufw action depends on UFW, it is affected too. If you are on an LXC plan, test carefully with the web console at hand, and if UFW reports errors, ask our support team about filtering at the host level instead.
Troubleshooting and common mistakes
- Locked out after
ufw enable. Log in through the web console in your client area and runsudo ufw allow 22/tcp(or your custom port), orsudo ufw disableto start over. This is why we keep a session open until step 5 is verified. ERROR: Could not find a profile matching 'OpenSSH'. Application profiles differ between distributions. Use port numbers, as we did in this tutorial, and they work everywhere.- A deny rule does not work. UFW checks rules from top to bottom and stops at the first match. A
denyadded after anallowfor the same port is never reached. Usesudo ufw insert 1 deny from 192.0.2.50to put it at the top. - Fail2ban will not start. Read the reason with
sudo journalctl -u fail2ban -n 50 --no-pager. On Debian, an error about missing log files means the jail is not usingbackend = systemd, orpython3-systemdis missing. On Ubuntu 24.04, anasynchaterror means the package needs updating. Total failedstays at 0. Check that SSH failures are actually logged withsudo journalctl -u ssh -n 30 --no-pager. Check that theJournal matchesline infail2ban-client status sshdmatches our config, and remember that attempts from IPs inignoreipare never counted.- You banned yourself. From the web console or another IP, run
sudo fail2ban-client unban YOUR_IP, orsudo fail2ban-client unban --allto clear every ban. Then add your IP toignoreip. ufw limitblocks your deployment tool. Tools like Ansible can open many SSH connections quickly. Add anallow fromrule for your management IP above the limit rule withsudo ufw insert 1 allow from 203.0.113.10 to any port 22 proto tcp.- A container port is reachable despite UFW. See the Docker section above: bind published ports to
127.0.0.1.
Security notes
- Use SSH keys and disable password logins. This is the single most effective protection against brute-force. Once your key works, create
/etc/ssh/sshd_config.d/10-hardening.confcontainingPasswordAuthentication no, check the syntax withsudo sshd -t, then restart SSH (sudo systemctl restart ssh). Keep a session open while you test. - Do not log in as root over SSH. Debian and Ubuntu already default to
PermitRootLogin prohibit-password. With keys only, root password guessing is pointless, but a normal sudo user is still the better habit. - Changing the SSH port is not security. It reduces log noise, but any port scanner finds the new port within minutes. Treat it as cosmetic, not as protection.
- A firewall does not patch software. An application with a vulnerability on port 443 is still exposed. Keep the system updated, ideally with the
unattended-upgradespackage for security updates. - Remember IPv6. Keep
IPV6=yesin/etc/default/ufw, otherwise your rules only protect half of your addresses. - Back up your rules. UFW stores them in
/etc/ufw/user.rulesand/etc/ufw/user6.rules, and Fail2ban in/etc/fail2ban/jail.local. Copy these files when you rebuild or clone a server. - Review regularly. Run
sudo ufw status numberedevery few months and remove rules for services you no longer run.
So, is your VPS locked down now?
In about 20 minutes you went from a server that answered on every port it happened to listen on, to one that follows a clear rule: deny everything, allow only SSH and the web, and automatically ban anyone who keeps guessing passwords. Add SSH keys on top and the routine brute-force noise of the internet becomes a line in a log file instead of a risk.
If you need a clean server to practice on, you can get a VPS with us running Debian 13 or Ubuntu 24.04 in a few minutes. And if you would rather have someone else handle firewalls, Fail2ban jails, SSH hardening and updates for you, our server administration team does exactly that, every day.
FAQ
Does UFW slow down my server?
No, not in any way you would notice. UFW only writes rules, the actual filtering is done by the kernel’s netfilter engine, which handles millions of packets per second. UFW itself uses no memory while running, and Fail2ban typically uses a few tens of MB of RAM.
Should I change the SSH port instead of using Fail2ban?
You can do both, but they are not equivalent. A different port reduces the number of automated attempts, while Fail2ban actively blocks the IPs that do find it. Neither replaces SSH key authentication, which is what actually makes guessing useless.
How do I unban an IP that Fail2ban blocked?
Run sudo fail2ban-client unban 192.0.2.41 to remove it from all jails, or sudo fail2ban-client set sshd unbanip 192.0.2.41 for a single jail. To prevent it from happening again, add the address to ignoreip in /etc/fail2ban/jail.local and restart Fail2ban.
Can Fail2ban protect my website too?
Yes. Fail2ban ships filters for Nginx, Apache, Postfix, Dovecot and many others, in /etc/fail2ban/filter.d/. You enable them by adding new jail sections to jail.local, the same way we did for SSH. Start with SSH, make sure it works, then add more jails one at a time.
Should I use UFW or write nftables rules directly?
For a single VPS with a handful of services, UFW is the better choice: readable commands, IPv4 and IPv6 handled together, and less room for mistakes. Raw nftables makes sense when you need complex setups like NAT, port forwarding between networks or very custom chains, usually on routers or larger infrastructure.








