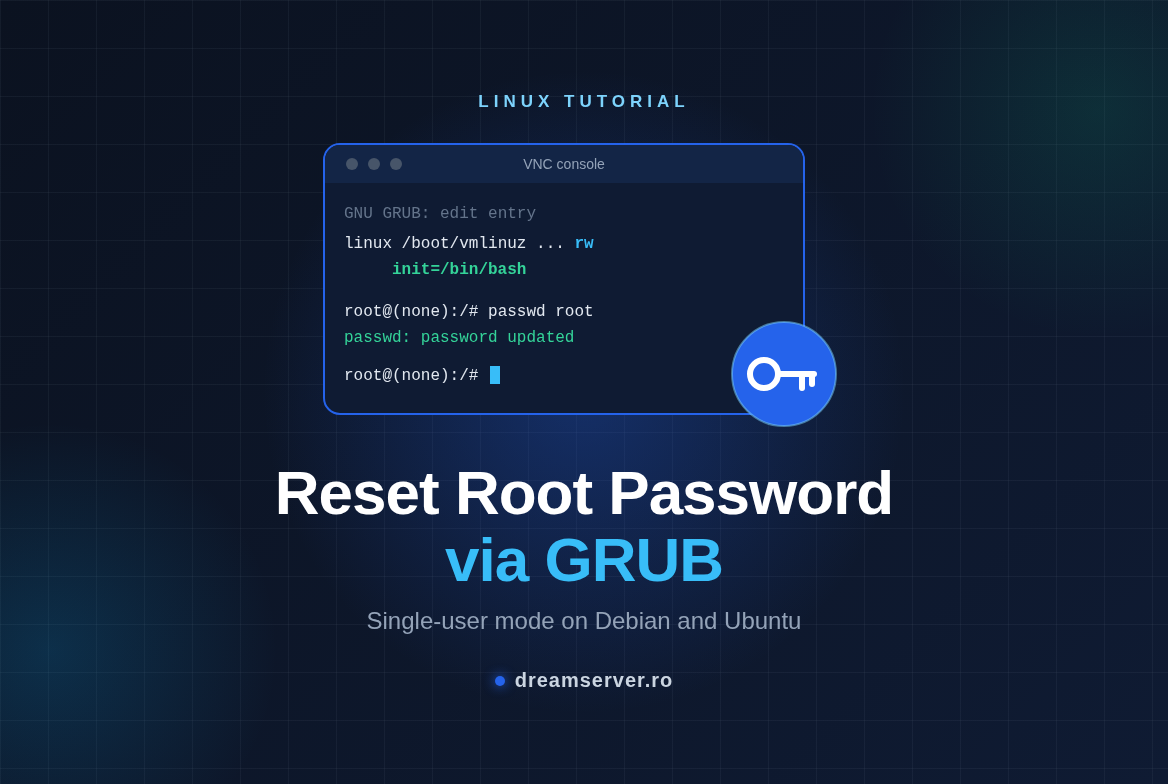
Reset Root Password on Linux from GRUB (Single-User Mode)
Sooner or later it happens to everyone. You come back to a VPS you set up months ago, type the password you were so sure about, and the server answers with “Permission denied” three times in a row. There is no SSH key on this laptop, the note with the password is gone, and sudo wants exactly the password you no longer have. It feels like being locked out of your own house. The good news: if you can reach the server’s console, a forgotten password is not a locked door, it is a speed bump. In this guide we will interrupt the boot process from the GRUB menu, start Linux straight into a root shell and set a new password, on Debian 13 and Ubuntu 24.04.
The whole thing takes about five minutes, does not touch your websites, databases or files, and works on any KVM VPS where the control panel gives you a console. We also cover the parts most quick recipes skip: why the classic single-user mode asks for the very password you lost, why the filesystem has to be writable before passwd can do its job, what extra step SELinux systems need, and what to do when the GRUB menu simply refuses to appear.
What you need
- A KVM VPS or dedicated server running Debian 13 or Ubuntu 24.04 (the method is the same on older releases and on most other distributions). It does not apply to LXC containers, privileged or unprivileged, we explain why below.
- Access to your client area / control panel, with the console (VNC) feature. This is the “virtual monitor and keyboard” of the server.
- A desktop browser and a physical keyboard. Doing this from a phone is possible, but painful.
- A short temporary password in mind, made of plain lowercase letters and digits. You will replace it with a strong one at the end.
- About 10 minutes of downtime: the server reboots twice, so pick a quiet moment if it serves live traffic.
How a Linux server boots, and where we step in
To understand why this trick works, it helps to know what happens between “power on” and the login prompt. A server boots in a chain, and each link hands control to the next one:
- Firmware (BIOS or UEFI): the very first code that runs. It finds the disk and starts the boot loader.
- GRUB: the boot loader. It shows a small menu (if configured to), loads the Linux kernel into memory and passes it a line of options called the kernel command line.
- The Linux kernel: the core of the operating system. It initializes the hardware, mounts the root filesystem (the partition that holds
/, with/etc,/usrand everything else), then starts exactly one program, the init process, which always gets process ID 1 (PID 1). - systemd: on Debian and Ubuntu, this is the init process. It starts every other service: networking, SSH, your web server and finally the login prompt that asks for a password.
The password check lives at the very end of this chain, in programs started by systemd. The kernel itself does not care about passwords. So if we tell the kernel “do not start systemd, start a bash shell instead”, we land in a shell that is already running as root, before anything has asked for credentials. That is what the kernel option init=/bin/bash does, and GRUB is where we can add it, because GRUB lets us edit the kernel command line for a single boot.
What “single-user mode” means on a modern system
On older Unix and Linux systems, “single-user mode” (runlevel 1, or S) was a minimal boot state meant for maintenance: no network, no other users, just a root shell on the console. On systemd-based distributions the equivalent is called rescue.target, and you can still request it by adding single or systemd.unit=rescue.target to the kernel command line.
There is a catch, though. On Debian and Ubuntu, rescue mode runs a program called sulogin, which asks for the root password before giving you a shell (“Give root password for maintenance”), or refuses entirely when the root account is locked. That protection makes sense, but it is useless when the root password is exactly what you forgot. This is why the reliable method is init=/bin/bash: it skips systemd and sulogin completely. People still call it “single-user mode”, because the result is the same idea, a lone root shell on the console.
One more detail for Ubuntu users: on a standard Ubuntu install the root account is locked and you work through a regular user with sudo. In that case the password you actually forgot is probably your own user’s. No problem: the same procedure lets you reset any account, and we show both variants in step 6. Depending on how your VPS was provisioned, you may be using root directly or a sudo user, so check which one you normally log in with.
Why this does not work in an LXC container
An LXC container is a lightweight VPS that shares the kernel of the physical host. It has no firmware, no GRUB and no kernel of its own, so there is no boot menu to interrupt, whether the container is privileged or unprivileged. If your VPS is LXC, look for a “reset root password” option in the control panel, or open a support ticket: from the host, our team can set a new password inside the container in seconds. Everything below applies to KVM virtual machines and dedicated servers.
Before you start: three details that save time
The keyboard is American. GRUB and the bare root shell use the US keyboard layout, regardless of the layout on your computer. If you use a Romanian, German or French layout, characters such as @, ", y and z or / may come out differently. This is why we suggest a temporary password made of simple letters and digits: you will type it at least twice in the console, and you want to be sure it is what you think it is.
Copy and paste usually does not work. The browser console sends keystrokes, it does not reliably paste text into GRUB. Plan to type the commands by hand, they are short on purpose.
Some setups add an extra lock. If the disk is encrypted with LUKS, you will be asked for the disk passphrase during boot, and without it no method can read the data (which is exactly the point of encryption). If GRUB itself is password protected, pressing e asks for a GRUB username and password; in that case jump to the rescue ISO method further down.
Reset the root password from GRUB, step by step
Here is the whole procedure at a glance. Step 7 only applies when SELinux is enabled, which is not the case on a default Debian or Ubuntu install.
Step 1: Open the console from the VPS control panel
Log in to your client area, select the VPS and open the Console (VNC) feature. A new browser tab or window shows the server’s screen, exactly as if a monitor were plugged into it. If the server is running normally, you will see a login prompt such as debian login: or ubuntu login:.
Click once inside the console window so it receives your keystrokes. Keep this tab open and visible: in the next step the GRUB menu may be on screen for only a second or two, and you do not want to miss it while switching tabs.
Step 2: Reboot and stop at the GRUB menu
Since you cannot log in, reboot the server from the outside: use the Reboot button in the control panel, or the “Send Ctrl+Alt+Del” button that most consoles offer. A graceful reboot is preferable, but a hard reset is acceptable if the server does not respond.
What happens next depends on the distribution:
- Debian 13 shows the GRUB menu by default, with a 5 second countdown. Press an arrow key as soon as it appears, this stops the countdown.
- Ubuntu 24.04 hides the menu on servers with a single operating system. Right after the reboot starts, tap Esc repeatedly (UEFI machines) or hold Shift (BIOS machines). In a browser console, tapping Esc is usually more reliable than holding Shift.
- Cloud images of both distributions often set the GRUB timeout to 0 seconds, so the window to press a key is very short. Start tapping Esc immediately after clicking Reboot.
If you press Esc one time too many and land on a bare grub> prompt, type normal and press Enter, and the menu comes back. If you missed the menu and the system booted normally, simply reboot again and retry. Once the menu is visible, the first entry (“Debian GNU/Linux” or “Ubuntu”) should be highlighted.
Step 3: Edit the boot entry
With the first entry highlighted, press e. GRUB opens a small text editor with the commands it would run for that entry. Nothing you change here is saved to disk: the edit applies to this one boot only, and the next boot will be completely normal.
Use the arrow keys to move down to the line that starts with linux. It is often long and wraps across two or three screen lines, which is normal. Press End to jump to the end of that line, then make two changes:
- Find the word
ro(read-only), usually right afterroot=UUID=..., and change it torw(read-write). This tells the kernel to mount the root filesystem with write access, whichpasswdneeds. - At the very end of the line, add a space followed by
init=/bin/bash.
On a typical Debian 13 VPS, the line changes from this:
linux /boot/vmlinuz-6.12.x-amd64 root=UUID=1a2b3c4d-... ro quiet
to this:
linux /boot/vmlinuz-6.12.x-amd64 root=UUID=1a2b3c4d-... rw quiet init=/bin/bash
The kernel version and the UUID will be different on your server; leave them exactly as they are. You can also delete quiet (and splash, if present) to see the kernel messages scroll by, which helps if something goes wrong.
Ubuntu cloud images need one more change. Their linux line often ends with console=tty1 console=ttyS0. The kernel sends its main console to the last console= it finds, here the serial port ttyS0, so your root shell would appear on a serial line you are not looking at, while the VNC window stays frozen. Delete console=ttyS0, so that tty1 (the screen you see) is the only one left:
linux /vmlinuz-6.8.0-xx-generic root=UUID=... rw console=tty1 init=/bin/bash
Notice that on Ubuntu 24.04 cloud images the path starts with /vmlinuz instead of /boot/vmlinuz, because /boot is a separate partition there. That is expected, do not change it.
Step 4: Boot into the root shell
Press Ctrl+X or F10 to boot with your modified line. After a few seconds of messages you should see something like this:
bash: cannot set terminal process group (-1): Inappropriate ioctl for device
bash: no job control in this shell
root@(none):/#
The two warnings are expected and harmless: this bash is running directly as PID 1, without the usual terminal setup. The hostname shows as (none) because nothing has set it yet. The # at the end of the prompt means you are root.
Two rules while you are here. First, do not type exit: bash is now the init process, and if PID 1 exits the kernel panics and you have to reset the server. Second, Ctrl+C will not interrupt commands, so stick to the short commands in this guide.
Step 5: Make sure the root filesystem is writable
Even though we asked for rw, it is worth checking, especially if you forgot to change ro. Run:
findmnt -no OPTIONS /
The output lists the mount options of /. If it starts with rw, for example rw,relatime, you are good to go. If it starts with ro, remount the filesystem in read-write mode:
mount -o remount,rw /
This command prints nothing when it succeeds. Run findmnt -no OPTIONS / again to confirm you now see rw. On Debian and Ubuntu, the initramfs (the small temporary system that prepares the real root filesystem) has already mounted /proc for you, so findmnt works. If you ever get an error mentioning /proc, mount it first with mount -t proc proc /proc.
Why does this matter? Passwords are stored as hashes in /etc/shadow. Changing a password means writing a new version of that file, and on a read-only filesystem the write fails.
Step 6: Set the new password
To set a new password for root:
passwd root
You are asked for the new password twice. Nothing is shown while you type, not even asterisks, which is normal. When both entries match, you get:
New password:
Retype new password:
passwd: password updated successfully
If the password you forgot belongs to your regular sudo user (the usual situation on Ubuntu), first list the human accounts on the system:
awk -F: '$3 >= 1000 && $3 < 65534 {print $1}' /etc/passwd
This prints the usernames with a user ID of 1000 or higher, which is where Debian and Ubuntu place normal users. Then reset the one you need, replacing alice with the actual username:
passwd alice
You can check the result with passwd -S root (or your username): the second field should be P, which means “usable password”. L means locked and NP means no password.
Step 7: Relabel files if SELinux is enabled
This step is only for systems that use SELinux, a security layer that attaches a label (a “security context”) to every file and decides which programs may access which labels. Default Debian and Ubuntu installs use AppArmor instead, which does not label files, so most readers will skip this step. To check, run:
grep -E '^SELINUX=' /etc/selinux/config 2>/dev/null
If the command prints nothing, SELinux is not installed and you can move on. If it prints SELINUX=enforcing or SELINUX=permissive, run:
touch /.autorelabel
Here is why. passwd does not edit /etc/shadow in place, it writes a new file and swaps it in. In our bare shell the SELinux policy is not loaded, so the new file is created without its correct label. On the next normal boot, with SELinux enforcing, the login programs are not allowed to read an unlabeled /etc/shadow, and every login fails even with the correct password. The empty file /.autorelabel tells the system to relabel all files on the next boot (this is honored on RHEL-family distributions and on Debian with the selinux-basics package). The relabel takes from one to several minutes, depending on the number of files, and is followed by an automatic extra reboot. Let it finish without interrupting it.
Step 8: Write changes to disk and reboot
Now we make sure everything has reached the disk, and restart into a normal boot:
sync
mount -o remount,ro /
reboot -f
sync flushes any data still in memory to the disk. Remounting / read-only is an extra safety net before a hard restart; if it complains that the device is busy, do not worry, sync has already done the important part. Finally, reboot -f restarts the machine immediately.
A plain reboot would fail here with a message like “System has not been booted with systemd as init system (PID 1)”, because systemd, which normally coordinates a shutdown, is not running. That is why we use -f, which does not contact the init system. If even that does not work, this fallback asks the kernel directly for an immediate restart:
echo b > /proc/sysrq-trigger
Alternatively, instead of rebooting, you can type exec /sbin/init to replace bash with systemd and let the boot continue normally from this point. Rebooting is cleaner and is what we recommend.
Remember: the GRUB edit from step 3 was temporary, so this boot is completely normal.
Step 9: Log in and tidy up
When the login prompt appears in the console, log in with the user and the temporary password you just set. If it works, the hard part is over. Now try SSH from your own computer as well.
Do not be surprised if SSH refuses the root password even though the console accepts it. Debian and Ubuntu ship with PermitRootLogin prohibit-password, which allows root over SSH only with keys, and Ubuntu cloud images also disable password authentication entirely. That is a sensible default. Log in over SSH as your regular user and use sudo -i, or use the console for root.
Next, replace the temporary password with a strong one, stored in a password manager:
passwd
While you are at it, set up an SSH key so you never depend on a remembered password again. Run this from your own computer, not from the server:
ssh-copy-id alice@203.0.113.10
Replace the user and IP address with yours. Finally, if you set a root password on Ubuntu only to get back in and you prefer to keep root locked, as Ubuntu intends, lock it again after confirming that your sudo user works:
sudo passwd -l root
Plan B: rescue ISO and chroot
Sometimes GRUB is out of reach: the menu is password protected, the boot loader is broken, or you simply cannot catch it in time. In that case, boot the VPS from a rescue or live ISO through the control panel (or ask our support team to attach one), open the console and work from there. The idea is the same, only the route differs: we mount the server’s disk from the rescue system and run passwd “inside” it with chroot, which makes a directory act as the root of the filesystem for one command.
First, identify the root partition:
lsblk -f
Look for the largest ext4 (or xfs) partition, often /dev/vda1 on a KVM VPS. On Ubuntu 24.04 cloud images, vda1 is the root, while vda15 (EFI) and vda16 (/boot) are small partitions you do not need here. If the disk uses LVM, run vgchange -ay first and look under /dev/mapper/. Then mount it and change the password (drop sudo if the rescue system already logs you in as root):
sudo mount /dev/vda1 /mnt
ls /mnt/etc/shadow
for d in dev proc sys; do sudo mount --bind /$d /mnt/$d; done
sudo chroot /mnt passwd root
The ls line is a sanity check: if it prints /mnt/etc/shadow, you mounted the right partition. The bind mounts give the chroot access to devices and system information that some PAM modules expect. If the server uses SELinux, also run sudo touch /mnt/.autorelabel. Then clean up:
for d in sys proc dev; do sudo umount /mnt/$d; done
sudo umount /mnt
Detach the ISO in the control panel and reboot. The server starts from its own disk, with the new password in place.
Which method should you choose?
In almost every case the GRUB method from this guide is the fastest, and it needs nothing beyond the console. The rescue ISO is the fallback when GRUB is locked or unreachable. Reinstalling is the last resort, and it only makes sense if you have good, tested backups.
Troubleshooting and common mistakes
The console stays black after Ctrl+X. Most often the main console was sent to a serial port. Reboot, edit the entry again and remove console=ttyS0 (or any other console= pointing to a serial port) from the linux line, as explained in step 3.
Kernel panic: “Attempted to kill init!”. Either you typed exit in the root shell, or the path after init= is wrong (a typo such as init=/bin/bsah, or a missing slash). Reset the server and retype the line carefully.
“passwd: Authentication token manipulation error”. The filesystem is still read-only. Go back to step 5, run mount -o remount,rw / and try again. On a completely full disk the same error appears because there is no space to write the new file; df -h / will tell you.
The new password does not work, even in the console. Usually a keyboard layout issue: the console typed different characters than you expected. Repeat the procedure with a password made only of lowercase letters and digits. On SELinux systems, the other classic cause is a forgotten /.autorelabel (step 7).
The password works in the console but not over SSH. That is the SSH configuration doing its job, see step 9. Log in as a normal user, or add an SSH key. Avoid enabling PermitRootLogin yes with passwords just to get around it.
Pressing e asks for a username and password. GRUB is password protected. Use the rescue ISO method, or ask whoever set up the server for the GRUB credentials.
You are asked for a disk passphrase. The disk is encrypted with LUKS. Without that passphrase there is no way in, by design.
You never manage to catch the GRUB menu. Tap Esc earlier and faster, right after clicking Reboot. For the future, once you are back in, make the menu always visible for a few seconds. Edit /etc/default/grub with sudo nano /etc/default/grub and set:
GRUB_TIMEOUT_STYLE=menu
GRUB_TIMEOUT=5
Also look at the files in /etc/default/grub.d/: Ubuntu cloud images ship a file there (for example 50-cloudimg-settings.cfg) that sets GRUB_TIMEOUT=0 and is read after the main file, so it overrides your change. Adjust the value there as well, then regenerate the GRUB configuration (the command is the same on Debian and Ubuntu):
sudo update-grub
Changes are lost after the reboot. You probably reset the server without running sync. Repeat the procedure and do not skip step 8.
Security notes
This guide shows something important about server security: whoever controls the console controls the server. No password survives physical or console access, unless the disk is encrypted. On a VPS the console lives in your control panel, so your control panel account is effectively another root password. Protect it with a strong, unique password and enable two-factor authentication where available.
You can add a GRUB password (generated with grub-mkpasswd-pbkdf2) so nobody can edit boot entries without it. On a VPS this is usually more trouble than it is worth: anyone with console access can also boot a rescue ISO, and the GRUB password only slows down your own recoveries. Full disk encryption is the real protection for data at rest, with the trade-off that you must type the passphrase in the console at every boot.
Be honest about why the password does not work. If you are sure you remember it and it suddenly stopped working, treat the situation as a possible compromise, not as forgetfulness. Take a snapshot or backup before changing anything, and once you are back in, review /root/.ssh/authorized_keys and each user’s ~/.ssh/authorized_keys, the accounts in /etc/passwd, recent logins with last and the running processes. A password reset gives you access back; it does not remove an intruder.
Finally, make the next lockout less likely: use SSH keys for daily access, keep passwords in a password manager, and always keep at least one working sudo user in addition to root.
So, is a forgotten root password a disaster?
Not at all, as long as you have console access and five quiet minutes. You interrupt GRUB, add rw init=/bin/bash for a single boot, set a new password, relabel if SELinux is in play and reboot. Your data stays exactly where it was. The real lesson is that a working console and a recovery plan are part of a server, just like backups.
If you want a server where the console, rescue ISO and reboot buttons are one click away in the control panel, take a look at our KVM VPS plans . And if you would rather never deal with lost passwords, SSH hardening or recovery at 2 AM, our server administration team can take care of access, security and monitoring for you.
FAQ
Does resetting the root password delete any data?
No. Only the password hash in /etc/shadow changes. Files, databases, websites and other users’ passwords are not touched.
Does this work on Ubuntu 24.04 and Debian 13?
Yes, both are covered here. The main differences: Ubuntu hides the GRUB menu (tap Esc or hold Shift), Ubuntu cloud images may send the console to the serial port, and on Ubuntu the root account is locked by default, so you may want to reset your sudo user instead of root.
Do I have to undo the GRUB changes afterwards?
No. Edits made with e in the GRUB menu apply to a single boot and are never written to disk. The next boot uses the normal configuration.
Can I use this method on an LXC VPS?
No. Containers have no GRUB and no kernel of their own. Use the password reset option in the control panel or contact support.
Why not just pick “recovery mode” from the GRUB menu?
The recovery entries on Debian and Ubuntu boot into rescue mode, which normally asks for the root password (or refuses when root is locked) before giving you a shell, and the exact behavior varies between releases. That is fine when you know the password and only the system is broken, but not when the password is the problem. init=/bin/bash asks for nothing and behaves the same everywhere.








