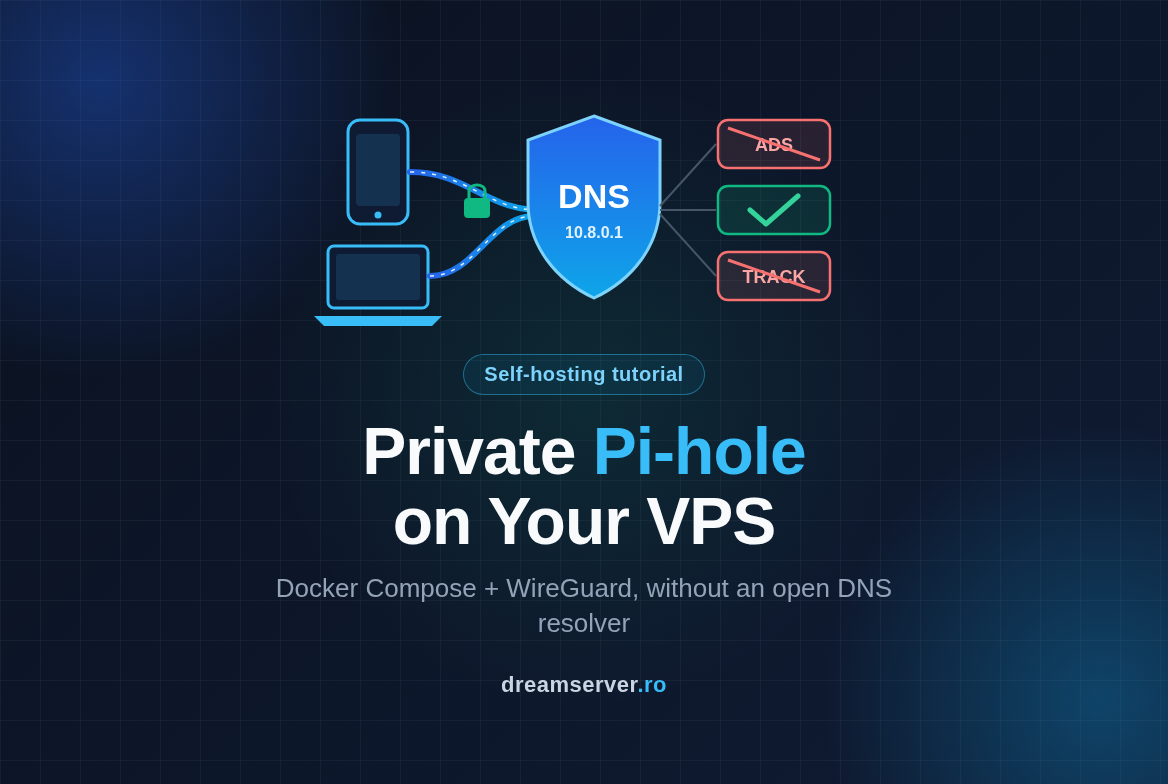
Pi-hole Docker Compose on a VPS: Ad Blocking, No Open Resolver
Ads and trackers follow you everywhere: from your laptop at the office to your phone on mobile data to the hotel wifi. Pi-hole is the classic answer, a small DNS server that replies “nothing here” whenever a device asks for an ad or tracking domain. Most people run it on a Raspberry Pi at home, which means it only helps at home. Put it on a VPS and it follows you everywhere. There is a catch that many guides skip, though: if you simply publish port 53 to the internet, you have built an open resolver, and within days strangers will be using your server to flood other people with DNS traffic. In this tutorial we run Pi-hole with Docker Compose and make it reachable only through a WireGuard tunnel from your own devices, so you get ad blocking on the go without becoming part of somebody else’s attack.
The project lives at pi-hole.net , with the official container image maintained at github.com/pi-hole/docker-pi-hole . For the tunnel we use WireGuard , which is built into the Linux kernel on both Debian and Ubuntu.
What we are building, and why not just open port 53
A quick DNS refresher
Every time your phone opens a website or an app talks to its backend, it first asks a DNS server (also called a resolver) to translate a name like example.com into an IP address. That question travels to port 53. A port is simply a numbered “door” on a server: the IP address tells packets which machine to go to, the port tells them which program on that machine should receive them. DNS uses port 53 over UDP (fast, connectionless) and sometimes TCP (for large answers).
What Pi-hole does
Pi-hole sits between your devices and the real DNS servers. It keeps a list of known ad, tracking and malware domains (the “gravity” database). When a device asks for a name on that list, Pi-hole answers 0.0.0.0, so the ad never loads. For everything else it forwards the question to an upstream resolver such as Quad9, caches the answer and returns it. Because blocking happens at the DNS level, it works in every app on the device, not only in the browser, and you see a dashboard with which device asked for what.
Why an open resolver is a real problem
An open resolver is a DNS server that answers anyone on the internet. Scanners sweep the whole IPv4 space looking for them constantly, and an exposed port 53 is usually found within hours. The abuse is called DNS amplification: an attacker sends a small query (around 60 bytes) with a forged source address, the victim’s address. Your server dutifully sends a much larger answer, often tens of times bigger, to the victim. Multiply that by thousands of queries per second and your VPS becomes a weapon in a DDoS attack. The consequences for you are abuse reports, a saturated network link, your IP landing on blocklists and possibly your service being suspended.
UDP makes this worse: there is no handshake, so the server cannot tell that the source address is fake. That is why “just put a password on it” is not an option for DNS. The only real fix is to make sure strangers cannot reach the port at all.
The design: DNS only through the tunnel
Here is the plan. WireGuard creates a private network interface on the VPS called wg0 with the address 10.8.0.1. Your phone and laptop connect to WireGuard (the only DNS-related thing exposed to the internet is the WireGuard port, which ignores every packet not signed with a known key). Docker publishes Pi-hole’s ports only on 10.8.0.1, an address that exists only inside the tunnel. On the public IP, nothing listens on port 53.
One detail matters a lot here: Docker bypasses ufw. Docker writes its own firewall rules for published ports, and those rules are evaluated before ufw’s, so ufw deny 53 does nothing for a container that publishes port 53. In our design ufw protects only the host services (SSH and WireGuard), and the Docker side is protected by the bind address, which is the real security boundary.
What you need
- A VPS with a public IPv4 address, running Debian 13 or Ubuntu 24.04. One vCPU and 1 GB of RAM are plenty. A KVM VPS is recommended: WireGuard needs a kernel module, and in an unprivileged LXC container you usually cannot create a WireGuard interface (or run Docker comfortably) unless the host has been configured for it.
- A regular user with
sudorights and SSH key login. All commands below are run as that user. - The WireGuard app on your phone (Android or iOS) and on your laptop (Windows, macOS or Linux).
- About 30 to 45 minutes.
Throughout the article we use 203.0.113.10 as the VPS public IP. It is a documentation address, so replace it with yours wherever it appears.
The procedure at a glance
The order of the steps is not arbitrary. Docker can only publish a port on 10.8.0.1 if that address already exists, so WireGuard has to be up before Pi-hole starts.
Step 1: Prepare the VPS and the firewall
Start with a fully updated system:
sudo apt update
sudo apt full-upgrade -y
On Ubuntu, check whether a reboot is needed with [ -f /var/run/reboot-required ] && echo "reboot needed". On Debian that file is not always created, so the rule is simpler: if the upgrade installed a new linux-image package, reboot. In both cases the command is sudo reboot, then log back in.
Next, the host firewall. ufw (Uncomplicated Firewall) is a friendly front end for the Linux packet filter. It is preinstalled on Ubuntu but not on Debian, so we install it (on Ubuntu the command simply reports it is already there):
sudo apt install -y ufw
sudo ufw default deny incoming
sudo ufw default allow outgoing
sudo ufw allow 22/tcp
sudo ufw allow 51820/udp
sudo ufw enable
sudo ufw status verbose
We allow SSH (22/tcp) before enabling the firewall so we do not lock ourselves out. If your SSH daemon listens on another port, allow that one instead. Port 51820/udp is for WireGuard. The status output should end with something like:
To                         Action      From
--                         ------      ----
22/tcp                     ALLOW IN    Anywhere
51820/udp                  ALLOW IN    Anywhere
22/tcp (v6)                ALLOW IN    Anywhere (v6)
51820/udp (v6)             ALLOW IN    Anywhere (v6)
Notice what is missing: no rule for 53 and none for 80. That is intentional. As explained above, ufw would not control Docker-published ports anyway, and we will never publish them on the public IP.
Finally, let us see what is already using port 53:
sudo ss -lnup | grep ':53 '
On Ubuntu 24.04 you will typically see systemd-resolved on 127.0.0.53 and 127.0.0.54. That is the local stub resolver for the VPS itself, it listens only on loopback and it does not conflict with our setup, because we will bind Pi-hole to 10.8.0.1, not to every address. Many Pi-hole guides tell you to disable it; with our design you do not have to. On Debian 13 the output may be empty, which is also fine.
Step 2: Install Docker Engine and Docker Compose
A container is an isolated process that ships with its own filesystem and libraries, so Pi-hole runs with exactly the dependencies its developers tested, without touching the host system. Docker Compose lets us describe the container in a small YAML file and start it with one command. We install Docker from Docker’s official repository, using the current deb822 format file /etc/apt/sources.list.d/docker.sources. The $ID and $VERSION_CODENAME variables come from /etc/os-release, so the same commands produce the right repository on Debian (debian, trixie) and Ubuntu (ubuntu, noble):
sudo apt install -y ca-certificates curl
sudo install -m 0755 -d /etc/apt/keyrings
. /etc/os-release
sudo curl -fsSL "https://download.docker.com/linux/${ID}/gpg" -o /etc/apt/keyrings/docker.asc
sudo chmod a+r /etc/apt/keyrings/docker.asc
sudo tee /etc/apt/sources.list.d/docker.sources > /dev/null <<EOF
Types: deb
URIs: https://download.docker.com/linux/${ID}
Suites: ${VERSION_CODENAME}
Components: stable
Signed-By: /etc/apt/keyrings/docker.asc
EOF
sudo apt update
sudo apt install -y docker-ce docker-ce-cli containerd.io docker-buildx-plugin docker-compose-plugin
Check that everything works:
sudo docker run --rm hello-world
sudo docker compose version
You should see the “Hello from Docker!” message and a Compose version starting with v2. We run Docker with sudo throughout instead of adding our user to the docker group, because membership in that group is effectively root access.
Step 3: Set up the WireGuard server
WireGuard is a modern VPN (virtual private network): it creates an encrypted tunnel between your device and the VPS, and inside that tunnel both sides get private addresses. Each side has a key pair, and the server only talks to devices whose public keys it knows. Packets from anyone else are silently dropped, so to a scanner the port looks dead.
sudo apt install -y wireguard qrencode
sudo install -d -m 700 /etc/wireguard
sudo sh -c 'umask 077; wg genkey > /etc/wireguard/server.key; wg pubkey < /etc/wireguard/server.key > /etc/wireguard/server.pub'
The first line installs the WireGuard tools plus qrencode, which we use later to show a QR code for the phone. The last line generates the server private key and derives the public key from it; umask 077 makes sure only root can read them. Now the interface configuration:
sudo tee /etc/wireguard/wg0.conf > /dev/null <<EOF
[Interface]
Address = 10.8.0.1/24
ListenPort = 51820
PrivateKey = $(sudo cat /etc/wireguard/server.key)
EOF
sudo chmod 600 /etc/wireguard/wg0.conf
sudo systemctl enable --now wg-quick@wg0
ip -brief address show wg0
The last command should print something like wg0 UNKNOWN 10.8.0.1/24. “UNKNOWN” is normal for WireGuard interfaces. If 10.8.0.0/24 happens to clash with a network you use at home or at the office, pick another private range (for example 10.66.0.0/24) and adjust it consistently in every step.
Now the important part that makes everything survive a reboot. Docker must not start before wg0 exists, otherwise it cannot bind to 10.8.0.1 and Pi-hole will fail to start. A systemd drop-in adds that ordering to Docker’s service without editing the original unit:
sudo mkdir -p /etc/systemd/system/docker.service.d
sudo tee /etc/systemd/system/docker.service.d/wait-for-wg0.conf > /dev/null <<'EOF'
[Unit]
Wants=wg-quick@wg0.service
After=wg-quick@wg0.service
EOF
sudo systemctl daemon-reload
Step 4: Create configs for your phone and laptop
Each device needs its own key pair and its own address in the tunnel: 10.8.0.2 for the phone and 10.8.0.3 for the laptop. The loop below generates keys, writes a client configuration file for each device, and adds each device as a [Peer] on the server. Set VPS_IP to your real public IP first, then paste the whole block:
VPS_IP="203.0.113.10"   # replace with your VPS public IPv4 address
sudo install -d -m 700 /etc/wireguard/clients
n=2
for c in phone laptop; do
  sudo sh -c "umask 077; wg genkey > /etc/wireguard/clients/$c.key; wg pubkey < /etc/wireguard/clients/$c.key > /etc/wireguard/clients/$c.pub"
  sudo sh -c "umask 077; cat > /etc/wireguard/clients/$c.conf" <<EOF
[Interface]
PrivateKey = $(sudo cat /etc/wireguard/clients/$c.key)
Address = 10.8.0.$n/32
DNS = 10.8.0.1

[Peer]
PublicKey = $(sudo cat /etc/wireguard/server.pub)
Endpoint = ${VPS_IP}:51820
AllowedIPs = 10.8.0.1/32
EOF
  sudo tee -a /etc/wireguard/wg0.conf > /dev/null <<EOF

[Peer]
# $c
PublicKey = $(sudo cat /etc/wireguard/clients/$c.pub)
AllowedIPs = 10.8.0.$n/32
EOF
  n=$((n+1))
done
sudo systemctl reload wg-quick@wg0
sudo wg show
sudo wg show should list the interface listening on port 51820 and two peers with allowed IPs 10.8.0.2/32 and 10.8.0.3/32. They will not have a “latest handshake” yet, because no device has connected.
Two lines in the client file deserve an explanation:
DNS = 10.8.0.1tells the device to use Pi-hole as its DNS server while the tunnel is active.AllowedIPs = 10.8.0.1/32is a split tunnel: only traffic to10.8.0.1(that is, DNS queries and the Pi-hole web UI) goes through the VPN. Your normal browsing still goes directly to the internet, so the VPS does not need to route or NAT your traffic and your speed is unaffected. Ads are still blocked, because blocking happens when the device looks up the ad domain.
We left out PersistentKeepalive on purpose: the device always starts the conversation (it sends a DNS query), so it does not need keepalive packets, and the phone battery is happier without them.
For the phone, display a QR code right in the terminal (make the terminal window large enough):
sudo cat /etc/wireguard/clients/phone.conf | qrencode -t ansiutf8
For the laptop, copy the file to your home directory with the right owner, download it, then delete the copy:
sudo install -m 600 -o "$USER" -g "$(id -gn)" /etc/wireguard/clients/laptop.conf ~/laptop.conf
# on the laptop: scp youruser@203.0.113.10:laptop.conf .
# then, back on the VPS:
rm ~/laptop.conf
Generating client keys on the server is convenient for a tutorial. If you prefer that the private key never leaves the laptop, generate the key pair in the laptop’s WireGuard app and put only its public key in the server’s [Peer] block.
Step 5: Run Pi-hole with Docker Compose
We keep everything in /opt/pihole. First a .env file holding the web interface password. Compose reads this file automatically and substitutes the value into the YAML, so the password is not written in the compose file itself:
sudo mkdir -p /opt/pihole
cd /opt/pihole
sudo sh -c 'umask 077; printf "PIHOLE_PASSWORD=%s\n" "$(openssl rand -base64 24)" > .env'
sudo cat /opt/pihole/.env
Write down the password that is printed, you will need it to log in. Now the heart of this pi-hole docker compose setup:
sudo tee compose.yaml > /dev/null <<'EOF'
services:
  pihole:
    image: pihole/pihole:latest
    container_name: pihole
    restart: unless-stopped
    ports:
      - "10.8.0.1:53:53/udp"
      - "10.8.0.1:53:53/tcp"
      - "10.8.0.1:80:80/tcp"
    environment:
      TZ: "Europe/Bucharest"
      FTLCONF_webserver_api_password: "${PIHOLE_PASSWORD}"
      FTLCONF_dns_listeningMode: "ALL"
      FTLCONF_dns_upstreams: "9.9.9.9;149.112.112.112"
      FTLCONF_ntp_ipv4_active: "false"
      FTLCONF_ntp_ipv6_active: "false"
      FTLCONF_ntp_sync_active: "false"
    volumes:
      - ./etc-pihole:/etc/pihole
EOF
Line by line:
- image: Pi-hole does not publish a “major version” tag; its tags are dated releases (year.month.patch) plus
latest. We uselatestso you always get the current Pi-hole v6 build when you pull. The tradeoff is that an update can change behavior without warning. If you prefer predictable upgrades, check the releases page and pin the newest dated tag, then bump it deliberately. - ports: the format is
host-address:host-port:container-port. The10.8.0.1:prefix is the most important text in this whole article. Without it, Docker would publish port 53 on every address of the VPS, IPv4 and IPv6, and you would have an open resolver, with ufw unable to stop it. We publish the web UI on port 80 inside the tunnel only; WireGuard already encrypts that traffic. - FTLCONF_webserver_api_password: sets the admin password from the
.envfile. Settings passed asFTLCONF_variables become read-only in the web UI. - FTLCONF_dns_listeningMode: “ALL”: by default Pi-hole only answers clients on its own local network. Inside Docker’s bridge network, your phone (
10.8.0.2) looks like a remote client, so Pi-hole would ignore it. “ALL” makes it answer everyone who can reach it, and that is safe here only because the bind address already limits who can reach it. - FTLCONF_dns_upstreams: where Pi-hole forwards questions it does not block, here Quad9, separated by a semicolon. Use any resolver you trust.
- FTLCONF_ntp_…: Pi-hole v6 includes an NTP time server and client. The VPS already keeps its own clock in sync, and we do not want to grant the container the extra capability needed to set the system time, so we turn them off.
- volumes: settings, the gravity database and query history live in
/opt/pihole/etc-piholeon the host, so they survive container updates.
Start it and follow the logs for a minute:
sudo docker compose up -d
sudo docker compose logs -f pihole
Compose pulls the image, creates a network called pihole_default and starts the container. In the logs you will see Pi-hole building its gravity database from the default blocklist and FTL (Pi-hole’s DNS engine) starting. Press Ctrl+C to stop following the logs (the container keeps running), then check the status:
sudo docker compose ps
After a minute the status should read Up ... (healthy) and the ports column should show only 10.8.0.1 addresses, something like 10.8.0.1:53->53/tcp, 10.8.0.1:53->53/udp, 10.8.0.1:80->80/tcp.
Step 6: Connect your devices and test blocking
Phone: install the WireGuard app, tap the plus button, choose “Scan from QR code”, scan the code from Step 4, give the tunnel a name and switch it on. On iOS you can enable “On-Demand” so it reconnects automatically. On Android, open Settings, search for “Private DNS” and set it to “Off” or “Automatic”. If it is set to a specific provider hostname, Android sends DNS there over TLS and bypasses Pi-hole completely.
Laptop: on Windows and macOS, open the WireGuard app, choose “Import tunnel(s) from file”, select laptop.conf and click Activate. On a Linux desktop with NetworkManager, the cleanest way is:
sudo nmcli connection import type wireguard file laptop.conf
Now the first test, from the laptop with the tunnel active:
nslookup example.com 10.8.0.1
You should get a normal answer with real IP addresses, from server 10.8.0.1. On the VPS, sudo wg show should now show a “latest handshake” for the device.
Open http://10.8.0.1/admin in the laptop browser and log in with the password from the .env file. The dashboard will show queries from 10.8.0.2 and 10.8.0.3, so you can see per device what is being looked up and blocked. Because Docker forwards published ports with address translation that keeps the original source, Pi-hole sees the real tunnel addresses of your devices.
To prove blocking works deterministically, go to Domains, add example.org as an exact deny entry, and run:
nslookup example.org 10.8.0.1
The answer should now be 0.0.0.0. That is Pi-hole saying “this domain does not exist for you”. Remove the test entry afterwards. From here on, open a few news sites on your phone and watch the “Queries Blocked” counter on the dashboard climb.
Step 7: Prove you are not running an open resolver
Do not trust the configuration, test it. First, on the VPS, list what listens on port 53:
sudo ss -lnup | grep ':53 '
sudo ss -lntp | grep ':53 '
You should see docker-proxy on 10.8.0.1:53 and, on Ubuntu, systemd-resolved on 127.0.0.53 and 127.0.0.54. You must not see 0.0.0.0:53, [::]:53 or *:53, and nothing on your public IP.
Second, test from outside. On the laptop, turn the WireGuard tunnel off and query the public IP directly (on Linux and macOS dig is available, on Windows use nslookup example.com 203.0.113.10):
dig @203.0.113.10 example.com +time=3 +tries=1
The correct result is a failure: ;; connection timed out; no servers could be reached or “connection refused”. If you get an answer with an IP address, stop here and re-check the ports: section of your compose file.
Third, make sure the boot order works. Reboot the VPS with sudo reboot, wait a minute, log back in and run cd /opt/pihole && sudo docker compose ps. Pi-hole should be up and healthy without you touching anything, thanks to the drop-in from Step 3.
Optional: allow a fixed office IP without the VPN
Sometimes you want a whole office network, behind a router with a static public IP, to use Pi-hole without installing WireGuard on every machine. This is possible, but understand the tradeoffs first: DNS will travel unencrypted over the internet, the allowlist must be maintained when the office IP changes, and the protection relies on firewall rules rather than on a bind address. Because Docker bypasses ufw, the rules go into Docker’s DOCKER-USER chain, which Docker evaluates before its own rules.
First find the name of your public network interface (it is the word after dev):
ip route show default
Create the allowlist script, replacing the IP addresses and the interface name with yours:
sudo tee /usr/local/sbin/pihole-allowlist.sh > /dev/null <<'EOF'
#!/bin/sh
# Public IPs allowed to query Pi-hole on the public address
ALLOWED="198.51.100.20"
EXT_IF="eth0"
iptables -N PIHOLE-DNS 2>/dev/null || true
iptables -F PIHOLE-DNS
for ip in $ALLOWED; do
  iptables -A PIHOLE-DNS -s "$ip" -j RETURN
done
iptables -A PIHOLE-DNS -j DROP
for proto in udp tcp; do
  iptables -C DOCKER-USER -i "$EXT_IF" -p "$proto" -m conntrack --ctorigdstport 53 --ctdir ORIGINAL -j PIHOLE-DNS 2>/dev/null || \
  iptables -I DOCKER-USER -i "$EXT_IF" -p "$proto" -m conntrack --ctorigdstport 53 --ctdir ORIGINAL -j PIHOLE-DNS
done
EOF
sudo chmod 755 /usr/local/sbin/pihole-allowlist.sh
The script keeps its rules in a dedicated chain, PIHOLE-DNS, which it flushes and rebuilds each time, so running it twice does not create duplicates. Every DNS packet arriving on the public interface jumps into that chain: allowed addresses continue to Docker’s normal rules, everything else is dropped. Iptables rules disappear at reboot, so a small systemd unit re-applies them after Docker starts, and again whenever Docker is restarted:
sudo tee /etc/systemd/system/pihole-allowlist.service > /dev/null <<'EOF'
[Unit]
Description=Allowlist for Pi-hole DNS on the public IP
After=docker.service
Requires=docker.service
PartOf=docker.service

[Service]
Type=oneshot
ExecStart=/usr/local/sbin/pihole-allowlist.sh
RemainAfterExit=yes

[Install]
WantedBy=multi-user.target
EOF
sudo systemctl daemon-reload
sudo systemctl enable --now pihole-allowlist.service
sudo iptables -L DOCKER-USER -n -v
Only after the rules are active, add the public bindings to the ports: list in compose.yaml (keep the 10.8.0.1 lines) and apply with sudo docker compose up -d:
      - "203.0.113.10:53:53/udp"
      - "203.0.113.10:53:53/tcp"
Then repeat the test from Step 7 from a network that is not on the allowlist: it must time out. Be aware that during boot there are a few seconds between Docker starting the container and the unit loading the rules. If that window is unacceptable for you, stay with the WireGuard-only design, which has no such gap.
Day-to-day: updates, blocklists and backups
Updating Pi-hole in Docker means pulling a new image and recreating the container. Do not run pihole -up inside the container, it is not supported there:
cd /opt/pihole
sudo docker compose pull
sudo docker compose up -d
sudo docker image prune -f
Blocklists: Pi-hole starts with a sensible default list. You can add more under Lists in the web UI; after adding, update the gravity database with sudo docker exec pihole pihole -g. More lists means more blocking, but also more false positives (a login page or a shopping site that breaks). When something stops working, the Query Log shows which domain was blocked, and you can allow it in one click.
Backups: the quickest way is Settings > Teleporter in the web UI, which downloads an archive with your settings and lists. For a full file-level copy, stop the container briefly so the databases are consistent:
cd /opt/pihole
sudo docker compose stop
sudo tar czf ~/pihole-backup-$(date +%F).tar.gz -C /opt pihole -C / etc/wireguard
sudo docker compose start
sudo chown "$USER": ~/pihole-backup-*.tar.gz
The archive contains both /opt/pihole (including the .env file) and /etc/wireguard with all private keys, so treat it as a secret. Because it was created with sudo, it belongs to root; the chown makes it yours so you can download it with scp.
How much does it use?
Very little. Pi-hole v6 merged the web server into its DNS engine, so a single process does all the work. On a 1 GB VPS the whole stack leaves most of the memory free:
Troubleshooting and common mistakes
cannot assign requested address when starting Pi-hole. Docker tried to bind 10.8.0.1 before the address existed. Check ip -brief address show wg0; if it is missing, run sudo systemctl start wg-quick@wg0 and then sudo docker compose up -d. If it happens after every reboot, the drop-in from Step 3 is missing or you forgot sudo systemctl daemon-reload.
address already in use on port 53. Something else already listens on that exact address. With the 10.8.0.1: prefix this almost never happens; it is the typical error when people publish plain 53:53 on Ubuntu and collide with systemd-resolved. Do not “fix” it by removing the prefix.
The tunnel never shows a handshake. Verify that ufw allows 51820/udp, that Endpoint in the client file contains your real public IP, and that you imported the correct file on the correct device. sudo wg show on the VPS shows the public keys it expects; compare them with the client.
Tunnel is up, but DNS queries time out. Most often FTLCONF_dns_listeningMode is not set to ALL, so Pi-hole ignores clients outside its container network. Check the “Pi-hole diagnosis” messages in the web UI and the container logs.
Ads still appear. Check that the browser does not use its own “secure DNS” (DNS over HTTPS) setting pointing to a public provider, and that Android “Private DNS” is not set to a hostname. Some ads, notably on large video platforms, come from the same domains as the content and cannot be blocked by DNS at all. Also remember that devices cache DNS answers for a while.
Linux laptop: resolvconf: command not found. This happens with wg-quick on systems using systemd-resolved. Import the tunnel with nmcli as shown in Step 6, or create the compatibility link with sudo ln -s /usr/bin/resolvectl /usr/local/bin/resolvconf.
RTNETLINK answers: Operation not supported when starting wg0. The kernel cannot create WireGuard interfaces, which is typical for an unprivileged LXC container. Use a KVM VPS for this setup.
A website broke. Open the Query Log, filter by your device’s IP, find the blocked domain right before the failure and add it to the allow list.
Security notes
- The bind address is your security boundary. Every port line in the compose file must start with
10.8.0.1:(or an allowlisted public IP, if you deliberately followed the optional section). Re-check it after every edit, and re-run the outside test from Step 7. - Do not count on ufw for Docker ports. It protects SSH and WireGuard on the host. Docker-published ports are controlled by the bind address and, if you need it, by the
DOCKER-USERchain. - Guard the private keys. Everything in
/etc/wireguardand your backup archives can impersonate your devices. If a phone is lost, delete its[Peer]block from/etc/wireguard/wg0.confand runsudo systemctl reload wg-quick@wg0; the key stops working immediately. - Protect the web UI. Use a long password (the generated one is fine) and enable two-factor authentication in the Pi-hole settings. The UI is only reachable through the tunnel, but defense in depth costs nothing.
- Mind privacy. Pi-hole logs every query from your devices. That is useful for debugging, but it is also a detailed record of your browsing. Adjust the privacy level and log retention in the settings to what you are comfortable with.
- Keep everything updated. Pull new Pi-hole images regularly and keep the host patched; on Debian and Ubuntu, the
unattended-upgradespackage applies security updates automatically. - Rate limiting stays on. Pi-hole limits each client by default (around 1000 queries per minute). Leave it enabled; it is a useful safety net if a device misbehaves.
So, is a VPS Pi-hole worth it?
If you want ad and tracker blocking on your phone and laptop wherever you are, not only on your home wifi, a VPS Pi-hole is one of the most satisfying small self-hosting projects: one container, one tunnel, and a dashboard that shows you how much junk your devices try to load every day. The key is to do it responsibly: DNS only through WireGuard (or an explicit allowlist), never on a public port 53.
You can run this whole stack on the smallest VPS we offer, hosted in our own data center in Romania, so the extra DNS latency for Romanian users is just a few milliseconds. If you would rather have someone else set up WireGuard, Pi-hole and the firewall rules and keep them updated, our server administration team can do it for you.
FAQ
Do I need to open port 53 in ufw?
No. DNS reaches Pi-hole through the WireGuard tunnel, and Docker handles the published port on 10.8.0.1 by itself. The only ports you open are SSH and 51820/udp for WireGuard.
Will this slow down my browsing?
Barely. Only DNS lookups go through the tunnel, each one adds a few milliseconds to tens of milliseconds depending on where you are, and both Pi-hole and your device cache answers. Downloads and video do not go through the VPS at all.
Can I route all my traffic through the VPS too?
Yes, by setting AllowedIPs = 0.0.0.0/0 on the client, but then the server must forward and NAT your traffic, which needs extra kernel and firewall configuration. It is a different project; the split tunnel in this tutorial is all Pi-hole needs.
Does Pi-hole block YouTube ads?
Usually not. Those ads are served from the same domains as the videos, so DNS blocking cannot separate them. Pi-hole is excellent for ad networks, trackers and telemetry, not for every ad on every platform.
Is Pi-hole v6 compatible with the old WEBPASSWORD variables?
No. Pi-hole v6 replaced the old variables with the FTLCONF_ scheme used in this article. If you copy a compose file from an older guide, translate those settings or they will be ignored.
What VPS size do I need?
The smallest one is enough for a household or a small team: about 1 GB of RAM and one vCPU handle a few dozen devices comfortably.








