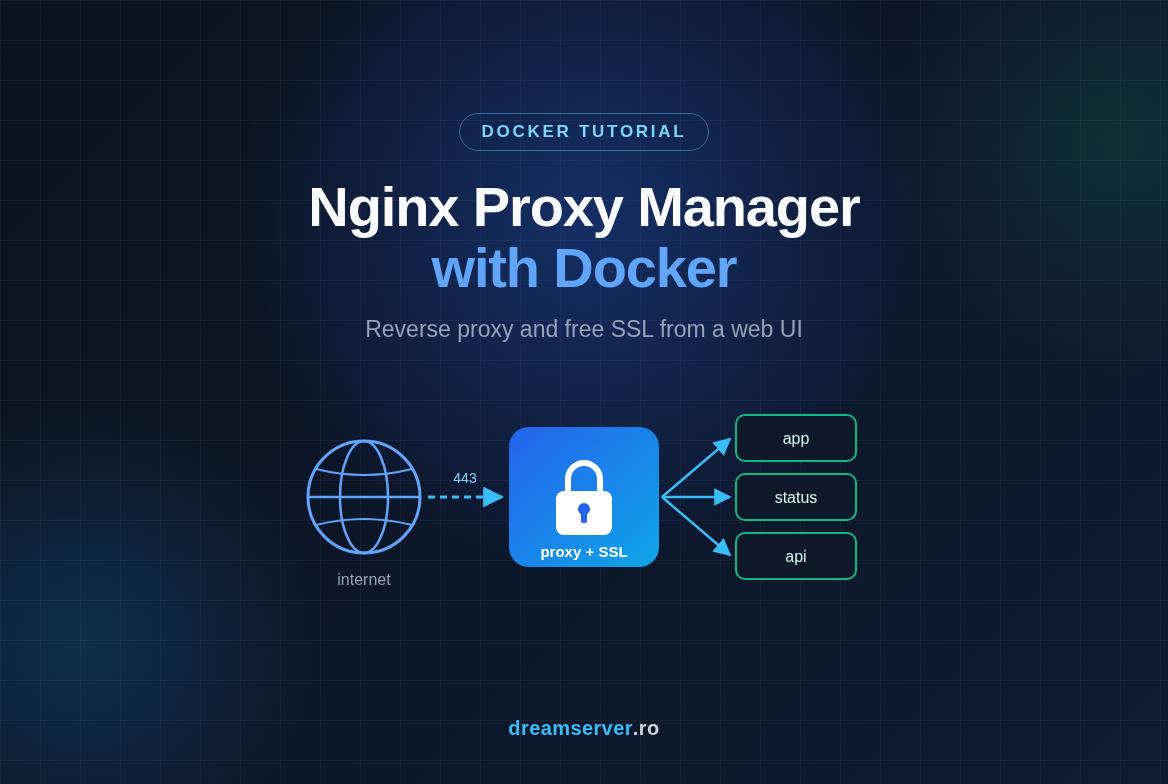
Nginx Proxy Manager with Docker Compose: Reverse Proxy and SSL
Every app you self-host on a VPS wants its own port. Uptime Kuma listens on 3001, a dashboard on 8080, a small API on 3000, and before long you are sending people links like http://203.0.113.10:8080 and hoping nobody notices the browser’s “Not secure” warning. What you really want is status.example.com and app.example.com, each with a valid HTTPS certificate, all served from the same machine. That is the job of a reverse proxy, and Nginx Proxy Manager lets you run one from a clean web interface instead of hand-writing Nginx configuration and certbot commands late at night.
Nginx Proxy Manager (we will call it NPM from here on, not to be confused with the Node.js package manager) is an open source project under the MIT license, documented at nginxproxymanager.com with its code at github.com/NginxProxyManager/nginx-proxy-manager . In this tutorial we install it with Docker Compose on a fresh VPS, put a real app behind it, issue a free Let’s Encrypt certificate with a few clicks, and then do the part most guides skip: lock down the admin panel and use access lists, so not every page is open to the whole internet.
What a reverse proxy is, and why you want one
A port is a numbered door on a server. One IP address can run many programs at once, and each one listens behind its own door: SSH usually on 22, web traffic on 80 (HTTP) and 443 (HTTPS). Browsers knock on 80 or 443 automatically, which is why you never type them. Any other port has to be written in the address, and that is exactly what looks unprofessional and breaks HTTPS.
A reverse proxy is a program that sits on ports 80 and 443, reads which domain name the visitor asked for (the Host header the browser sends), and forwards the request to the right app behind it. Visitors only ever talk to the proxy. The apps themselves never need a public port at all.
A TLS certificate (still commonly called an SSL certificate) is what turns http:// into https://: it proves to the browser that the server really belongs to the domain, and it encrypts the traffic. Let’s Encrypt is a free, automated certificate authority. Its certificates are valid for a short period (currently 90 days), so they must be renewed automatically, and a reverse proxy is the natural place to do that.
Putting a reverse proxy in front of your apps gives you:
- One public entry point. Only 80 and 443 are open to the internet; apps stay internal.
- HTTPS in one place. Certificates are requested, stored and renewed by the proxy, not by every app separately.
- Clean URLs. One subdomain per app, no port numbers.
- A single place for rules, such as IP allowlists, passwords or redirects.
What Nginx Proxy Manager is
Nginx is one of the most widely used web servers in the world, fast and reliable, but configured through text files that are easy to get subtly wrong. NPM wraps Nginx in a container (a packaged app with everything it needs, isolated from the rest of the system and started from an image) and adds a web interface on top.
Inside that single container you get an Nginx build (OpenResty) that does the actual proxying, a Node.js backend with a REST API, the admin web interface on port 81, a Let’s Encrypt client for certificates, and a small SQLite database that stores your settings. You click, NPM writes the Nginx configuration and reloads it for you.
What you get out of the box:
- Proxy hosts: map a domain to a container or an IP and port.
- Free SSL: Let’s Encrypt certificates via HTTP challenge, or DNS challenge for wildcards, with automatic renewal.
- Access lists: IP allow and deny rules and HTTP basic authentication.
- Redirection hosts, 404 hosts and streams (TCP and UDP forwarding).
- Multiple users and permissions, plus an audit log of who changed what.
- An Advanced tab where you can still paste raw Nginx directives when the UI is not enough.
When NPM fits, and when another tool fits better
NPM is a great fit for a handful to a few dozen sites managed by people who prefer clicking to editing files: small businesses, freelancers, homelab setups, teams where not everyone lives in a terminal. If you want your proxy configuration versioned in Git and reviewed like code, Caddy (one short Caddyfile) or Traefik (configured through Docker labels) suit that workflow better. NPM also uses more memory than a bare Nginx, because it ships a Node.js backend and a UI, although on any modern VPS the difference rarely matters.
What you need
- A DreamServer VPS with Debian 13 or Ubuntu 24.04. A KVM VPS is the simplest choice. Docker also runs in an LXC container, but in an unprivileged LXC it needs the nesting feature enabled, and ufw may not work inside it; if in doubt, ask our support or pick KVM.
- At least 1 GB of RAM and a few GB of free disk. NPM plus a couple of small apps fit easily.
- A user with sudo and SSH access (we never work as root directly).
- A domain name where you can edit DNS records, for example
example.com. - Ports 80 and 443 free on the VPS: no Apache or Nginx installed directly on the host.
- About 30 minutes.
How the pieces fit together
Before we type anything, it helps to see the final picture. Visitors reach the VPS on ports 80 and 443, which Docker publishes for the NPM container. NPM and your apps share a private Docker network called proxy, so NPM can reach each app by its container name, while the apps publish no ports at all. The admin interface on port 81 is bound to 127.0.0.1, which means it only answers from inside the VPS, and we reach it through an SSH tunnel.
One detail in that diagram is worth repeating, because it surprises almost everyone: Docker writes its own firewall rules, and ports it publishes bypass ufw. If you publish 81:81, ufw cannot hide it, even with a deny rule. The real control is what you publish and on which address. That is why the admin port is bound to 127.0.0.1 from the very first start.
Here is the route we will take. The numbers match the step headings below.
Step 1: Point DNS at the VPS and prepare the firewall
Let’s Encrypt only issues a certificate if it can reach your domain on the VPS, so DNS comes first: it can take a few minutes to propagate while you do the rest.
In your DNS provider’s panel, create A records pointing to your VPS’s public IPv4 address. In this guide we use:
status.example.com: for Uptime Kuma, our example appnpm.example.com: for the NPM admin panel itself (used in Step 8)
If your VPS also has IPv6, you can add AAAA records with the IPv6 address. If you do not use IPv6, make sure no old AAAA record points somewhere else: Let’s Encrypt prefers IPv6 when it exists, and a stale AAAA record is a classic reason for failed certificates.
Now log in to the VPS and bring it up to date:
sudo apt update && sudo apt full-upgrade -y
sudo apt install -y bind9-dnsutils
The second line installs dig, a DNS lookup tool. Check that your records already resolve to the VPS:
dig +short status.example.com
dig +short npm.example.com
Each command should print your VPS IP. Empty output means the record has not propagated yet, give it a few more minutes.
About rebooting after the upgrade: on Ubuntu, the file /var/run/reboot-required appears when a reboot is needed. Debian does not always create that file, so on Debian reboot if the upgrade installed a new linux-image package.
# Ubuntu: prints a message if a reboot is needed
[ -f /var/run/reboot-required ] && echo "Reboot needed"
sudo reboot
Next, the firewall. ufw (Uncomplicated Firewall) is preinstalled on Ubuntu but inactive; on Debian you install it first. Always allow SSH before enabling it, or you lock yourself out:
sudo apt install -y ufw        # needed on Debian, harmless on Ubuntu
sudo ufw allow OpenSSH         # or: sudo ufw allow 2222/tcp if SSH uses a custom port
sudo ufw enable
sudo ufw status verbose
The last command should show Status: active and a rule allowing OpenSSH. We deliberately do not open ports 80, 443 or 81 here. As explained above, Docker publishes its ports through its own rules, so ufw is about protecting services that run directly on the host, such as SSH. If you are on an unprivileged LXC VPS and ufw enable fails, use the firewall in the control panel instead.
Step 2: Install Docker Engine and the Compose plugin
We install Docker from Docker’s own repository, which is newer than the distribution packages and includes the Compose v2 plugin. The same block works on Debian 13 and Ubuntu 24.04, because it reads your distribution’s name from /etc/os-release:
sudo apt update
sudo apt install -y ca-certificates curl
sudo install -m 0755 -d /etc/apt/keyrings
. /etc/os-release
sudo curl -fsSL "https://download.docker.com/linux/${ID}/gpg" -o /etc/apt/keyrings/docker.asc
sudo chmod a+r /etc/apt/keyrings/docker.asc
sudo tee /etc/apt/sources.list.d/docker.sources > /dev/null <<EOF
Types: deb
URIs: https://download.docker.com/linux/${ID}
Suites: ${VERSION_CODENAME}
Components: stable
Signed-By: /etc/apt/keyrings/docker.asc
EOF
sudo apt update
sudo apt install -y docker-ce docker-ce-cli containerd.io docker-buildx-plugin docker-compose-plugin
What happens here: . /etc/os-release loads two variables, ID (debian or ubuntu) and VERSION_CODENAME (trixie or noble). We download Docker’s signing key, write the repository in the modern deb822 format to /etc/apt/sources.list.d/docker.sources, and install the engine plus the Compose plugin.
Check that everything works:
sudo docker run --rm hello-world
docker compose version
You should see “Hello from Docker!” and a line like Docker Compose version v2.x.x. To run docker without sudo, add your user to the docker group, then log out and back in:
sudo usermod -aG docker "$USER"
Be aware that membership in the docker group is effectively root access on the server, so only add trusted users.
Optional but recommended: by default Docker keeps container logs forever. To rotate them, put the following in /etc/docker/daemon.json. If the file already exists, merge these keys into it instead of overwriting it:
{
  "log-driver": "json-file",
  "log-opts": { "max-size": "10m", "max-file": "3" }
}
sudo systemctl restart docker
This applies to containers created after the change, which is everything we create from here on.
Step 3: Write the docker-compose.yml for Nginx Proxy Manager
First we create the shared network. Creating it separately (instead of inside the NPM Compose file) means you can stop or recreate NPM without Docker complaining that apps are still attached:
docker network create proxy
mkdir -p ~/npm && cd ~/npm
nano docker-compose.yml
Paste this content:
services:
  npm:
    image: jc21/nginx-proxy-manager:2
    container_name: npm
    restart: unless-stopped
    ports:
      - "80:80"
      - "443:443"
      - "127.0.0.1:81:81"
    environment:
      TZ: "Europe/Bucharest"
    volumes:
      - ./data:/data
      - ./letsencrypt:/etc/letsencrypt
    networks:
      - proxy

networks:
  proxy:
    external: true
Line by line:
image: jc21/nginx-proxy-manager:2uses the current 2.x major line, so you get fixes without jumping to a future major version by surprise. The official docs often show:latest, which works too, but it can bring breaking changes on anypull. Check the project’s releases page for the newest version before you start.restart: unless-stoppedbrings NPM back after a reboot or crash."80:80"and"443:443"publish HTTP and HTTPS to the world, these are the only public doors."127.0.0.1:81:81"publishes the admin UI only on the loopback address. Nobody on the internet can reach it, regardless of ufw../dataholds the SQLite database, generated Nginx configs and logs;./letsencryptholds certificates and private keys. Both are bind mounts, plain folders next to the Compose file, which makes backups easy.networks: proxywithexternal: trueattaches NPM to the network we created.
Save with Ctrl+O, Enter, and exit with Ctrl+X.
Step 4: Start the stack and log in through an SSH tunnel
Start NPM in the background:
docker compose up -d
docker compose ps
The first command pulls the image and prints Container npm Started. The second should show the container with a status of Up. To watch the startup, run docker compose logs -f npm and wait until the log stops scrolling without errors (database migrations run on first start), then press Ctrl+C.
Two quick checks from the VPS itself:
curl -sI http://127.0.0.1:81 | head -n 1
curl -sI http://127.0.0.1 | head -n 1
Both should answer HTTP/1.1 200 OK: the first is the admin UI, the second is NPM’s default “Congratulations” page.
Now open the admin UI from your laptop. An SSH tunnel forwards a port on your computer, through your existing encrypted SSH connection, to a port on the server. On your laptop (Linux, macOS, or Windows 10/11 PowerShell):
ssh -N -L 8181:127.0.0.1:81 youruser@203.0.113.10
Leave that window open and browse to http://localhost:8181. -L 8181:127.0.0.1:81 means “my local port 8181 goes to 127.0.0.1:81 as seen from the VPS”, and -N opens no shell, just the tunnel.
If you will do this often, add a separate host alias to ~/.ssh/config on your laptop, so your normal admin SSH entry stays untouched:
Host npm-tunnel
    HostName 203.0.113.10
    User youruser
    # Port 2222   # only if your SSH runs on a non-standard port
    LocalForward 8181 127.0.0.1:81
From then on, ssh -N npm-tunnel opens the tunnel.
First login: depending on the NPM version, you either get a screen asking you to create the first admin account, or a login form where the default credentials are admin@example.com with password changeme, followed immediately by a forced change of email and password. Either way, use a real email address (Let’s Encrypt uses it for expiry notices) and a long, unique password from your password manager.
Step 5: Connect an app to the proxy network
NPM needs something to proxy. We use Uptime Kuma, a monitoring tool, but the pattern is identical for any containerized app: attach it to the proxy network and remove its ports: section, so it is only reachable through NPM.
mkdir -p ~/apps/uptime-kuma && cd ~/apps/uptime-kuma
nano docker-compose.yml
services:
  uptime-kuma:
    image: louislam/uptime-kuma:2
    container_name: uptime-kuma
    restart: unless-stopped
    volumes:
      - ./data:/app/data
    networks:
      - proxy

networks:
  proxy:
    external: true
As with NPM, check the Uptime Kuma releases for the current version. Start it and confirm both containers share the network:
docker compose up -d
docker network inspect proxy --format '{{range .Containers}}{{.Name}} {{end}}'
docker run --rm --network proxy curlimages/curl -sI http://uptime-kuma:3001
The second command should print npm uptime-kuma (in any order). The third starts a throwaway container on the same network and requests the app by name: a 200 or 302 response means the app is reachable from inside the network. Docker provides a small internal DNS on user-defined networks, which is why the container name works as a hostname.
Step 6: Add a proxy host
Back in the NPM admin UI (through your tunnel), go to Hosts > Proxy Hosts > Add Proxy Host. On the Details tab fill in:
- Domain Names:
status.example.com(press Enter after typing it so it becomes a tag) - Scheme:
http. Traffic between NPM and the app stays inside the VPS; HTTPS is handled by NPM in front. - Forward Hostname / IP:
uptime-kuma, the container name - Forward Port:
3001, the port the app listens on inside its container, not a host port - Block Common Exploits: on
- Websockets Support: on. Uptime Kuma, like many modern apps, uses websockets for live updates; without this the dashboard keeps disconnecting.
Leave Cache Assets off unless you know the app benefits from it. Click Save (labels can vary slightly between NPM versions, but the fields are the same). The host appears with status “Online”.
Open http://status.example.com in your browser. You should see Uptime Kuma’s setup screen. Version 2 first asks which database to use; the embedded SQLite option is perfectly fine for a small instance. Since the app is now publicly reachable, complete its admin account setup right away, or at least before you leave for lunch, so nobody else claims it first. Better still, continue directly with Step 7 and do the setup over HTTPS.
Step 7: Issue a Let’s Encrypt certificate
Edit the proxy host (three-dot menu > Edit) and open the SSL tab:
- SSL Certificate: choose Request a new SSL Certificate
- Force SSL: on, so plain HTTP visitors are redirected to HTTPS
- HTTP/2 Support: on
- HSTS Enabled: leave off for now (see the security notes below)
- Email Address for Let’s Encrypt: your real email
- Tick I Agree to the Let’s Encrypt Terms of Service
Click Save. NPM asks Let’s Encrypt for a certificate, Let’s Encrypt connects to http://status.example.com/.well-known/acme-challenge/... on port 80 to confirm you control the domain (the HTTP-01 challenge), and after 10 to 30 seconds the dialog closes. Verify from any machine:
curl -sI http://status.example.com | head -n 1
curl -sI https://status.example.com | head -n 1
The first should return a 301 redirect, the second HTTP/2 200 (or a 302 redirect inside the app). The browser now shows the padlock. Renewal is automatic: NPM renews certificates well before they expire, you do not need a cron job.
Need a wildcard certificate like *.example.com, or a domain whose port 80 is not reachable? Use the Use a DNS Challenge option instead. NPM supports many DNS providers through API credentials; it then proves ownership by creating a temporary DNS TXT record.
Step 8: Lock down the admin panel and add access lists
Right now the admin UI is safe, because it only exists on 127.0.0.1. The tunnel is a little inconvenient though, so many people want https://npm.example.com. We can do that safely with an access list: a set of rules NPM applies before a request reaches the backend.
Create an IP-only access list for the admin
First find the public IP you connect from. While logged in to the VPS over SSH, run:
echo "$SSH_CLIENT"
The first field (for example 198.51.100.23) is your IP as the VPS sees it. In NPM go to Access Lists > Add Access List:
- Details tab: name it
admin-only. Leave Satisfy Any off. - Access tab: add a rule
allow198.51.100.23(or a range such as198.51.100.0/24for an office network), then a ruledenyall. - Leave the Authorization tab empty. NPM’s admin UI already has its own login, and an extra password layer would actually break it (more on that below).
Save it.
Proxy the admin UI through its own domain
Add a new proxy host: domain npm.example.com, scheme http, forward hostname 127.0.0.1, forward port 81. Here 127.0.0.1 means “this same NPM container”, which is exactly where the admin UI lives. Choose admin-only in the Access List dropdown, then on the SSL tab request a certificate with Force SSL on, as in Step 7.
From your allowed IP, https://npm.example.com now opens the login page; from anywhere else you get 403 Forbidden. Keep the 127.0.0.1:81 binding in the Compose file: if your IP changes and you lock yourself out, the SSH tunnel from Step 4 still works and you can update the rule.
Password-protect an app that has no login
Some things should not be public but have no login of their own: a staging site, a documentation preview, a simple admin tool. Create another access list, for example team-password, add one or more users on the Authorization tab, and attach it to that proxy host. Visitors now get a browser login prompt (HTTP basic authentication) before they see anything.
If you want either condition to be enough (your office IP or a password), add the IP rules too and turn Satisfy Any on. With it off, a visitor must satisfy both the IP rules and the password.
One important caveat: basic authentication uses the HTTP Authorization header. Apps that use that same header for their own logins, such as many APIs and NPM’s own admin UI, can break behind a password access list. For those, use IP rules only.
Choose what unknown hostnames see
Any domain pointed at your IP that does not match a proxy host currently gets NPM’s “Congratulations” page, which tells scanners exactly what you run. Under Settings > Default Site, switch it to 404 Page or No Response (444).
Backups and updates
Everything NPM knows lives in two folders: ~/npm/data and ~/npm/letsencrypt. Back them up regularly, with NPM briefly stopped so the SQLite database is consistent:
cd ~/npm
docker compose stop
sudo tar czf ~/npm-backup-$(date +%F).tar.gz -C ~/npm data letsencrypt
docker compose start
sudo chown "$USER": ~/npm-backup-*.tar.gz
We use sudo because some files inside belong to root, which also makes the archive root-owned; the chown hands it back to your user so you can copy it off the server from your laptop:
scp youruser@203.0.113.10:npm-backup-2026-11-10.tar.gz .
To restore (on a new VPS or after a disaster), restore into empty folders, never on top of a running instance:
cd ~/npm
docker compose down
sudo mv data data.old && sudo mv letsencrypt letsencrypt.old
sudo tar xzf ~/npm-backup-2026-11-10.tar.gz -C ~/npm
docker compose up -d
To update NPM, back up first, read the release notes, then:
cd ~/npm
docker compose pull
docker compose up -d
docker image prune -f
Troubleshooting and common mistakes
- 502 Bad Gateway. NPM cannot reach the app. Check that the app container is running, that it is on the
proxynetwork (docker network inspect proxy), and that the forward port is the port inside the container. Thecurlimages/curltest from Step 5 tells you quickly whether the problem is the app or NPM. - Certificate request fails with “Internal Error”. Usually DNS does not point to this VPS yet, a stale AAAA record points elsewhere, or port 80 is blocked by an external firewall. If you use a CDN proxy in front of the domain, disable it during issuance or use the DNS challenge. After 5 failed attempts for the same hostname Let’s Encrypt temporarily rate-limits you, so fix the cause before retrying.
- NPM will not start: “port is already allocated” or “address already in use”. Something else listens on 80 or 443. Find it with
sudo ss -tlnp | grep -E ':(80|443) 'and stop or remove it, typically a host Apache (sudo systemctl disable --now apache2) or Nginx (sudo systemctl disable --now nginx). - I cannot open
http://IP:81in the browser. That is by design: it is bound to127.0.0.1. Use the SSH tunnel from Step 4. - The app keeps disconnecting or shows “reconnecting”. Turn on Websockets Support for that proxy host.
- Uploads fail with “413 Request Entity Too Large”. Edit the proxy host, open the Advanced tab and add
client_max_body_size 100m;(adjust the size). - The access list blocks me from an allowed IP. Look at
~/npm/data/logs/proxy-host-N_access.log(N is the host’s ID) to see which address NPM actually receives. If you browse over IPv6, add your IPv6 address too; if every visitor shows up as a172.x.x.xaddress, connections are arriving through Docker’s userland proxy and IP rules will not match real clients. - Restart loop after an update. Run
docker compose logs npmand check the release notes; if needed, go back to the previous tag and restore your backup.
Security notes
- Never publish port 81 publicly. Keep
127.0.0.1:81:81. Remember that ufw does not filter Docker-published ports, so aufw deny 81rule gives you a false sense of safety. - Apps get no
ports:. Every app reaches the internet only through NPM. A forgottenports: - "8080:8080"exposes it over plain HTTP, bypassing your access lists. - Strong, unique admin credentials, and a separate NPM user for each person, with only the permissions they need.
- HSTS with care. HSTS tells browsers to refuse plain HTTP for your domain for months. Enable it only once HTTPS works reliably, and enable HSTS Subdomains only if every subdomain has a valid certificate.
- “Block Common Exploits” is not a WAF. It filters a few obvious attack patterns; your apps still need updates and good passwords.
- Treat backups as secrets. The
letsencryptfolder contains private keys; store archives encrypted or in a restricted location. - Keep the image updated and the host patched. Subscribe to the project’s releases on GitHub to know when to update.
So, should you use Nginx Proxy Manager?
If you run a few self-hosted apps on one VPS and want clean domains with HTTPS without becoming an Nginx expert, NPM with Docker Compose is one of the fastest ways to get there: one container, a friendly UI, certificates that renew themselves, and access lists that take seconds to apply. Keep the admin port on localhost, give apps no public ports, and back up two folders, and you have a setup that is both convenient and solid. If you later want everything as code in Git, Caddy or Traefik are the natural next step.
You can have all of this running on a VPS from our own data center in Romania in about half an hour, or let our server administration team set up the proxy, certificates and security rules for you.
FAQ
Can Nginx Proxy Manager proxy apps that do not run in Docker?
Yes. Point the forward hostname at an IP the container can reach. For a service on the VPS host itself, add extra_hosts: ["host.docker.internal:host-gateway"] to the NPM service, use host.docker.internal as the forward hostname, and make sure the service listens on an address reachable from Docker, not only on 127.0.0.1. You can also forward to other servers on your private network.
Do I need MySQL or MariaDB for NPM?
No. Current versions use SQLite by default, stored in ./data, which is more than enough for hundreds of hosts. An external MySQL/MariaDB database is supported if you prefer it, but it adds a container and more to back up.
How do I get a wildcard certificate?
Use the DNS challenge on the SSL tab, select your DNS provider and enter its API credentials. Wildcards like *.example.com can only be validated through DNS, not through port 80.
Will it run on the smallest VPS?
Yes. NPM idles at roughly 100-200 MB of RAM, so a 1 GB VPS comfortably runs it plus a few lightweight apps. Your apps, not the proxy, usually decide how much RAM you need.
Is the :2 tag safe, or should I pin an exact version?
:2 follows the current major release, which is a good balance for most people. If you need fully reproducible deployments, pin an exact version from the releases page and update it deliberately after reading the changelog.








