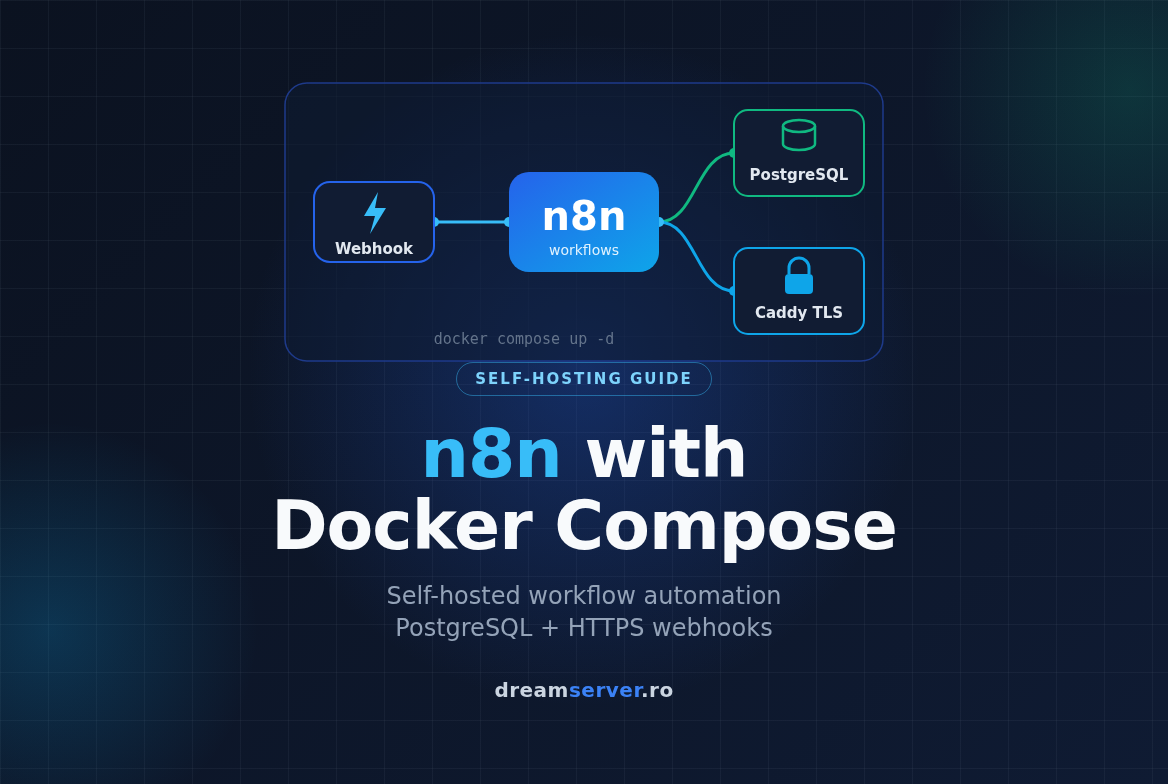
n8n with Docker Compose: Self-Hosted Workflow Automation
Every small business has a few tasks that someone does by hand, every single day: copying contact form submissions into a spreadsheet, forwarding invoices from email to accounting, posting in the team chat when a new order arrives. Services like Zapier or Make automate this nicely, right up until the monthly bill starts growing with every “task” you run. n8n gives you the same kind of visual workflow builder, runs on your own server, and does not charge per execution. In this guide we deploy n8n with Docker Compose on a fresh VPS, with PostgreSQL as the database, Caddy in front for automatic HTTPS (so webhooks from outside services actually work), a proper encryption key and the right timezone. Then we build a first automation you can test with a single command.
What n8n is and why self-host it
n8n (pronounced “n-eight-n”, short for “nodemation”) is a workflow automation tool. A workflow is a chain of steps that runs automatically. Each step is a node: one node receives data, the next transforms it, another sends it somewhere else. The first node is always a trigger, the event that starts the workflow: a webhook (an HTTP request sent by another service), a schedule (“every day at 08:00”), a new email, a new row in a sheet.
The project lives at n8n.io , with the source code on github.com/n8n-io/n8n . It ships with hundreds of integrations (Google Sheets, Slack, Telegram, Stripe, GitHub, generic HTTP, SMTP, databases) and, unlike most no-code tools, lets you drop into JavaScript or Python with a Code node when the visual blocks are not enough.
A licensing note, because it matters: n8n is “fair-code”, distributed under the Sustainable Use License, not a classic OSI open source license. In practice you can self-host it for free for your own business or personal use; what you cannot do is resell n8n itself as a hosted service. A few enterprise features (SSO, advanced permissions) are paid.
Why self-host instead of buying a cloud plan:
- No per-execution pricing. On your own VPS, a workflow that runs 50,000 times a month costs the same as one that runs 50 times.
- Your data stays with you. Customer data processed by workflows never leaves your server, which helps with GDPR when that server sits in a Romanian data center.
- Access to internal systems. n8n can talk directly to a database or an API on your private network, no tunnels required.
The tradeoff is honest: you become responsible for updates, backups and security. Most of this guide is about doing those parts properly.
Why PostgreSQL and HTTPS instead of the defaults
Out of the box, n8n stores everything (workflows, credentials, execution history) in a SQLite file. That is fine for a quick test, but PostgreSQL handles concurrent executions better, gives you clean backups with pg_dump, and is required if you later scale n8n with queue mode and worker processes. Starting on PostgreSQL now saves you a migration later.
HTTPS is not optional either. Most services that send webhooks (Stripe, GitHub, Telegram bots, many form builders) refuse plain HTTP URLs, OAuth logins for Google or Microsoft need an HTTPS callback address, and n8n itself sets secure cookies that browsers only accept over HTTPS. Without a domain and a certificate, half of the interesting integrations simply will not connect.
How the pieces fit together
A few definitions first. A container is an isolated package containing an application and everything it needs, running on the host’s kernel. Docker runs containers, and Docker Compose describes several containers in a single YAML file so you can start, stop and update them together. A port is a numbered “door” on a server: HTTP uses 80, HTTPS uses 443, n8n listens on 5678 and PostgreSQL on 5432. A reverse proxy is a web server that receives public traffic and forwards it to an application behind it; we use Caddy because it obtains and renews Let’s Encrypt certificates automatically. A volume is storage managed by Docker that survives container restarts and upgrades.
Our stack has three containers: Caddy (the only one that publishes ports to the internet), n8n and PostgreSQL. n8n and PostgreSQL are reachable only on Docker’s internal network.
What you need
- A VPS running Debian 13 or Ubuntu 24.04, with at least 1 vCPU, 2 GB of RAM recommended (1 GB works for light use with swap) and about 20 GB of disk.
- A user with
sudorights and SSH access. - A domain or subdomain where you can edit DNS, for example
n8n.example.com. We use that name in every example: replace it with your own. - Ports 80 and 443 reachable from the internet (Let’s Encrypt validates through port 80).
- A KVM VPS is the easiest option. Docker inside an unprivileged LXC container needs the nesting (and often keyctl) features enabled; if Docker refuses to start there, ask our support to enable them or choose a KVM plan.
- About 30 minutes.
Step 1: Point DNS and prepare the VPS
Create an A record for n8n.example.com pointing to your VPS IPv4 address (plus an AAAA record if your VPS has IPv6 configured). Do this first, because Caddy needs the name to resolve to your server when it requests the certificate in step 6. Check it from the VPS:
getent hosts n8n.example.com
The output should show your VPS IP next to the name. If it shows nothing or an old IP, wait a few minutes for DNS to propagate.
Next, bring the system up to date:
sudo apt update && sudo apt full-upgrade -y
Whether you need a reboot depends on the distribution. On Ubuntu, the file /var/run/reboot-required appears when a reboot is needed:
[ -f /var/run/reboot-required ] && echo "Reboot needed" || echo "No reboot needed"
On Debian that file is not always created, so the rule is simpler: if the upgrade installed a new linux-image package, reboot with sudo reboot.
Optionally, set the host’s own clock to your timezone with sudo timedatectl set-timezone Europe/Bucharest. This affects host logs only; the containers get their timezone from the configuration in step 3.
Now the firewall. ufw (“uncomplicated firewall”) is preinstalled but inactive on Ubuntu and not installed on Debian, so the install command is harmless on both:
sudo apt install -y ufw
sudo ufw allow 22/tcp
sudo ufw allow 80/tcp
sudo ufw allow 443
sudo ufw enable
sudo ufw status verbose
Allow SSH before enabling the firewall, otherwise you lock yourself out; if you moved SSH to another port, allow that port instead of 22. Port 443 is allowed for both TCP and UDP because Caddy can also serve HTTP/3 over UDP. ufw status verbose should list the three rules as ALLOW IN.
One detail surprises a lot of people: ports published by Docker bypass ufw. Docker writes its own iptables rules, so a container published on a port is reachable from the internet no matter what ufw says. The 80/443 rules above document intent, but ufw really protects only host services such as SSH. That is exactly why our Compose file never publishes 5678 (n8n) or 5432 (PostgreSQL). Also note that ufw may not work inside an unprivileged LXC container, where you rely on the host’s firewall instead.
Step 2: Install Docker Engine and the Compose plugin
We install Docker from Docker’s official apt repository, which provides a recent Engine and the Compose v2 plugin. If you previously installed the distribution packages docker.io or docker-compose, remove them first with sudo apt remove docker.io docker-compose.
sudo apt install -y ca-certificates curl
sudo install -m 0755 -d /etc/apt/keyrings
. /etc/os-release
sudo curl -fsSL "https://download.docker.com/linux/${ID}/gpg" -o /etc/apt/keyrings/docker.asc
sudo chmod a+r /etc/apt/keyrings/docker.asc
sudo tee /etc/apt/sources.list.d/docker.sources > /dev/null <<EOF
Types: deb
URIs: https://download.docker.com/linux/${ID}
Suites: ${VERSION_CODENAME}
Components: stable
Signed-By: /etc/apt/keyrings/docker.asc
EOF
sudo apt update
sudo apt install -y docker-ce docker-ce-cli containerd.io docker-buildx-plugin docker-compose-plugin
What this does: it reads /etc/os-release, where ID is debian or ubuntu and VERSION_CODENAME is trixie on Debian 13 or noble on Ubuntu 24.04. It downloads Docker’s signing key, writes the repository in the modern deb822 format to /etc/apt/sources.list.d/docker.sources, and installs the packages. The same block works on both distributions because those variables fill in the right values.
Check that everything works:
sudo docker run --rm hello-world
sudo docker compose version
You should see “Hello from Docker!” and a line like Docker Compose version v2.x.x. Throughout this guide we prefix Docker commands with sudo. You can add your user to the docker group (sudo usermod -aG docker $USER, then log out and back in), but remember that membership in that group is equivalent to root access.
Step 3: Create the project folder and generate secrets
All files for the stack live in one folder. Secrets go into a .env file, which Docker Compose reads automatically from the project folder:
mkdir -p ~/n8n && cd ~/n8n
cat > .env <<EOF
N8N_DOMAIN=n8n.example.com
GENERIC_TIMEZONE=Europe/Bucharest
POSTGRES_PASSWORD=$(openssl rand -hex 24)
N8N_ENCRYPTION_KEY=$(openssl rand -hex 32)
EOF
chmod 600 .env
nano .env
openssl rand -hex generates random values, so you get a 48-character database password and a 64-character encryption key without typing anything. Hex characters avoid quoting problems with special symbols. chmod 600 makes the file readable only by your user. In nano, replace n8n.example.com with your real domain and adjust the timezone if you are not in Romania, then save with Ctrl+O, Enter, and exit with Ctrl+X.
Why the encryption key matters
When you save credentials in n8n (an API key, an SMTP password, an OAuth token), n8n encrypts them in the database with N8N_ENCRYPTION_KEY. If you do not set it, n8n generates a random key on first start and stores it in its data volume. That works until the day you lose or recreate the volume: the database is still there, but every stored credential becomes unreadable. Setting the key yourself means you control it. Copy the whole .env file into your password manager now. The key must never change after the first start.
Why the timezone matters
GENERIC_TIMEZONE is the timezone n8n uses for Schedule Trigger nodes and date expressions such as $now. Its default is America/New_York, so without it, a workflow scheduled “every day at 08:00” fires at 08:00 New York time, which is mid-afternoon in Bucharest. We also pass the same value as TZ, which sets the time inside the container for logs. Each workflow can still override the timezone in its own settings.
Step 4: Write the n8n Docker Compose file
Create compose.yaml in the same folder (nano compose.yaml) and paste:
services:
  postgres:
    image: postgres:17
    restart: unless-stopped
    environment:
      POSTGRES_USER: n8n
      POSTGRES_PASSWORD: ${POSTGRES_PASSWORD}
      POSTGRES_DB: n8n
    volumes:
      - postgres_data:/var/lib/postgresql/data
    healthcheck:
      test: ["CMD-SHELL", "pg_isready -U n8n -d n8n"]
      interval: 10s
      timeout: 5s
      retries: 5

  n8n:
    image: docker.n8n.io/n8nio/n8n:latest
    restart: unless-stopped
    environment:
      DB_TYPE: postgresdb
      DB_POSTGRESDB_HOST: postgres
      DB_POSTGRESDB_PORT: "5432"
      DB_POSTGRESDB_DATABASE: n8n
      DB_POSTGRESDB_USER: n8n
      DB_POSTGRESDB_PASSWORD: ${POSTGRES_PASSWORD}
      N8N_HOST: ${N8N_DOMAIN}
      N8N_PORT: "5678"
      N8N_PROTOCOL: https
      WEBHOOK_URL: https://${N8N_DOMAIN}/
      N8N_PROXY_HOPS: "1"
      N8N_ENCRYPTION_KEY: ${N8N_ENCRYPTION_KEY}
      GENERIC_TIMEZONE: ${GENERIC_TIMEZONE}
      TZ: ${GENERIC_TIMEZONE}
      N8N_ENFORCE_SETTINGS_FILE_PERMISSIONS: "true"
      EXECUTIONS_DATA_PRUNE: "true"
      EXECUTIONS_DATA_MAX_AGE: "336"
      N8N_DIAGNOSTICS_ENABLED: "false"
    volumes:
      - n8n_data:/home/node/.n8n
    depends_on:
      postgres:
        condition: service_healthy

  caddy:
    image: caddy:2
    restart: unless-stopped
    ports:
      - "80:80"
      - "443:443"
      - "443:443/udp"
    environment:
      N8N_DOMAIN: ${N8N_DOMAIN}
    volumes:
      - ./Caddyfile:/etc/caddy/Caddyfile:ro
      - caddy_data:/data
      - caddy_config:/config
    depends_on:
      - n8n

volumes:
  postgres_data:
  n8n_data:
  caddy_data:
  caddy_config:
Service by service:
- postgres uses the official
postgres:17image. ThePOSTGRES_*variables create the user and the database on first start, data lives in thepostgres_datavolume, and the healthcheck runspg_isreadyso other services know when the database is truly ready. There is noports:section, so it is invisible from the internet. - n8n uses the official image from n8n’s own registry. The
DB_*variables point it to PostgreSQL by service name (Compose gives every service a DNS name on the internal network).N8N_HOST,N8N_PROTOCOLandWEBHOOK_URLtell n8n its public address, so the webhook URLs it shows you arehttps://n8n.example.com/webhook/...instead ofhttp://localhost:5678/....N8N_PROXY_HOPS=1says there is exactly one reverse proxy in front, so n8n trusts the client IP forwarded by Caddy.N8N_ENFORCE_SETTINGS_FILE_PERMISSIONSkeeps its settings file private. Execution pruning stops the database from growing forever: history older than 336 hours (14 days) is deleted.N8N_DIAGNOSTICS_ENABLED=falseturns off anonymous telemetry (optional).depends_onwithservice_healthywaits for PostgreSQL before starting n8n. - caddy is the only service with
ports:, publishing 80 and 443 (plus 443/udp for HTTP/3). It receivesN8N_DOMAINas an environment variable, which the Caddyfile uses in the next step.
About image tags. postgres:17 and caddy:2 follow a major version: you get bug fixes and security patches, but no surprise jump to a new major. For n8n we use latest, the tag n8n assigns to its current stable release. n8n ships new versions very often, so with latest a docker compose pull can bring a release with breaking changes. Once your setup works, look at the n8n releases page
and consider replacing latest with the exact version you tested, then bump it deliberately. In general, always check each project’s releases for the newest version before deploying.
Validate the file:
sudo docker compose config --quiet
No output means the syntax is correct and every variable was found in .env. A warning such as The "N8N_DOMAIN" variable is not set means the .env file is missing or you are in a different folder.
Step 5: Configure Caddy for automatic HTTPS
Caddy needs only a few lines:
cat > Caddyfile <<'EOF'
{$N8N_DOMAIN} {
    reverse_proxy n8n:5678
}
EOF
{$N8N_DOMAIN} is Caddy’s syntax for an environment variable, so your domain is defined in exactly one place, the .env file. The quotes around 'EOF' stop your shell from interpreting the $ while writing the file. When Caddy starts, it sees a real domain name, requests a Let’s Encrypt certificate through port 80, redirects HTTP to HTTPS and renews the certificate automatically. reverse_proxy also passes websocket connections, which the n8n editor uses for live updates.
Optional: to receive expiry notices from Let’s Encrypt, add a global options block with your email at the very top of the Caddyfile, before the site block: { on one line, email you@example.com on the next, } on the third.
Step 6: Start the stack and create the owner account
cd ~/n8n
sudo docker compose up -d
sudo docker compose ps
The first start downloads the images, which takes a minute or two. ps should list three containers with status Up, with postgres marked (healthy). Follow n8n’s log:
sudo docker compose logs -f n8n
After the database migrations finish, you should see a line similar to Editor is now accessible via: https://n8n.example.com. Press Ctrl+C to stop following; the container keeps running. Check Caddy too with sudo docker compose logs caddy and look for certificate obtained successfully. A quick health check from any machine:
curl -s https://n8n.example.com/healthz
The expected answer is {"status":"ok"}. You can point an uptime monitor at this URL later.
Open https://n8n.example.com in a browser. n8n asks you to create the owner account: use a real email and a long, unique password. Then open your personal settings and enable two-factor authentication. n8n may also offer a free community license key by email, which unlocks a few extra features in the self-hosted edition; it is optional.
Step 7: Build your first workflow
Our first automation is a webhook that receives contact form data, stamps it with the current time and replies with JSON. It needs no external accounts, and it proves the most important thing: public HTTPS webhooks reach your n8n.
- In n8n, click Create workflow and add the trigger On webhook call (the Webhook node).
- Set HTTP Method to
POST, Path tocontact-form, and Respond to “Using ‘Respond to Webhook’ Node”. - Add an Edit Fields (Set) node after it, with three fields:
name={{ $json.body.name }}email={{ $json.body.email }}received_at={{ $now.toISO() }}
- Add a Respond to Webhook node and set Respond With to “First Incoming Item”.
- Save the workflow.
The expressions between double curly braces read data from the previous node: the Webhook node puts the request body under body, and $now is the current time in your GENERIC_TIMEZONE.
The Webhook node shows two URLs. The test URL (/webhook-test/contact-form) works only while you click “Listen for test event” (or “Execute workflow”) in the editor, and it shows the data live on the canvas. Click it, then send a request from your terminal:
curl -s -X POST https://n8n.example.com/webhook-test/contact-form \
  -H "Content-Type: application/json" \
  -d '{"name":"Ana","email":"ana@example.com"}'
Expected output, with the time in your timezone (note the +02:00 offset for Bucharest in November):
{"name":"Ana","email":"ana@example.com","received_at":"2026-11-10T10:15:42.123+02:00"}
The production URL (/webhook/contact-form) works only after you activate the workflow with the switch in the top right of the editor (newer n8n versions call this step “Publish”). Activate it, then repeat the curl command with /webhook/ instead of /webhook-test/. The execution now shows up in the Executions list rather than on the canvas.
From here, extend it: add a Google Sheets node to log every submission, a Send Email or Telegram node to notify you, or an IF node that routes messages containing “invoice” to accounting. Replace the Webhook with a Schedule Trigger and you have a cron job with a visual editor.
How much server does n8n need?
n8n itself is a Node.js application. Idle, with a handful of workflows, the whole stack uses roughly 350 MB of RAM. Memory jumps during executions that handle big payloads: large JSON responses, spreadsheets with thousands of rows, or binary files such as PDFs and images. A 2 GB VPS leaves comfortable headroom for typical small business automations; with 1 GB, add swap and avoid processing big files. CPU usage stays low except while workflows run, so 1-2 vCPUs are enough for most people. If you later reach hundreds of executions per minute, n8n’s queue mode (Redis plus separate worker containers) is the next step, and that is where starting on PostgreSQL pays off.
Backups and restores
Three things must be backed up: the PostgreSQL database (workflows, credentials, history), the n8n_data volume (settings and any binary data stored on disk), and your .env file, especially the encryption key. Without the key, a database backup is only half useful, because stored credentials cannot be decrypted.
mkdir -p ~/n8n-backups
cd ~/n8n
sudo docker compose exec -T postgres pg_dump -U n8n -d n8n -Fc > ~/n8n-backups/n8n-db-$(date +%F).dump
-Fc creates PostgreSQL’s compressed custom format, which you restore with pg_restore. No password is needed because pg_dump runs inside the container over the local socket, which the official image trusts. If you ever connect over the network from another machine, pass the password through the PGPASSWORD environment variable or a ~/.pgpass file, never as a command line argument visible in the process list.
Next, the n8n volume. Compose prefixes volume names with the project folder name, so ours is n8n_n8n_data (confirm with sudo docker volume ls):
sudo docker run --rm -v n8n_n8n_data:/data:ro -v ~/n8n-backups:/backup alpine \
  tar czf /backup/n8n-data-$(date +%F).tar.gz -C /data .
sudo chown "$USER": ~/n8n-backups/n8n-data-*.tar.gz
cp ~/n8n/.env ~/n8n/compose.yaml ~/n8n/Caddyfile ~/n8n-backups/
The archive is written by root inside a temporary container, so chown hands it back to your user before you copy it off the server. And a backup that lives only on the same server is not a backup: pull it to another machine, for example from your computer with rsync -av user@your-vps:n8n-backups/ ./n8n-backups/.
To automate the database dump, open root’s crontab with sudo crontab -e and add a line like the one below (replace youruser; inside crontab the % sign must be escaped as \%). It dumps the database every night at 03:00 and deletes dumps older than 14 days:
0 3 * * * cd /home/youruser/n8n && docker compose exec -T postgres pg_dump -U n8n -d n8n -Fc > /home/youruser/n8n-backups/n8n-db-$(date +\%F).dump && find /home/youruser/n8n-backups -name 'n8n-db-*.dump' -mtime +14 -delete
These dumps are owned by root, so run sudo chown on them before copying them off, as above.
Restoring. Always restore into an empty database, never on top of the live one that n8n has already migrated and filled. Stop n8n, recreate the database, restore, then start n8n again:
cd ~/n8n
sudo docker compose stop n8n
sudo docker compose exec -T postgres dropdb -U n8n --if-exists n8n
sudo docker compose exec -T postgres createdb -U n8n -O n8n n8n
sudo docker compose exec -T postgres pg_restore -U n8n -d n8n --no-owner < ~/n8n-backups/n8n-db-2026-11-10.dump
sudo docker compose start n8n
The .env file must contain the same N8N_ENCRYPTION_KEY as when the backup was taken. On a brand new server, copy .env, compose.yaml and Caddyfile first, start only the database with sudo docker compose up -d postgres (it creates a fresh, empty n8n database), restore the dump into it, unpack the n8n-data archive into the new volume with the same alpine trick (tar xzf instead of tar czf), and only then run sudo docker compose up -d.
Updating n8n safely
cd ~/n8n
sudo docker compose pull
sudo docker compose up -d
sudo docker image prune -f
pull downloads newer images for the tags in your Compose file, up -d recreates only the containers whose image changed, and prune removes the old images. Before every update, take a database backup and read the release notes, especially before a major version change (for example from 1.x to 2.x), which can remove deprecated features or nodes. n8n runs its own database migrations on start, so watch sudo docker compose logs -f n8n after updating and read any deprecation warnings it prints.
PostgreSQL is different: changing postgres:17 to postgres:18 is not a simple update. Major PostgreSQL versions use incompatible data formats, and the new container will refuse to start on the old volume. The safe path is: dump, new empty volume with the new version, restore. Staying on 17 with regular pull updates is perfectly fine for years.
Troubleshooting: common mistakes
Webhook URLs show http://localhost:5678. WEBHOOK_URL is missing or the container was not recreated after you edited it. Fix the variable and run sudo docker compose up -d; Compose recreates containers whose configuration changed.
Caddy cannot get a certificate. Read sudo docker compose logs caddy. Common causes: the DNS record does not point to this VPS yet, port 80 is blocked somewhere upstream, or another web server (Apache, nginx) on the host already uses ports 80/443, which shows up as “address already in use” when the stack starts. Let’s Encrypt also rate-limits repeated failures, so fix the cause before restarting in a loop.
“Webhook not registered” (404). You called the test URL without clicking “Listen for test event”, or the production URL while the workflow is inactive. Test URLs are for the editor, production URLs for active workflows.
“Mismatching encryption keys”. The n8n_data volume contains a config file with a different key than N8N_ENCRYPTION_KEY, usually because n8n was started once before the variable was set. On a fresh install with no data worth keeping, remove the stack together with its volumes (sudo docker compose down -v, which deletes all data) and start again. Otherwise, put the original key back into .env.
Schedules fire at the wrong hour. GENERIC_TIMEZONE is not set, or the workflow has its own timezone in its settings. Remember that TZ alone does not change the schedule timezone in n8n.
Errors about X-Forwarded-For or “trust proxy”. Make sure N8N_PROXY_HOPS is 1 when one proxy sits in front of n8n.
PostgreSQL rejects the password after you changed it in .env. POSTGRES_PASSWORD is only used the first time the data volume is initialized. To change it later, open sudo docker compose exec postgres psql -U n8n, run \password n8n (it prompts for the new password), then update .env and run sudo docker compose up -d.
Docker will not start in an LXC container. Unprivileged LXC needs nesting and keyctl enabled by the host. On KVM this problem does not exist.
Permission errors on /home/node/.n8n. n8n runs as the user node (UID 1000). With a named volume, as in our file, Docker handles this. If you switched to a bind mount (a host folder), run sudo chown -R 1000:1000 on that folder.
Security notes
- Publish only Caddy. Docker-published ports bypass ufw, so the only real protection for n8n and PostgreSQL is not publishing their ports at all. Do not add
"5678:5678"“just for testing” and forget it there. - Treat editor access as server access. The Code node runs JavaScript (and Python) on your server, and workflows hold credentials for your other systems. Give editor accounts only to people you trust, with strong passwords and two-factor authentication.
- Protect your webhooks. A production webhook URL is public. For anything that writes data, set Authentication on the Webhook node (Header Auth with a long random token is easy) or verify the signatures that services like Stripe and GitHub send.
- Limit risky nodes. If you do not need nodes that run shell commands or touch the server’s files, such as Execute Command, block them with the
NODES_EXCLUDEenvironment variable. Recent n8n releases already disable some of them by default; check the documentation for your version. - Guard the
.envfile. Keep it atchmod 600, never commit it to Git, and store an offline copy of the encryption key. - Update regularly. Automation tools hold the keys to many other systems, which makes them attractive targets. Watch the releases and apply security fixes promptly.
So, is self-hosted n8n worth it?
If you automate more than a couple of small tasks, the answer is usually yes. A modest VPS runs n8n with PostgreSQL comfortably, executions are unlimited, and your data stays on your server instead of a third-party cloud. The price is a bit of operational discipline: keep the encryption key safe, back up the database off the server, read the release notes before updating. Follow the seven steps above and you have a production-ready setup in about half an hour, with real HTTPS webhooks that outside services can call.
You can deploy this stack today on a VPS in our Romanian data center, or let our server administration team install, secure, back up and update n8n for you, so you can focus on building automations instead of maintaining servers.
FAQ
Is n8n free to self-host?
Yes. The Community edition is free to self-host for internal business and personal use under the Sustainable Use License; you pay only for the server. Some enterprise features require a paid license, and you may not resell n8n itself as a hosted service.
Can I run n8n on a 1 GB VPS?
For a few light workflows, yes, especially with swap enabled. If you process large files or run many executions in parallel, 2 GB is the comfortable minimum.
Can I use nginx or Traefik instead of Caddy?
Yes. Any reverse proxy works as long as it passes websocket connections and the forwarding headers, and you set N8N_PROXY_HOPS to the number of proxies in front of n8n. We chose Caddy because it handles certificates with zero configuration.
I started with SQLite. Can I move to PostgreSQL?
Yes. The cleanest path is to export workflows and credentials with n8n’s CLI (n8n export:workflow and n8n export:credentials) from the old instance, then import them into the new PostgreSQL-backed instance, which must use the same encryption key.








