mkcert: local HTTPS with no browser warnings, in two commands
Everyone has been through it: you start a local service on https://localhost, and the browser greets you with a red “your connection is not private” screen. You click “proceed anyway”, keep working, and get used to the warning. The problem is that this warning trains you to ignore exactly the signal that should stop you in production, plus some tools (webhooks, mobile apps, service workers) simply refuse to talk to a certificate they do not trust. Self-signed certificates are not the answer, they are the source of the pain.
mkcert , the tool written by Filippo Valsorda (former Go security lead at Google), solves this elegantly. It is licensed under BSD-3, it is one of the most beloved dev tools in the ecosystem, and we use it in our own workflows. This post is the field report, plus the web-interface variant we run for teams.
What mkcert actually is
mkcert does one thing and does it perfectly: it generates locally-trusted development certificates. Not self-signed certificates the browser rejects, but certificates signed by your own certificate authority (CA) that mkcert installs into your system and browser trust stores. From that moment, any certificate issued by that CA is considered valid by your machine, with no warning at all.
The subtle but crucial difference from self-signed is trust. A self-signed certificate has nobody behind it vouching for it, so the browser complains. An mkcert certificate is signed by your local CA, and your local CA is explicitly trusted on your machine because mkcert registered it there. It is the same mechanism by which Let’s Encrypt or any public CA works, just at the scale of your machine, not the internet.
How it works underneath
The flow has two steps, and that is all you need to understand:
mkcert -install: creates a CA key pair (once, on the first run) and installs it into the relevant trust stores, the operating system, plus Firefox and Chrome via the NSS database. From this moment, your machine trusts anything this CA signs.mkcert example.test localhost 127.0.0.1 ::1: issues a certificate valid for exactly those names and IPs, signed by your local CA. It writes two files, the certificate and the private key, which you hand to your local server.
You put the certificate into nginx, into your Node app, into anything, and https://example.test works with the green padlock, without a single warning. Two steps, zero configuration, zero PKI theory to learn.
What you get out of the box
mkcert is minimalist by design, but it covers everything you need:
- Multiple names on one certificate: domains, subdomains,
localhost, IP addresses (IPv4 and IPv6), all in a single certificate. - Wildcard certificates:
mkcert "*.example.test"covers all subdomains at once. - Cross-platform: macOS, Linux and Windows, installable via Homebrew, distro packages, Chocolatey/Scoop or a direct binary.
- Multiple trust stores: system, Firefox, Chrome, Java, NSS, all updated by
-install. - Formats: PEM by default, plus PKCS#12 (
.p12) for tools that require it. - S/MIME certificates: for email signing in development.
What it does not do, by design: mkcert is not for production. Its CA is only trusted on the machines where you manually installed it. A random visitor from the internet will see the same red screen, because their browser does not know your CA. For public certificates you need a public CA (Let’s Encrypt, Google Trust Services), and mkcert does not even try to compete there. It is the tool for development, labs and internal networks, exactly where it shines.
Installing and your first certificate
On Linux, the simplest way is through the package manager or the direct binary:
# Debian/Ubuntu
sudo apt install libnss3-tools
curl -JLO "https://dl.filippo.io/mkcert/latest?for=linux/amd64"
chmod +x mkcert-v*-linux-amd64
sudo mv mkcert-v*-linux-amd64 /usr/local/bin/mkcert

# install the local CA (once)
mkcert -install

# issue a certificate for your project
mkcert example.test "*.example.test" localhost 127.0.0.1 ::1
The second command writes example.test+4.pem (the certificate) and example.test+4-key.pem (the key). You point your server config at them and you are done. In nginx, for example:
server {
    listen 443 ssl;
    server_name example.test;
    ssl_certificate     /path/example.test+4.pem;
    ssl_certificate_key /path/example.test+4-key.pem;
}
libnss3-tools matters on Linux: without it, mkcert cannot install the CA into Firefox and Chrome, only into the system trust store. With it, all browsers trust it from the first go.
mkcert for a team: the web interface
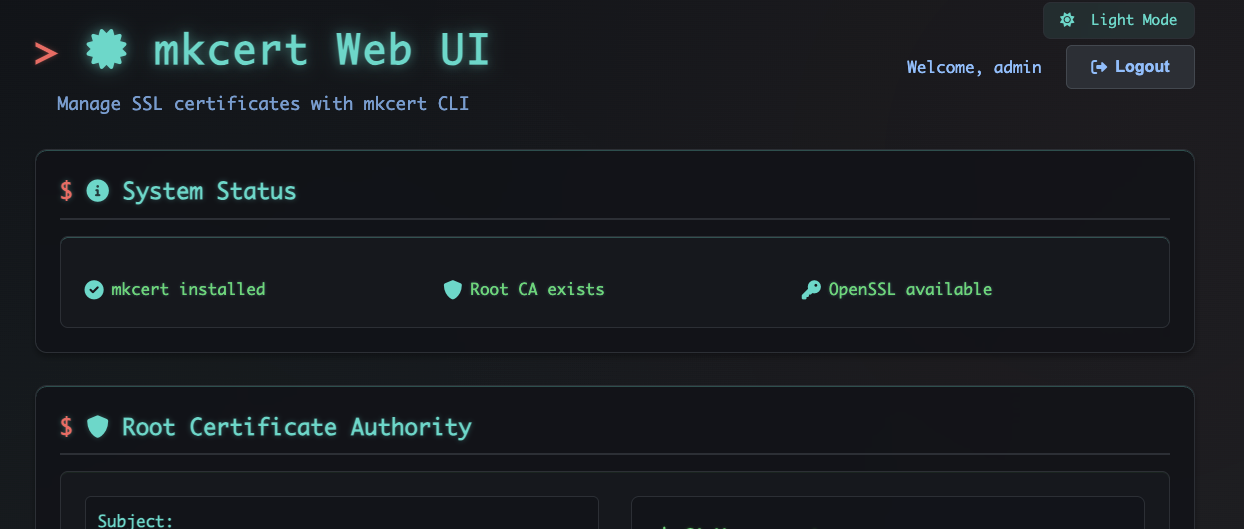
mkcert on the command line is perfect for a single developer on their machine. But when you have a team or an internal lab where several people need certificates for internal services, distributing keys by hand over Slack gets ugly fast. This is where mkcert Web UI comes in, a web layer over mkcert that we run for exactly this need.
It gives you a dashboard where you issue certificates for any domain and IP without touching the terminal, in PEM, CRT or PFX formats. It also brings things useful for a team:
- Expiry monitoring with email notifications before a certificate expires.
- SCEP, the automatic device enrollment protocol.
- Authentication, basic auth or SSO through OpenID Connect.
- Dark/light theme and a clean UI.
We keep it behind our SSO, so only our people can issue certificates from the internal CA. One hygiene step: the CA is a trust key, treat it as a secret. Anyone with the CA’s private key can issue certificates your machines will believe. Do not expose it, do not put it in Git, and restrict who reaches the interface.
Configuration patterns worth knowing
A few things useful beyond the defaults.
Distribute the CA, not the certificates
If you have a team, do not issue and distribute certificates one by one. Distribute the public CA once (mkcert -CAROOT shows you where it is), install it on the team’s machines, and from there each person issues whatever certificates they want, all trusted on all machines. One CA, many certificates.
Use a .test or .localhost domain
For development, use reserved TLDs like .test or .localhost, which will never exist publicly. You avoid collisions with real domains and it is clear from the name that it is a development environment.
Do not bake the CA into public Docker images
The temptation is to put the CA into a development image so it is “ready”. Do not do it for images that end up in a public registry, you have published a CA key. Mount it at runtime from a volume, do not bake it into the image.
PKCS#12 for stubborn tools
Some tools (Java, certain clients) do not want PEM but .p12. mkcert outputs the format directly with mkcert -pkcs12 example.test, without wrestling with openssl incantations.
Where mkcert is not the right answer
It is worth being honest about the limits.
- Not for production. We repeat it because it is the most common mistake: the mkcert CA is only trusted where you manually installed it. A public site needs a certificate from a public CA.
- Not certificate management at scale. For automatically rotating hundreds of production certificates you need ACME (Let’s Encrypt, Google Trust Services), not mkcert.
- The local CA is a risk surface. If someone steals your CA key and installs it without your knowledge, they can issue certificates you trust. Treat
-CAROOTwith care. - Does not solve trust between foreign machines. Two computers that do not have the same CA installed will not trust each other’s certificates. It is a local-first tool by definition.
Alternatives we considered
For completeness: we also looked at plain openssl (you can do everything mkcert does, but with ten cryptic commands and good odds of getting a field wrong), Caddy (which automatically issues locally-trusted certificates for development, excellent if you use it as your server anyway), and step-ca from Smallstep (a full private CA with ACME, far more capable but also far heavier, right when you actually want a serious internal PKI). For “I want local HTTPS that works now, without becoming a PKI expert”, mkcert is the most on-target.
So, should you run it?
If you develop any local web service and you are tired of the red screen, mkcert is worth the five minutes to install. The first time https://your-project.test opens with the green padlock, without a single warning, without having learned a word of PKI theory, you will understand why it is one of the most beloved dev tools in the ecosystem.
If you have a team or an internal lab, add mkcert Web UI behind an SSO and distribute the CA once to all machines, and issuing certificates becomes a click. We run it exactly like that, for our internal services. If you want to put it on infrastructure you do not have to build first, our VPS plans are perfect for a small internal certificate server, and our server administration service covers the setup and SSO integration if you would rather skip the learning curve.
Either way, an evening with no red browser screens is a better evening. The code is on GitHub, the install is one command, and you will know within five minutes whether it earns a spot in your workflow.