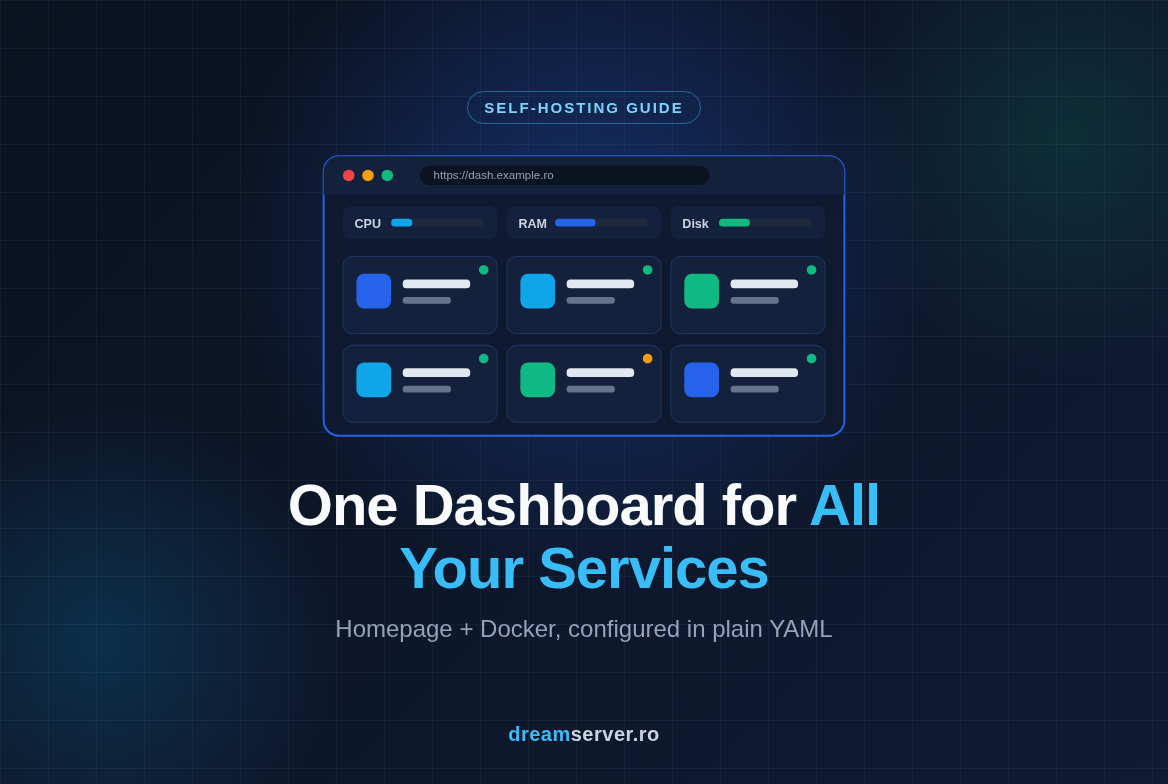
Homepage Dashboard with Docker: One Start Page for Your Server
Once you run more than a handful of apps on a VPS, a quiet problem creeps in: you forget where things live. Was Uptime Kuma on port 3001 or behind status.yourdomain? Is the file sync app actually running, or did it crash after last night’s update? You end up with a bookmarks folder full of half-remembered IP addresses and a terminal permanently open on docker ps. A self-hosted dashboard fixes this with a single page that links every app, shows whether each container is up, and pulls live numbers from the services themselves. In this guide we build exactly that with Homepage, step by step, on a fresh VPS.
Homepage is an open source project (GPL-3.0 license) documented at gethomepage.dev , with the code on github.com/gethomepage/homepage . It is a fast start page built with Next.js, it integrates with well over a hundred popular self-hosted apps, and, the part we like most, its whole configuration lives in a few plain YAML files. No database, no admin panel to click through, nothing hidden: if you can edit a text file, you can build your dashboard.
What Homepage is and why a dashboard helps
Think of Homepage as the “new tab” page for your server. Every app you run becomes a tile, tiles are arranged in groups (for example “Infrastructure” and “Apps”), and the page loads in a fraction of a second. It is made of three kinds of building blocks:
- Services: tiles for your apps. Each one has a link, an icon, a short description and, optionally, a status indicator and a widget that shows live data pulled from the app’s API, for example how many monitors are up in Uptime Kuma.
- Info widgets: the bar at the top of the page, with things like CPU, RAM and disk usage, the date and time, the weather or a search box.
- Bookmarks: simple lists of links for things you use often but do not host yourself, such as your DNS provider, your hosting client area or documentation.
Homepage also talks to Docker. If you are new to it, Docker is the tool that runs applications in containers: isolated, packaged environments that contain an app and everything it needs, so it behaves the same on any server. Because Homepage can ask Docker which containers exist and what state they are in, each tile can show a small “running” or “exited” badge, and Docker labels can even create tiles automatically.
The configuration format is YAML, a human-friendly text format where structure is expressed through indentation (spaces at the start of a line). That is the only “language” you need for this tutorial, and we explain every file we touch.
What we are going to build
By the end of this guide you will have:
- Homepage running with Docker Compose, reachable only over HTTPS at an address like
https://dash.example.ro, protected by a password. - A list of your services, grouped, with icons, descriptions and availability checks.
- Live container status through a read-only Docker socket proxy (we explain below why we do not hand Homepage the Docker socket directly).
- A top bar with server resources, date and time, weather and search.
- A single
configfolder that holds everything and can be backed up by copying it.
Homepage compared to other dashboards
Homepage is not the only start page out there. Homer is a static page with almost no footprint but no live status. Heimdall and Dashy let you edit tiles from the browser. Homarr offers a drag-and-drop interface but is noticeably heavier. Homepage sits in a sweet spot: modest memory use, deep integrations, and configuration as text files you can keep in Git.
Together with the socket proxy (a few MB), Homepage stays comfortably under 150 MB of RAM, so it fits alongside your other apps even on the smallest VPS.
What you need
- A DreamServer VPS running Debian 13 or Ubuntu 24.04. 1 vCPU and 1 GB of RAM are plenty for Homepage itself.
- SSH access with a sudo user (a regular user allowed to run administrative commands with
sudo). - A domain or subdomain you control, for example
dash.example.ro, with a DNS A record pointing to your VPS IP address. An A record is simply the entry that tells the internet “this name lives at this IP”. - About 30 minutes and a text editor in the terminal (we use
nano, which is preinstalled). - Optional, but more fun: a few apps already running on the server, so the dashboard has something to show.
A note for LXC customers: Docker runs inside an unprivileged LXC container only if the “nesting” feature is enabled. If Docker refuses to start, contact support to enable it, or use a KVM VPS, where Docker works without any special settings.
How the pieces fit together
Before typing commands, let us look at the path a request takes. Understanding this makes the security choices later obvious.
Here is what each piece does:
- The firewall (UFW) decides which network ports are reachable from outside. A port is a numbered door on the server: SSH uses 22, web traffic uses 80 (HTTP) and 443 (HTTPS). We open only those three.
- Caddy is a reverse proxy: a web server that receives every visitor, handles the HTTPS certificate automatically through Let’s Encrypt, asks for a password, and then forwards the request to the right app on the inside.
- Homepage listens on port 3000, but only on
127.0.0.1(localhost), which means nobody on the internet can reach it directly. Only Caddy, running on the same machine, can. - The socket proxy is a tiny container that sits between Homepage and Docker and allows only safe, read-only questions such as “which containers are running?”.
- The config folder holds the YAML files that describe your dashboard. It lives on the VPS disk, so it survives container restarts and updates.
The procedure at a glance
Step 1: Prepare the VPS (updates, Docker, firewall)
First, bring the system up to date. This installs security patches before we add anything new:
sudo apt update && sudo apt upgrade -y
On Ubuntu, check whether a reboot is required (for example after a kernel update):
[ -f /var/run/reboot-required ] && echo "Reboot needed" || echo "No reboot needed"
Debian does not create /var/run/reboot-required by default, so if the upgrade installed a new linux-image package, simply reboot with sudo reboot to be safe.
Next, install Docker from Docker’s official repository. The packages shipped by the distribution are often older and do not include the Compose v2 plugin under the same name. The block below works on both Debian and Ubuntu, because it reads the distribution name (ID) and release codename from /etc/os-release:
sudo apt install -y ca-certificates curl
sudo install -m 0755 -d /etc/apt/keyrings
. /etc/os-release
sudo curl -fsSL "https://download.docker.com/linux/${ID}/gpg" -o /etc/apt/keyrings/docker.asc
sudo chmod a+r /etc/apt/keyrings/docker.asc
echo "deb [arch=$(dpkg --print-architecture) signed-by=/etc/apt/keyrings/docker.asc] https://download.docker.com/linux/${ID} ${VERSION_CODENAME} stable" | sudo tee /etc/apt/sources.list.d/docker.list > /dev/null
sudo apt update
sudo apt install -y docker-ce docker-ce-cli containerd.io docker-buildx-plugin docker-compose-plugin
Check that it works:
sudo docker run --rm hello-world
sudo docker compose version
You should see a “Hello from Docker!” message, followed by something like Docker Compose version v2.x.x. In this guide we always prefix Docker commands with sudo. You can add your user to the docker group to skip it, but keep in mind that membership in that group is effectively equivalent to root access.
Now the firewall. On Debian 13, UFW is not installed by default; on Ubuntu 24.04 it is installed but inactive. The same commands work on both:
sudo apt install -y ufw
sudo ufw allow 22/tcp
sudo ufw allow 80/tcp
sudo ufw allow 443/tcp
sudo ufw enable
sudo ufw status
If your SSH server listens on a different port, allow that port before running ufw enable, or you will lock yourself out. One important detail: ports published by Docker bypass UFW rules, because Docker writes its own firewall rules. That is why, in the next step, we publish Homepage only on 127.0.0.1 instead of relying on UFW to hide it.
Step 2: Create the project folder and the Compose file
Docker Compose lets us describe several containers, their settings and how they connect, in one file called compose.yaml. Let us create a project folder with a config subfolder for Homepage’s settings:
mkdir -p ~/homepage/config
cd ~/homepage
id -u && id -g
The last command prints your user ID and group ID, usually 1000 and 1000 on a fresh VPS. Homepage will create its files with these IDs, so you can edit them without sudo. Now create the Compose file:
nano compose.yaml
Paste the following, replacing dash.example.ro with your real subdomain and 1000 with the values you just saw:
services:
  dockerproxy:
    image: tecnativa/docker-socket-proxy:latest
    container_name: dockerproxy
    environment:
      CONTAINERS: "1"   # allow reading the container list and stats
      POST: "0"         # block every write operation (start, stop, delete)
    volumes:
      - /var/run/docker.sock:/var/run/docker.sock:ro
    restart: unless-stopped
    networks:
      - homepage

  homepage:
    image: ghcr.io/gethomepage/homepage:latest
    container_name: homepage
    environment:
      HOMEPAGE_ALLOWED_HOSTS: "dash.example.ro"
      PUID: "1000"
      PGID: "1000"
    ports:
      - "127.0.0.1:3000:3000"
    volumes:
      - ./config:/app/config
    depends_on:
      - dockerproxy
    restart: unless-stopped
    networks:
      - homepage

networks:
  homepage:
    name: homepage
Save with Ctrl+O, Enter, and exit with Ctrl+X. What each part means:
- dockerproxy connects to the Docker socket (
/var/run/docker.sock, the “control channel” of Docker) and exposes only the container read endpoints to other containers on the privatehomepagenetwork. Its port 2375 is never published to the host. - HOMEPAGE_ALLOWED_HOSTS is a security check introduced in Homepage v1: the app answers only requests addressed to the host names in this list.
localhost:3000and127.0.0.1:3000are always allowed, which is handy for testing. - ports
"127.0.0.1:3000:3000"means “publish container port 3000 on the host, but only on localhost”. - volumes
./config:/app/configis a bind mount: theconfigfolder on the VPS appears inside the container at/app/config, so your YAML files persist outside the container. - restart: unless-stopped brings the containers back after a reboot or crash.
About image tags: :latest always pulls the newest release, which is convenient but means an update can surprise you. For a setup you rarely touch, pin a specific release from the Homepage releases page
, using a tag in the form vX.Y.Z, and bump it deliberately when you want to upgrade. The socket proxy changes rarely, so :latest is a reasonable tradeoff there, but you can pin it the same way.
Step 3: Start Homepage for the first time
Start both containers in the background (-d means “detached”):
sudo docker compose up -d
sudo docker compose ps
The ps output should list dockerproxy and homepage with the status Up. Look at the logs to confirm Homepage started cleanly:
sudo docker compose logs --tail 30 homepage
You should see a line saying the server is ready on port 3000. Now ask it for a page from the VPS itself:
curl -sI http://127.0.0.1:3000 | head -n 1
Expected output: HTTP/1.1 200 OK. On the first start, Homepage also copies example files into the empty config folder:
ls config
You should see files such as bookmarks.yaml, docker.yaml, services.yaml, settings.yaml, widgets.yaml, plus custom.css and custom.js for advanced styling. These are the only files you will edit from now on.
To see the dashboard in your browser before configuring HTTPS, use an SSH tunnel, which forwards a port from your own computer to the VPS through the encrypted SSH connection. On your computer (not on the VPS), run:
ssh -L 3000:127.0.0.1:3000 your-user@your-vps-ip
While that session stays open, browse to http://localhost:3000. You will see Homepage with its example content. Leave the tunnel open, because we will refresh this page after each of the next steps.
Step 4: Set the look and layout in settings.yaml
settings.yaml controls the global appearance: page title, theme, colors and how groups are laid out. Open it:
nano ~/homepage/config/settings.yaml
Replace its content with:
title: My Server
theme: dark
color: slate
headerStyle: boxed
statusStyle: dot
hideVersion: true
layout:
  Infrastructure:
    style: row
    columns: 3
  Apps:
    style: row
    columns: 3
theme can be dark or light, color picks the palette (for example slate, zinc, blue, emerald), statusStyle: dot shows availability as a small colored dot instead of a text badge, and the layout section tells Homepage to display the “Infrastructure” and “Apps” groups as rows with three tiles each. The group names must match exactly the names you use in services.yaml in the next step, including capitalization.
Refresh the browser: most changes appear immediately. If something does not update, restart the container with sudo docker compose restart homepage.
Remember the YAML golden rule: indentation uses spaces, never tabs, and every nested level is indented consistently (two spaces in our examples).
Step 5: Add your services in services.yaml
Now the heart of the dashboard. Open services.yaml:
nano ~/homepage/config/services.yaml
Here is an example with two groups. Adapt names and addresses to the apps you actually run:
- Infrastructure:
    - Uptime Kuma:
        icon: uptime-kuma.png
        href: https://status.example.ro
        description: Uptime monitoring and status page
        siteMonitor: https://status.example.ro
        widget:
          type: uptimekuma
          url: https://status.example.ro
          slug: main

    - Webmail:
        icon: mdi-email-outline
        href: https://mail.example.ro
        description: Company mailboxes
        siteMonitor: https://mail.example.ro

- Apps:
    - Nextcloud:
        icon: nextcloud.png
        href: https://cloud.example.ro
        description: Files, calendar and contacts
        siteMonitor: https://cloud.example.ro

    - Website:
        icon: mdi-web
        href: https://www.example.ro
        description: Public company site
        siteMonitor: https://www.example.ro
The structure is: a list of groups, each group contains a list of services, each service has its settings. The fields:
- icon: an icon name. Names ending in
.pngcome from Homepage’s built-in icon library of popular apps; names starting withmdi-use Material Design icons, useful for generic things. - href: where the tile takes you when clicked.
- siteMonitor: Homepage sends a request to this URL periodically and shows a green or red dot plus the response time. It works for any web address, even on other servers.
- widget: live data from the app’s API. The
uptimekumawidget needs the URL of your Uptime Kuma instance and theslugof one of its status pages (the last part of the status page URL), and then shows how many monitors are up or down.
Widgets are fetched by the Homepage server, not by your browser, so API keys for apps that need them stay on the VPS. If an app runs in Docker on the same server, you can also connect its container to the homepage network (declared as external: true in that app’s Compose file) and use its internal address, such as http://uptime-kuma:3001, instead of the public URL.
Save and refresh the browser. Your tiles should appear in two groups, with green dots for the sites that respond.
Step 6: Show live container status with docker.yaml
So far Homepage checks URLs. Now we let it see the containers themselves, through the read-only proxy we started in Step 2. Open docker.yaml:
nano ~/homepage/config/docker.yaml
Replace its content with:
my-docker:
  host: dockerproxy
  port: 2375
my-docker is just a name we choose for this Docker server, and dockerproxy is the container name of the proxy, which Docker resolves automatically on the shared homepage network. Now link a tile to a container by adding two lines to the service in services.yaml:
    - Uptime Kuma:
        icon: uptime-kuma.png
        href: https://status.example.ro
        description: Uptime monitoring and status page
        server: my-docker
        container: uptime-kuma
container must match the name shown in the NAMES column of sudo docker ps. After a restart (sudo docker compose restart homepage), the tile shows the container state, and clicking the status reveals CPU and memory usage of that container. To display these numbers on every tile all the time, add showStats: true to settings.yaml.
There is an even lazier option: Docker labels. Labels are small key/value tags attached to a container. If you add Homepage labels to another app’s Compose file, Homepage discovers it automatically through the proxy, no editing of services.yaml needed:
services:
  uptime-kuma:
    image: louislam/uptime-kuma:1
    container_name: uptime-kuma
    labels:
      - homepage.group=Infrastructure
      - homepage.name=Uptime Kuma
      - homepage.icon=uptime-kuma.png
      - homepage.href=https://status.example.ro
      - homepage.description=Uptime monitoring
Pick one method per service: if you define the same app both in services.yaml and through labels, it shows up twice.
Step 7: Add info widgets and bookmarks
The info bar at the top is configured in widgets.yaml:
nano ~/homepage/config/widgets.yaml
- resources:
    cpu: true
    memory: true
    disk: /

- datetime:
    text_size: xl
    format:
      timeStyle: short
      dateStyle: short

- openmeteo:
    label: Bucharest
    latitude: 44.43
    longitude: 26.10
    timezone: Europe/Bucharest
    units: metric

- search:
    provider: duckduckgo
    target: _blank
resources shows CPU, RAM and disk usage. Inside a Docker container on a KVM VPS, these values reflect the whole server, and disk: / reports the filesystem that holds Docker’s data, which is usually your root disk. On an LXC VPS, you see the limits of your container. openmeteo uses a free weather service that needs no API key, and search adds a search box that opens results in a new tab.
Bookmarks go in bookmarks.yaml:
nano ~/homepage/config/bookmarks.yaml
- Admin:
    - DreamServer:
        - abbr: DS
          href: https://dreamserver.ro
    - Docker docs:
        - abbr: DK
          href: https://docs.docker.com

- Docs:
    - Homepage docs:
        - abbr: HP
          href: https://gethomepage.dev
The format looks a little odd at first: each bookmark is a list with a single entry, which holds its settings. abbr is a two-letter abbreviation displayed when there is no icon. Refresh, and your dashboard is complete. A nice bonus: just start typing on the page and Homepage’s quick launch searches through your services, so you can open any app with a few keystrokes.
Step 8: Publish it with HTTPS and a password
Homepage has no login of its own. Anyone who can reach it sees all your services, and widgets can reveal internal details. So we put it behind Caddy, which adds HTTPS and a password in a few lines.
First, make sure your subdomain points to the VPS:
getent hosts dash.example.ro
The output must show your VPS IP. If it does not, fix the DNS A record and wait a few minutes. Then install Caddy, which is available in the official repositories of both Debian 13 and Ubuntu 24.04 (on Ubuntu it comes from the universe component, enabled by default on server images):
sudo apt install -y caddy
caddy hash-password
caddy hash-password asks for a password twice and prints a hash starting with $2a$14$. A hash is a one-way scrambled version of the password, so the real password never sits in a config file. Copy it, then edit the Caddy configuration:
sudo nano /etc/caddy/Caddyfile
Replace the whole file with:
dash.example.ro {
	basicauth {
		admin $2a$14$PASTE_YOUR_HASH_HERE
	}
	reverse_proxy 127.0.0.1:3000
}
admin is the username you will type in the browser. We use the basicauth directive because it works on the Caddy version shipped by both distributions; newer Caddy releases call it basic_auth and still accept the old name with a warning. Validate and reload:
sudo caddy validate --config /etc/caddy/Caddyfile
sudo systemctl reload caddy
curl -sI https://dash.example.ro | head -n 1
Expected output: HTTP/2 401. That “401 Unauthorized” is good news: it means HTTPS works, the certificate was issued, and a password is required. Open https://dash.example.ro in your browser, log in, and enjoy your dashboard. You can now close the SSH tunnel from Step 3.
Troubleshooting and common mistakes
- “Host validation failed” in the browser: the address you used is not listed in
HOMEPAGE_ALLOWED_HOSTS. Add it (several hosts are comma-separated, without spaces) and runsudo docker compose up -dto apply the change. Setting the value to*disables the check, which we do not recommend. - An error page after editing YAML: almost always indentation, a tab character or a missing colon. Run
sudo docker compose logs --tail 50 homepage; the log names the file and line. Revert your last change if in doubt. - Container status shows “not found” or “unknown”: the
containervalue does not matchdocker ps, theservervalue does not match the name indocker.yaml, or the proxy is not running. Check withsudo docker compose ps. - A widget shows “API Error”: wrong URL, wrong slug or key, or Homepage cannot reach the address from inside its container. Try the public HTTPS URL first, then switch to internal addresses once it works.
- Caddy cannot obtain a certificate: port 80 or 443 is blocked, the DNS record points elsewhere, or another web server (Apache, nginx) already uses those ports. Read
sudo journalctl -u caddy --no-pager -n 50. - Permission denied when editing config files: the
PUID/PGIDvalues do not match your user. Fix them incompose.yamland runsudo chown -R $USER:$USER ~/homepage/config. - Port 3000 already in use: another app uses it. Change only the left side, for example
"127.0.0.1:3010:3000", and point Caddy to127.0.0.1:3010. - Docker does not start on an LXC VPS: nesting is disabled for your container. Ask support to enable it, or use a KVM VPS.
Security notes
- Never skip the password. Homepage is designed as a private start page. Besides Caddy’s basic auth, a VPN is an even stronger option if only you and your team use the dashboard.
- The Docker socket is root access. Whoever can talk to it freely can start a privileged container and take over the server. Mounting it with
:rodoes not change that, which is why we use the proxy withPOST=0and never publish its port. - Keep Homepage on localhost. Because Docker bypasses UFW, a mapping like
"3000:3000"would expose the dashboard to the internet without HTTPS or a password. Always keep the127.0.0.1:prefix. - Keep secrets out of YAML. Widgets that need API keys can read them from environment variables whose names start with
HOMEPAGE_VAR_. Put them in a.envfile next tocompose.yaml, protect it withchmod 600 .env, addenv_file: .envunder thehomepageservice, and reference the value in YAML like this:
        widget:
          type: portainer
          url: https://portainer.example.ro
          env: 1
          key: "{{HOMEPAGE_VAR_PORTAINER_KEY}}"
- Use read-only API keys wherever an app offers them: a dashboard only needs to read.
Keeping Homepage updated and backed up
Updating is two commands, run from ~/homepage:
sudo docker compose pull
sudo docker compose up -d
If you pinned a version, change the tag in compose.yaml first. Read the release notes before major upgrades, because configuration options occasionally change. As for backups, everything that matters is in the project folder:
tar czf ~/homepage-backup-$(date +%F).tar.gz -C ~ homepage
Copy that archive off the server from time to time. Since the configuration is plain text, it also fits perfectly in a private Git repository, so every change to your dashboard is versioned.
So, is Homepage worth it?
If you run more than three or four services, yes. In half an hour you get one page that answers “where is that app?” and “is it running?” at a glance, with live numbers from your apps, and a configuration made of a few readable text files that you can back up, version and copy to the next server. It costs around 120 MB of RAM and no ongoing effort beyond the occasional update.
You can deploy everything in this guide on a VPS from our Romanian data center in minutes. If you would rather have someone else set up Docker, the reverse proxy, HTTPS and the dashboard for you, our server administration team can build and maintain the whole stack.
FAQ
Does Homepage have a login or user accounts?
No. Homepage has no built-in authentication, by design. Protect it with a reverse proxy that requires a password, as in Step 8, or make it reachable only through a VPN.
Can I edit the dashboard from the browser?
No, Homepage is configured only through YAML files. This is deliberate: text files are easy to back up, compare and keep in Git. Most changes show up after a simple browser refresh.
Can Homepage show services running on other servers?
Yes. siteMonitor works with any URL, and docker.yaml can list several Docker hosts, each with its own socket proxy. Expose a remote proxy only over a private network or VPN, never directly on the internet.
Will it run on the smallest VPS?
Yes. Homepage and the socket proxy together use roughly 120 to 150 MB of RAM and almost no CPU when idle, leaving room for the apps the dashboard links to.
Does it work in an LXC container?
It does, as long as Docker itself works, which in an unprivileged LXC container requires nesting to be enabled. On a KVM VPS there are no such restrictions.