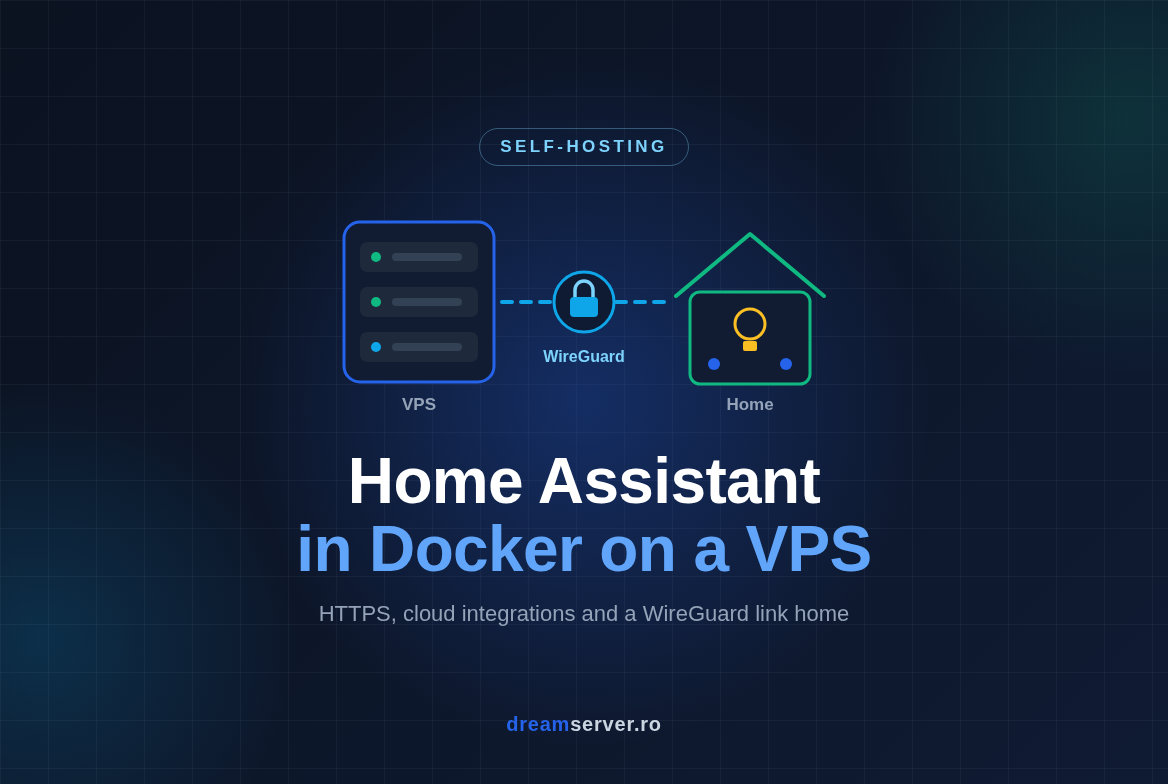
Home Assistant Docker Compose on a VPS: Setup and What Works
Home Assistant is the closest thing the smart home world has to a universal remote: one dashboard, one automation engine and thousands of integrations that make lights, thermostats, plugs, sensors and cloud services from different vendors talk to each other. Most people run it on a small box next to the router. But maybe you do not want another device at home, maybe you manage several places at once (your apartment, your parents’ house, a holiday cabin), or maybe you simply want it reachable from anywhere over a proper HTTPS address without opening ports on your home router. In those cases a VPS becomes an interesting home for it. Interesting, not magic: some things work better than at home, some need a tunnel back to your network, and a few simply do not work from a data center. In this tutorial we install Home Assistant with docker compose on a fresh VPS, put it behind HTTPS, connect cloud integrations, and build a WireGuard tunnel for the local devices that need one.
The project lives at home-assistant.io , it is open source under the Apache 2.0 license and is stewarded by the Open Home Foundation. Everything we use here is the official Home Assistant container image plus two other well known open source tools: Caddy for HTTPS and WireGuard for the tunnel home.
Why run Home Assistant on a VPS (and when not to)
Let us be honest from the start, because it saves you a weekend. Home Assistant was designed to be local first: it lives in your house, talks to your devices over your home network, and keeps working when the internet goes down. Putting it on a VPS changes that model.
What you gain:
- No hardware at home to babysit. No SD card corruption, no power adapter dying, no box under the TV. The VPS sits in a data center with redundant power and network.
- Clean remote access. A real domain name with a valid HTTPS certificate, reachable from the mobile app anywhere, without port forwarding at home and without caring whether your ISP gives you a public IP (many Romanian home connections sit behind CGNAT).
- One instance for several locations. A VPS can reach multiple homes through separate tunnels, or simply aggregate cloud-connected devices from wherever they are.
- Great for cloud-heavy setups. If most of your devices already talk to vendor clouds (many Wi-Fi plugs, robot vacuums, heat pumps, weather data, energy prices), Home Assistant only needs internet access, and a VPS has plenty of it.
What you lose:
- Offline resilience. If your home internet drops, the VPS cannot reach devices at home, so automations that depend on them stop until the connection returns.
- Direct hardware. There is no USB port on a VPS for a Zigbee, Z-Wave or Bluetooth stick.
- Automatic discovery. Many devices announce themselves on the local network (mDNS, SSDP). Those announcements never leave your house.
Installation types, and why Container is the one for a VPS
Home Assistant officially supports a few installation methods. Home Assistant OS is a complete operating system that you flash onto a dedicated device or VM, with the Supervisor and the add-on store. Home Assistant Container is just the application, packaged as a Docker image, which you run on any Linux host you already manage. The older Core and Supervised methods were deprecated by the project in 2025, so for new installs on a server you already use for other things, Container is the right choice.
A container, if you have not used one before, is a lightweight package that contains an application and everything it needs to run, isolated from the rest of the system but sharing the host’s kernel. Docker is the tool that runs containers, and Docker Compose lets us describe several containers in one YAML file and start them together.
The one trade off: Container installs have no add-on store. That is less of a problem than it sounds, because add-ons are themselves containers. Anything you would install as an add-on (an MQTT broker, Zigbee2MQTT, ESPHome) can run as an ordinary service in the same compose file.
What works on a VPS, and what needs a VPN
Before installing anything, check your device list against this table. It is the single most important part of the article.
| Category | Examples | On a VPS |
|---|---|---|
| Cloud integrations | Weather (Met.no), Tuya, Netatmo, Google Calendar, Spotify, energy prices | Works directly |
| Mobile companion app | Location, phone sensors, push notifications | Works directly over HTTPS |
| Webhooks and APIs | IFTTT style triggers, scripts, Telegram bot | Works directly, needs the public URL |
| IP based local devices | Shelly, ESPHome, Philips Hue bridge, Tasmota, IP cameras | Works over a VPN, added by IP |
| MQTT devices | Zigbee2MQTT at home, sensors publishing to a broker | Works over a VPN or TLS to a broker on the VPS |
| Discovery dependent | Chromecast, Apple TV, HomeKit devices, Matter over Thread | Poor or not working |
| USB radios | Zigbee, Z-Wave or Bluetooth sticks plugged into the server | Not possible on a VPS |
The rule of thumb: if Home Assistant can reach a device by IP address and port, it can reach it through a tunnel. If the device depends on being on the same local network segment (multicast discovery, IPv6 link-local, a USB cable), it will not work from a data center. For Zigbee, the clean solution is to keep a small Zigbee2MQTT box at home and send its MQTT messages to Home Assistant over the tunnel.
What you need
- A VPS with Debian 13 or Ubuntu 24.04, at least 1 vCPU, 2 GB RAM and 20 GB of disk. A KVM VPS is strongly recommended (see the LXC note in the troubleshooting section).
- A sudo user you can log in with over SSH.
- A domain or subdomain you control, for example
ha.example.com, with an A record pointing to the VPS public IP. If you also add an AAAA record, it must point to the VPS IPv6 address. - For local devices: a small always-on Linux device at home (a Raspberry Pi is perfect) or a router that supports WireGuard. Only needed for step 7.
- About an hour, most of which is waiting for downloads.
Throughout the article, replace ha.example.com with your domain, VPS_IP with your server’s address, and 192.168.1.0/24 with your home network range.
Home Assistant docker compose setup, step by step
Here is the whole procedure at a glance. Each number below matches a “Step” heading, so you can always see where you are.
Step 1: Prepare the VPS
Log in over SSH and bring the system up to date, then set the time zone. Home Assistant uses the time zone for automations (“turn on the heating at 6:30”), so it matters more than on a typical web server.
sudo apt update && sudo apt full-upgrade -y
sudo timedatectl set-timezone Europe/Bucharest
timedatectl
The last command should show Time zone: Europe/Bucharest and System clock synchronized: yes.
Next, the firewall. A firewall decides which ports (numbered doors through which network services accept connections) are reachable from the internet. We open SSH (22), HTTP (80, needed for the certificate challenge), HTTPS (443 over TCP, plus UDP for HTTP/3). On Ubuntu, ufw is already installed but inactive; on Debian it is not installed, so the first line is needed there and harmless on Ubuntu.
sudo apt install -y ufw
sudo ufw allow 22/tcp
sudo ufw allow 80/tcp
sudo ufw allow 443/tcp
sudo ufw allow 443/udp
sudo ufw enable
sudo ufw status verbose
Always allow 22 before running ufw enable, otherwise you lock yourself out of your own server. The status output should list the four rules as ALLOW IN.
If the upgrade installed a new kernel, reboot now. On Ubuntu you can check for the flag file:
[ -f /var/run/reboot-required ] && echo "Reboot needed" || echo "No reboot flag"
On Debian this file is not created by default, so the command will always say “No reboot flag”. There, the simple rule is: if apt installed a new linux-image package, run sudo reboot.
Step 2: Install Docker Engine and Compose
We install Docker from Docker’s own repository, which gives us a current Docker Engine and the Compose v2 plugin (the docker compose command, with a space). The same commands work on both Debian and Ubuntu, because they read the distribution name from /etc/os-release.
sudo apt install -y ca-certificates curl
sudo install -m 0755 -d /etc/apt/keyrings
sudo curl -fsSL https://download.docker.com/linux/$(. /etc/os-release && echo "$ID")/gpg -o /etc/apt/keyrings/docker.asc
sudo chmod a+r /etc/apt/keyrings/docker.asc
echo "deb [arch=$(dpkg --print-architecture) signed-by=/etc/apt/keyrings/docker.asc] https://download.docker.com/linux/$(. /etc/os-release && echo "$ID") $(. /etc/os-release && echo "$VERSION_CODENAME") stable" | sudo tee /etc/apt/sources.list.d/docker.list > /dev/null
sudo apt update
sudo apt install -y docker-ce docker-ce-cli containerd.io docker-buildx-plugin docker-compose-plugin
Verify it works:
sudo docker run --rm hello-world
sudo docker compose version
You should see “Hello from Docker!” followed by a version line like Docker Compose version v2.x.x. The Docker service is enabled at boot automatically on both distributions. We use sudo docker ... throughout this guide; you could add your user to the docker group instead, but be aware that membership in that group is effectively root access.
Step 3: Write the docker compose file
We keep everything in one folder, /opt/homeassistant: the compose file, the Caddy configuration and the Home Assistant data.
sudo mkdir -p /opt/homeassistant
cd /opt/homeassistant
sudo nano compose.yaml
Paste this content:
services:
  homeassistant:
    image: ghcr.io/home-assistant/home-assistant:stable
    container_name: homeassistant
    restart: unless-stopped
    environment:
      TZ: Europe/Bucharest
    volumes:
      - ./config:/config
      - /etc/localtime:/etc/localtime:ro
    ports:
      - "127.0.0.1:8123:8123"
    networks:
      - ha_net

  caddy:
    image: caddy:2
    container_name: caddy
    restart: unless-stopped
    depends_on:
      - homeassistant
    ports:
      - "80:80"
      - "443:443"
      - "443:443/udp"
    volumes:
      - ./Caddyfile:/etc/caddy/Caddyfile:ro
      - caddy_data:/data
      - caddy_config:/config
    networks:
      ha_net:
        ipv4_address: 172.30.10.10

networks:
  ha_net:
    ipam:
      config:
        - subnet: 172.30.10.0/24

volumes:
  caddy_data:
  caddy_config:
What each part does:
image:stablealways points to the latest Home Assistant release. It is convenient, butdocker compose pullwill jump to a new monthly release with possible breaking changes. If you prefer controlled upgrades, replacestablewith a specific release tag in the form YEAR.MONTH.PATCH, as listed on the project’s releases page, and bump it deliberately.caddy:2pins the major version, which is safe.volumes:./configis where Home Assistant keeps its configuration, database and backups. Because it is a folder on the host, it survives container updates. The/etc/localtimemount keeps the container clock in sync with the host.ports: "127.0.0.1:8123:8123": Home Assistant listens only on the VPS loopback address, so it is not reachable from the internet directly. This matters because Docker published ports bypassufw, so we restrict them at the source.networks: a private network with a fixed range, and a fixed address for Caddy (172.30.10.10). We need that address in step 5, to tell Home Assistant which proxy to trust.
You may notice the official documentation uses network_mode: host and privileged: true. Those exist so Home Assistant can see the local network for discovery and access USB devices. On a VPS there is no home network to discover and no USB stick, so we skip both and get better isolation.
Check that the file is valid:
sudo docker compose config --quiet
No output means the syntax is correct. An error message will point to the line with the problem, usually an indentation mistake (YAML requires spaces, not tabs).
Step 4: First start and onboarding over an SSH tunnel
Start only Home Assistant for now. The image is over a gigabyte, so the first pull takes a minute or two.
cd /opt/homeassistant
sudo docker compose up -d homeassistant
sudo docker compose logs -f homeassistant
Wait until the log stops scrolling quickly, then press Ctrl+C (this only stops watching the logs, not the container). Test it locally:
curl -s -o /dev/null -w "%{http_code}\n" http://127.0.0.1:8123
The answer should be 200. Now, why not open the public address right away? Because the first person who reaches a fresh Home Assistant creates the owner account. We do not want that page on the internet, even for five minutes. Instead, we use an SSH tunnel: a secure forwarding of a port from your laptop to the server, through your existing SSH connection. On your own computer (Linux, macOS or Windows 10/11, all ship an SSH client), run:
ssh -L 8123:127.0.0.1:8123 youruser@VPS_IP
Keep that session open and visit http://localhost:8123 in your browser. The onboarding wizard asks you to:
- Create the owner account. Use a long, unique password, this account controls your home.
- Set the home location. Pick your actual house on the map, not the data center, otherwise sunrise, weather and presence automations will be wrong.
- Choose units, currency and analytics preferences.
- Review discovered devices. This list will be empty or almost empty on a VPS. That is normal and expected.
Step 5: Configure trusted proxies
A reverse proxy is a server that receives requests from the internet and forwards them to an application behind it. Caddy will be ours. Home Assistant deliberately rejects proxied requests unless you tell it which proxy to trust, and without that setting every request through Caddy ends with “400: Bad Request”.
Open the configuration file that Home Assistant generated on its first start:
sudo nano /opt/homeassistant/config/configuration.yaml
Add this block at the end (keep the existing lines):
http:
  use_x_forwarded_for: true
  trusted_proxies:
    - 172.30.10.10
  ip_ban_enabled: true
  login_attempts_threshold: 5
use_x_forwarded_for makes Home Assistant read the real client address from the header Caddy adds. trusted_proxies limits that trust to Caddy’s fixed address. ip_ban_enabled with a threshold of 5 bans an IP after five failed logins, and it bans the real attacker, not Caddy, precisely because of the first two lines.
Validate the configuration and restart:
cd /opt/homeassistant
sudo docker compose exec homeassistant python -m homeassistant --script check_config --config /config
sudo docker compose restart homeassistant
The check prints “Testing configuration at /config” and no errors if everything is fine.
Step 6: Enable HTTPS with Caddy
First confirm that your domain points to the VPS. From the server:
getent hosts ha.example.com
The output should show your VPS IP. Now create the Caddy configuration file. Do this before starting Caddy: if the file does not exist, Docker creates a folder named Caddyfile instead, and Caddy will not start.
sudo nano /opt/homeassistant/Caddyfile
{
    email you@example.com
}

ha.example.com {
    reverse_proxy homeassistant:8123
}
That is the entire configuration. Caddy obtains a free Let’s Encrypt certificate, renews it automatically, redirects HTTP to HTTPS and handles the WebSocket connections that the Home Assistant interface relies on. homeassistant:8123 works because containers on the same compose network can reach each other by service name. The email is used only for certificate expiry notices.
cd /opt/homeassistant
sudo docker compose up -d caddy
sudo docker compose logs caddy | grep -i certificate
curl -sS -o /dev/null -w "%{http_code}\n" https://ha.example.com
In the logs, look for “certificate obtained successfully”. The curl command should return 200. Open https://ha.example.com in your browser and log in with the owner account. Finally, in Home Assistant go to Settings > System > Network and set the Home Assistant URL (Internet) to https://ha.example.com. The mobile app and OAuth based integrations use it.
We keep the 127.0.0.1:8123 port mapping as an emergency door: if Caddy or DNS ever breaks, the SSH tunnel from step 4 still gets you in.
Step 7: Connect home devices over WireGuard
This step is only needed for devices on your home network. WireGuard is a modern VPN: two machines exchange public keys and build an encrypted tunnel over UDP. A key detail for home users: the home side starts the connection, so you do not need a public IP or port forwarding at home, and it works behind CGNAT.
On the VPS, install WireGuard and generate a key pair:
sudo apt install -y wireguard
sudo sh -c 'umask 077; wg genkey > /etc/wireguard/vps.key; wg pubkey < /etc/wireguard/vps.key > /etc/wireguard/vps.pub'
sudo cat /etc/wireguard/vps.pub
Run the same on the home device (a Raspberry Pi with Raspberry Pi OS or Debian), naming the files home.key and home.pub, and also install iptables there with sudo apt install -y wireguard iptables.
Create /etc/wireguard/wg0.conf on the VPS with sudo nano:
[Interface]
Address = 10.66.0.1/24
ListenPort = 51820
PrivateKey = PASTE_CONTENT_OF_vps.key

[Peer]
# home gateway
PublicKey = PASTE_CONTENT_OF_home.pub
AllowedIPs = 10.66.0.2/32, 192.168.1.0/24
AllowedIPs is both a filter and a routing table: it tells the VPS that the home LAN 192.168.1.0/24 lives behind this peer. Open the port and start the tunnel:
sudo ufw allow 51820/udp
sudo systemctl enable --now wg-quick@wg0
On the home device, check the name of the LAN interface with ip -br addr (often eth0 or end0), then create /etc/wireguard/wg0.conf:
[Interface]
Address = 10.66.0.2/24
PrivateKey = PASTE_CONTENT_OF_home.key
PostUp = iptables -t nat -A POSTROUTING -o eth0 -j MASQUERADE
PostDown = iptables -t nat -D POSTROUTING -o eth0 -j MASQUERADE

[Peer]
PublicKey = PASTE_CONTENT_OF_vps.pub
Endpoint = VPS_IP:51820
AllowedIPs = 10.66.0.0/24
PersistentKeepalive = 25
The MASQUERADE rule makes traffic from the VPS look like it comes from the Pi, so your devices and router answer without any extra routes. PersistentKeepalive keeps the tunnel open through your home router. Enable forwarding and start the tunnel:
echo 'net.ipv4.ip_forward=1' | sudo tee /etc/sysctl.d/99-wireguard.conf
sudo sysctl --system
sudo systemctl enable --now wg-quick@wg0
Back on the VPS, test the tunnel, then test from inside the Home Assistant container (replace the IPs with your router and a real device):
sudo wg show
ping -c 3 192.168.1.1
cd /opt/homeassistant && sudo docker compose exec homeassistant ping -c 3 192.168.1.50
wg show should report a “latest handshake” a few seconds ago, and both pings should get replies. Traffic from the container reaches the tunnel because Docker translates container addresses when they leave the private network, so no extra configuration is needed on the VPS. If you use a WireGuard capable router (OpenWrt, MikroTik RouterOS 7 and others) instead of a Pi, the concepts are identical: same keys, same AllowedIPs, and either NAT or a return route for 10.66.0.0/24.
Adding cloud and network integrations
With HTTPS in place, the companion app for Android or iOS is the first thing to set up: enter https://ha.example.com, log in, and you get location tracking, phone sensors and push notifications. Notifications to the app work without any paid subscription.
Cloud integrations are added from Settings > Devices & services > Add integration. Weather, calendars, music services, vendor clouds for plugs and vacuums, energy price feeds: they all just need outbound internet, which the VPS has in abundance. Integrations that use OAuth account linking redirect your browser back to your instance, which works now that the external URL is set.
Network devices over the tunnel must be added manually by IP, because discovery broadcasts do not cross the tunnel. For example, the Shelly integration asks for the device IP, ESPHome asks for host and port (6053), the Hue integration asks for the bridge IP and then for the link button press. Give those devices fixed IPs (DHCP reservations) in your home router, otherwise an address change breaks the integration. Most of these are connections that Home Assistant initiates, which is exactly the direction our tunnel supports. Anything at home that needs to call Home Assistant (a webhook, a script) can simply use the public HTTPS URL.
For Zigbee, run Zigbee2MQTT at home with the USB coordinator, and an MQTT broker (Eclipse Mosquitto) either at home or as an extra service in your compose file. MQTT is a lightweight publish and subscribe protocol; Home Assistant subscribes to the broker and the devices appear automatically through MQTT discovery, which, unlike mDNS, works fine across the tunnel. If the broker runs on the VPS, never expose port 1883 to the internet: bind it to the WireGuard address or require TLS and passwords.
How much VPS do you need
Home Assistant itself is a Python application, and its RAM usage grows with the number of integrations and the history it keeps. The rest of the stack is tiny.
In practice, 1 vCPU and 2 GB RAM leave comfortable headroom for the system, updates and spikes during startup. Disk is the resource that creeps: the history database (home-assistant_v2.db) grows with every sensor change. The default retention is 10 days; you can tune it with the recorder settings (purge_keep_days) and exclude chatty sensors you do not care about.
Updates and backups
Home Assistant releases a new version every month, with patch releases in between. Before every update, read the “Backward-incompatible changes” section of the release notes, then:
cd /opt/homeassistant
sudo docker compose pull
sudo docker compose up -d
sudo docker image prune -f
pull downloads newer images, up -d recreates only the containers whose image changed, and prune deletes the old images to free disk space. Your data in ./config is untouched.
For backups, Home Assistant has a built in feature under Settings > System > Backups, which also works on Container installs and stores archives in config/backups. Recent versions encrypt backups, so save the encryption key somewhere safe, without it the backup is useless. As a second, simple layer, archive the whole folder while Home Assistant is stopped:
cd /opt/homeassistant
sudo docker compose stop homeassistant
sudo tar czf ~/ha-config-$(date +%F).tar.gz config compose.yaml Caddyfile
sudo docker compose start homeassistant
Then copy the archive off the server, for example with scp to your laptop. A backup that lives only on the same VPS is not a backup.
Troubleshooting and common mistakes
- “400: Bad Request” in the browser. Home Assistant does not trust the proxy. Check the logs with
sudo docker compose logs homeassistant | grep -i proxy: the message shows the IP the request came from. It must matchtrusted_proxies(172.30.10.10 in our setup). Also check that thehttp:block is not duplicated inconfiguration.yaml. - Caddy cannot get a certificate. The A record does not point to the VPS yet, port 80 is closed, or an AAAA record points somewhere else. Fix DNS, wait a few minutes, then
sudo docker compose restart caddy. - Caddy does not start, error about a directory. You started Caddy before creating the Caddyfile and Docker created a folder instead. Run
sudo docker compose stop caddy,sudo rm -r /opt/homeassistant/Caddyfile, create the file and start again. - “Pool overlaps with other one on this address space”. Another Docker network or your home LAN already uses
172.30.10.0/24. Pick another private range and update both the compose file andtrusted_proxies. - Locked out after failed logins. Your own IP got banned. Edit
/opt/homeassistant/config/ip_bans.yaml, remove your entry, and restart Home Assistant. - WireGuard shows no handshake. Usually a swapped key (each side needs the other side’s public key), UDP 51820 not allowed on the VPS, or a wrong
Endpoint.sudo journalctl -u wg-quick@wg0shows errors on startup. - The VPS can ping home devices but the container cannot. The home range overlaps a Docker network, or the device has a firewall of its own. Test with another device, and check
ip routeon the VPS for conflicting routes. - A device integration says “cannot connect”. Discovery does not cross the tunnel. Add it manually by IP and make sure the IP is reserved in your router.
- Times in automations are off by an hour or two. The
TZvariable or the host time zone is wrong. Fix it and recreate the container withsudo docker compose up -d. - LXC containers. If your VPS is an unprivileged LXC container, Docker only works when nesting is enabled on the host, and WireGuard needs the kernel module loaded on the host, because a container cannot load kernel modules. A KVM VPS avoids both problems, which is why we recommend it for this project.
Security notes
A Home Assistant instance can unlock doors, turn off heating and show who is at home. Treat it with the same care as an email account.
- Enable multi-factor authentication for every user: click your profile, then Security, and enable the authenticator app (TOTP) module.
- Keep 8123 on localhost. Docker published ports bypass
ufw, so a port published as8123:8123would be public even with the firewall enabled. Our compose file binds it to127.0.0.1on purpose. - Keep the login ban enabled and do not remove
trusted_proxies, otherwise bans hit the wrong address. - Treat long-lived access tokens like passwords. Create one per script or device, name them clearly and delete the ones you no longer use.
- Remember what the tunnel means. Anyone who gains root on the VPS can reach your home network through WireGuard. Limit that exposure on the home side: give the Pi firewall rules that only forward traffic to the specific device IPs Home Assistant needs, rather than the whole LAN. Rules on the VPS alone do not protect you, because a compromised VPS can change them.
- Patch both layers. Update the host with
aptand the containers withdocker compose pull. On Ubuntu, unattended security updates are enabled by default; on Debian, install and enable theunattended-upgradespackage. - Store backups encrypted and off server, and keep the Home Assistant backup encryption key separately from the backups.
So, should you run Home Assistant on a VPS?
If your home is mostly cloud connected devices, if you manage more than one location, or if you want rock solid remote access without a box at home and without port forwarding, a VPS is a very good place for Home Assistant. The setup we built is small and clean: one compose file, HTTPS that renews itself, an admin port that never touches the internet, and a WireGuard tunnel only for the devices that really need your local network. If your house is full of Zigbee sensors and you want lights to work during an internet outage, keep Home Assistant at home and use a VPS for what it is great at, such as backups, monitoring or an MQTT bridge.
You can start with a VPS from our Romanian data center, with low latency to Romanian home connections, and have this running in an afternoon. If you would rather not deal with Docker, certificates and VPN keys yourself, our server administration team can set up, secure and maintain the whole stack for you.
FAQ
Can I install Home Assistant OS on a VPS instead of Docker?
Home Assistant OS is designed for dedicated hardware or a virtual machine where it controls the whole disk. On a VPS that usually means uploading a custom image and giving up the server for anything else. Home Assistant Container is the officially supported way to run it on a Linux host you manage, and the services you would install as add-ons can run as normal containers next to it.
Do I still need Home Assistant Cloud (Nabu Casa)?
Not for remote access, because you already have your own HTTPS domain. The subscription is still convenient for linking Alexa or Google Assistant without manual configuration, and it funds the project. Both approaches can coexist.
Is the latency between the VPS and my home a problem?
Within Romania, round trips to a data center are typically in the 10 to 30 ms range, which is not noticeable when switching lights or reading sensors. It becomes relevant only for tight control loops or for streaming several high resolution cameras, where your home upload bandwidth is the real limit.
What happens when my home internet goes down?
Cloud integrations and the mobile app keep working, because they do not depend on your home connection. Devices reachable only through the tunnel become unavailable until the connection is restored, and automations that use them will not run. If that is unacceptable, run Home Assistant at home.
Can I use Zigbee or Bluetooth devices?
Not directly, since a VPS has no USB ports or radios. Zigbee works well through Zigbee2MQTT on a small device at home, sending messages over MQTT. For Bluetooth, an ESPHome Bluetooth proxy at home can forward data over the tunnel, but expect a little extra latency.








