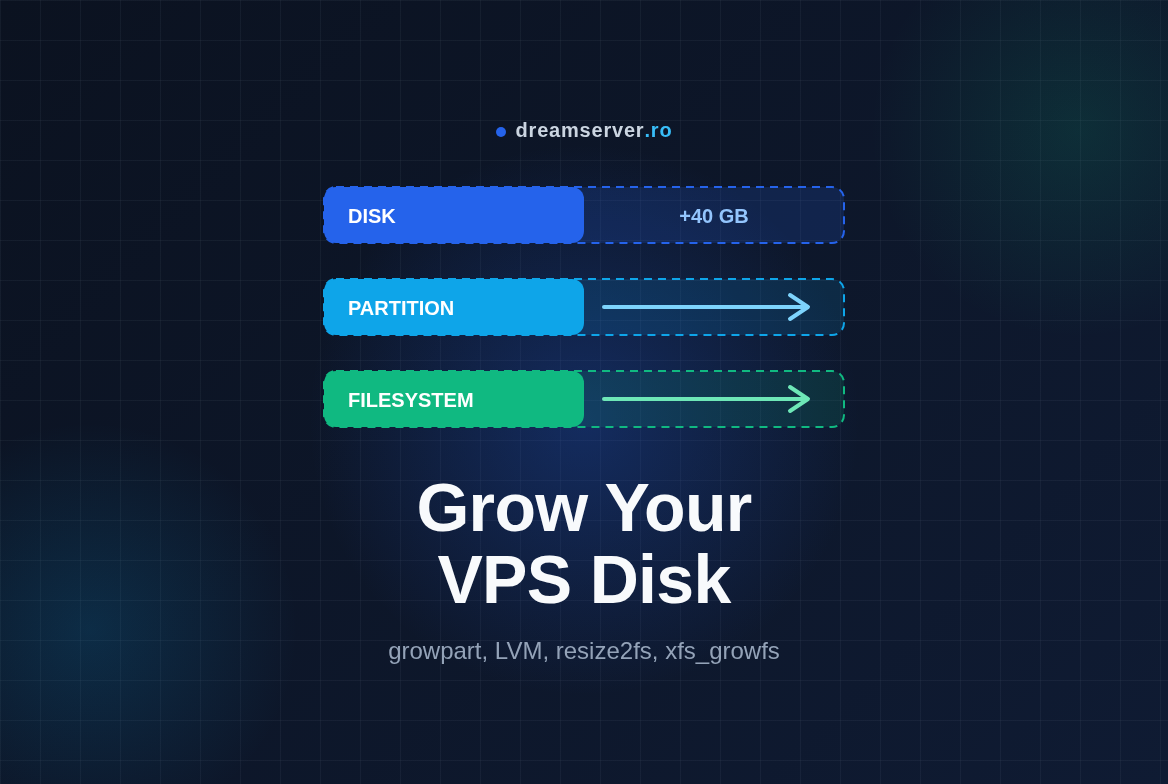
Grow Your Disk, Partition and Filesystem After a VPS Upgrade
You clicked upgrade, the new plan is active and the panel says 80 GB. Then you log in, run df -h, and the root filesystem still says 40 GB. Nothing is broken and no data is lost. The hypervisor made the virtual disk bigger, but the partition table, the partition and the filesystem on top of it still describe the old size. Linux does not stretch them on its own, because quietly rewriting partitions without being asked is exactly the kind of thing an operating system should never do.
In this guide we carry the extra space all the way up the chain: from disk to partition, through LVM if you use it, and finally into the filesystem. The tools are growpart, pvresize, lvextend, resize2fs and xfs_growfs. Everything happens online, on the running system, without reinstalling, and it usually takes less than five minutes. We also include the checks we run before and after, so at every moment you know which layer you are working on and nothing is left to luck.
Why the new space does not show up on its own
To understand why df still shows the old size, it helps to see how storage is stacked on a Linux server. Every layer has its own idea of “how big am I”, stored in its own metadata, and an upgrade only changes the bottom one.
- The virtual disk (also called a block device) is what the hypervisor hands to your VPS. On a KVM VPS it usually appears as
/dev/vda(virtio disk), sometimes as/dev/sda(virtio SCSI) or/dev/nvme0n1. This is the layer that grows when you upgrade. - The partition table is a small map at the beginning (and, for GPT, also at the end) of the disk. It says where each partition starts and ends. There are two formats: the modern GPT and the older MBR (also shown as “dos”).
- A partition is a slice of the disk described in that table, for example
/dev/vda1. Its end is written in the table, so it stays where it was, even if the disk behind it doubled. - LVM (Logical Volume Manager) is an optional extra layer. A partition becomes a physical volume (PV), one or more PVs form a volume group (VG), and from the VG you carve logical volumes (LV) that hold filesystems. Ubuntu’s server installer uses LVM by default, many cloud images do not.
- The filesystem (ext4, XFS, Btrfs) is the structure that organizes files and directories. It records its own size in its superblock, and
dfreports exactly that number.
So after the upgrade you have a large disk, a small partition and a small filesystem. Our job is to grow each layer in order, from the bottom up, with the one tool that knows how to grow it.
The good news: growing is the safe direction. ext4, XFS and Btrfs can all be enlarged while mounted, and none of the tools move your existing data. They only rewrite metadata (the end of a partition in the table, the size of a PV or LV, the block count of a filesystem). Shrinking is a completely different story, and we will not do it here.
What you need
- A KVM VPS whose virtual disk has already been enlarged by the upgrade (if you are on an LXC container, read the next section first).
- Debian 13 or Ubuntu 24.04, SSH access and a user with
sudorights. - A fresh snapshot or backup of the server. Growing is low risk, but low is not zero.
- About ten minutes, ideally outside peak traffic hours.
- The
cloud-guest-utilspackage, which providesgrowpart(we install it in Step 3).
Debian, Ubuntu and LXC: what is different
The procedure is the same on both distributions, but the starting point often is not. Here is what to watch for:
- Package names are identical.
growpartcomes fromcloud-guest-utilson both Debian and Ubuntu.lvm2is already installed if your system uses LVM, andxfsprogsis installed if your root filesystem is XFS. - Cloud images may do the job for you. Debian and Ubuntu cloud images ship with cloud-init, whose
growpartandresizefsmodules grow the root partition and filesystem at boot. If your VPS was restarted as part of the upgrade, rundf -h /first: the space may already be there. - Default layouts differ. A Debian cloud image typically has ext4 on
/dev/vda1, which is physically the last partition, the easy case. A Debian installed from the ISO with the “guided, use entire disk” option puts root onvda1and then a swap partition (vda5inside an extendedvda2) after it, which blocks growth, see the troubleshooting section. Debian with LVM from the ISO puts the PV onvda5inside an extendedvda2. Ubuntu 24.04 installed from the server ISO uses GPT, a PV on partition 3 and a logical volume namedubuntu-vg/ubuntu-lv, and the installer often leaves a big part of the volume group unallocated. - Device names differ. You may see
vda,sdaornvme0n1. Always use the names your ownlsblkprints, never copy device names blindly from a guide (including this one). - LXC containers are a different world. A container has no block device of its own: its root filesystem is a volume managed by the host. Inside an LXC container, especially an unprivileged one,
growpartandresize2fscannot work and are not needed. The host grows the volume anddf -h /shows the new size right away or after a container restart. If it does not, contact support. You can check what you are on withsystemd-detect-virt: it printskvmon a KVM VPS andlxcinside a container.
The procedure at a glance
Here are the seven steps we will follow. The first three only read information and change nothing. Steps 4 to 6 write metadata, one layer each, and Step 7 checks the result.
Extend a partition on Linux: growpart, LVM and resize2fs step by step
Step 1: Back up and record the current layout
Growing a partition is one of the safest disk operations there is, but “safe” is not a backup strategy. If your plan includes snapshots or backups, take one now. If not, copy anything you cannot afford to lose off the server first.
Then take a picture of the current layout, so you can compare it later:
lsblk -i -o NAME,SIZE,TYPE,FSTYPE,MOUNTPOINTS
df -hT /
findmnt -n -o SOURCE,FSTYPE /
lsblk lists disks and partitions as a tree (-i uses plain ASCII characters for the tree lines), df -hT / shows the size and type of the root filesystem, and findmnt tells you exactly which device is mounted on /. On a typical Debian cloud image after an upgrade from 40 to 80 GB you will see something like this:
NAME     SIZE TYPE FSTYPE MOUNTPOINTS
vda       80G disk
|-vda1  39.9G part ext4   /
|-vda14    3M part
`-vda15  124M part vfat   /boot/efi

/dev/vda1 ext4
The disk is already 80G, but vda1 and the filesystem are still about 40G. That is the situation this guide fixes. On an LVM install, findmnt prints something like /dev/mapper/ubuntu--vg-ubuntu--lv ext4 instead, which tells you Step 5 applies to you.
Save the full picture to a file in your home directory:
{ date; lsblk -i -o NAME,SIZE,TYPE,FSTYPE,MOUNTPOINTS; df -hT; cat /etc/fstab; sudo blkid; } > ~/disk-before.txt
Finally, check which partition is physically last on the disk, because growpart can only grow a partition into free space that directly follows it. Partition numbers do not follow physical order (on the Debian image above, vda1 sits after vda14 and vda15):
sudo parted /dev/vda unit GiB print free
On a GPT disk that was just enlarged, parted may warn that not all of the space is used and ask Fix/Ignore?. Answering Fix is safe: it only moves the backup GPT header to the real end of the disk, which growpart would do anyway. Look for a Free Space line right below your root (or LVM) partition:
Number  Start    End      Size     File system  Name  Flags
14      0.00GiB  0.00GiB  0.00GiB                     bios_grub
15      0.00GiB  0.12GiB  0.12GiB  fat16              boot, esp
 1      0.12GiB  40.0GiB  39.9GiB  ext4
        40.0GiB  80.0GiB  40.0GiB  Free Space
If something else (typically swap) sits between your partition and the free space, stop and read “A swap partition sits after the root partition” in the troubleshooting section.
Step 2: Confirm the kernel sees the bigger disk
The kernel must know the new disk size before anything else can use it. If the VPS was stopped and started during the upgrade, it already does. If the disk was grown while the server was running, check:
lsblk -d -o NAME,SIZE
sudo dmesg | grep -i capacity
lsblk -d shows only whole disks. For virtio disks (vda), the kernel usually notices the change live and dmesg contains a line like vda: detected capacity change from 83886080 to 167772160. For SCSI disks (sda) you can ask the kernel to rescan the device:
echo 1 | sudo tee /sys/class/block/sda/device/rescan
If the disk still shows the old size, reboot the VPS. A reboot also gives cloud-init a chance to grow everything by itself, so check df -h / again afterwards.
Step 3: Install growpart and do a dry run
growpart is a small script that moves the end of one partition to the end of the available free space. It works with both GPT and MBR tables and it is safe to run on a mounted partition. Install it:
sudo apt update
sudo apt install -y cloud-guest-utils
Now ask it what it would do, without touching anything. Note the space between the disk and the partition number: it is /dev/vda 1, not /dev/vda1.
sudo growpart --dry-run /dev/vda 1
A line starting with CHANGE: means the partition can be grown and shows the old and new sizes in sectors:
CHANGE: partition=1 start=262144 old: size=83623903 end=83886046 new: size=167509983 end=167772126
A line starting with NOCHANGE: means there is nothing to grow into. Either the kernel does not see the new disk size yet (go back to Step 2) or another partition is in the way (see troubleshooting). For NVMe disks the syntax is sudo growpart --dry-run /dev/nvme0n1 1. On an LVM install, run it against the partition that holds the PV, for example sudo growpart --dry-run /dev/sda 3.
Step 4: Grow the partition with growpart
When the dry run looks right, run it for real:
sudo growpart /dev/vda 1
The output repeats the CHANGE: line. growpart rewrites the partition table and tells the kernel about the new partition end, so no reboot is needed. Check it:
lsblk -i -o NAME,SIZE,TYPE,FSTYPE,MOUNTPOINTS
vda1 should now be about 79.9G. df still shows the old size, and that is expected: the filesystem has not been told yet.
On an LVM install, grow the PV partition instead, for example sudo growpart /dev/sda 3. On a Debian ISO install with LVM, where the PV is the logical partition vda5 inside the extended partition vda2, grow the container first and then the partition inside it:
sudo growpart /dev/vda 2
sudo growpart /dev/vda 5
Step 5: Extend LVM (only if you use it)
If findmnt in Step 1 showed a plain partition like /dev/vda1, skip to Step 6. If it showed a /dev/mapper/... device, you have two more layers to grow. First, look at them:
sudo pvs
sudo vgs
sudo lvs -o lv_name,vg_name,lv_size,lv_path
Look at the VFree column of vgs before doing anything else. On Ubuntu installs it is common to find free space already sitting in the volume group, left unallocated by the installer. In that case you can skip pvresize and go straight to lvextend.
Tell LVM that the physical volume is now bigger (use your PV partition from pvs):
sudo pvresize /dev/sda3
Expected output: Physical volume "/dev/sda3" changed and 1 physical volume(s) resized or updated. Run sudo vgs again and VFree now shows the new space. Then give it to the logical volume that holds your root filesystem (use the path from the lv_path column):
sudo lvextend -r -l +100%FREE /dev/ubuntu-vg/ubuntu-lv
-l +100%FREE adds all free space in the volume group. If you prefer to keep some in reserve for later or for LVM snapshots, use a fixed amount like -L +30G. The -r flag (long form --resizefs) makes lvextend grow the filesystem right after the LV, for both ext4 and XFS, so on LVM Step 6 happens automatically. On Debian, the default names look like /dev/<hostname>-vg/root, which is why we always read the path from lvs instead of guessing.
Step 6: Grow the filesystem with resize2fs or xfs_growfs
This is the step that makes df happy. Use the tool that matches the FSTYPE you recorded in Step 1. All three work online, on the mounted filesystem.
For ext4 (the default on Debian and Ubuntu), point resize2fs at the device, either the partition or the LV path:
sudo resize2fs /dev/vda1
Expected output:
Filesystem at /dev/vda1 is mounted on /; on-line resizing required
old_desc_blocks = 5, new_desc_blocks = 10
The filesystem on /dev/vda1 is now 20938747 (4k) blocks long.
For XFS, give xfs_growfs the mount point, not the device:
sudo xfs_growfs /
It prints the filesystem geometry and ends with a line like data blocks changed from 10468352 to 20938496.
For Btrfs, the equivalent is sudo btrfs filesystem resize max /.
If you used lvextend -r in Step 5, this already ran for you, and running it again just reports that there is nothing to do.
Step 7: Verify the result
Compare the result with what you recorded in Step 1:
df -hT /
lsblk -i -o NAME,SIZE,TYPE,FSTYPE,MOUNTPOINTS
sudo dmesg | tail -n 20
df should now show close to the full disk size (a bit less than the partition, because the filesystem keeps some space for its own metadata). dmesg should be free of I/O or filesystem errors. To keep a record, save the “after” picture and compare:
{ date; lsblk -i -o NAME,SIZE,TYPE,FSTYPE,MOUNTPOINTS; df -hT; cat /etc/fstab; sudo blkid; } > ~/disk-after.txt
diff ~/disk-before.txt ~/disk-after.txt
The sizes change, but the UUIDs in the blkid output and the content of /etc/fstab stay identical, because growing never changes a filesystem’s identity. That is also why the server boots normally afterwards.
A reboot is not required. If you want full peace of mind, schedule one in a quiet moment to confirm the server comes back cleanly. And if you also ran apt upgrade while you were at it, reboot if a new kernel was installed: Ubuntu creates /var/run/reboot-required in that case, while Debian does not always create it, so on Debian simply reboot if a new linux-image package was installed.
Troubleshooting and common mistakes
growpart says NOCHANGE
NOCHANGE: partition 1 is size ... it cannot be grown means there is no free space right after that partition. Check two things: that lsblk -d shows the new disk size (Step 2), and that the partition you chose is really the last one before the free space (parted ... print free in Step 1). A common mistake is growing partition 1 when the root or PV partition is actually number 3.
A swap partition sits after the root partition
This is the classic Debian ISO layout: root on vda1, then an extended vda2 containing swap on vda5. growpart cannot jump over the swap. The clean fix is to remove the swap partition and use a swap file instead. Take a snapshot first, then confirm the partition numbers with lsblk, because these commands delete partitions:
sudo swapoff -a
sudo sed -i.bak '/\sswap\s/ s/^/#/' /etc/fstab
sudo parted /dev/vda rm 5
sudo parted /dev/vda rm 2
sudo growpart /dev/vda 1
sudo resize2fs /dev/vda1
sed comments out the swap line in /etc/fstab and keeps a copy in /etc/fstab.bak. Then recreate swap as a file:
sudo fallocate -l 2G /swapfile
sudo chmod 600 /swapfile
sudo mkswap /swapfile
sudo swapon /swapfile
echo '/swapfile none swap sw 0 0' | sudo tee -a /etc/fstab
If /etc/initramfs-tools/conf.d/resume exists, it still points to the deleted partition and the next boot will pause while waiting for it. Fix it with echo 'RESUME=none' | sudo tee /etc/initramfs-tools/conf.d/resume followed by sudo update-initramfs -u.
resize2fs: Bad magic number in super-block
You pointed resize2fs at something that is not an ext4 filesystem: the whole disk (/dev/vda), an LVM physical volume (/dev/sda3) instead of the logical volume, or an XFS filesystem. Check with findmnt -n -o SOURCE,FSTYPE / and use exactly that device and the matching tool.
xfs_growfs says it is not a mounted XFS filesystem
xfs_growfs expects the mount point (/, /var, /data), not a device path. Run sudo xfs_growfs /.
df still shows the old size
You grew the partition (or the LV) but not the filesystem. Run Step 6. Conversely, if resize2fs reports that the filesystem is “already” its full size but df is small, the partition was never grown: go back to Step 4.
growpart fails with an sfdisk or locale error
Some growpart versions misread the output of sfdisk when the system language is not English. Run it with the C locale: sudo LC_ALL=C growpart /dev/vda 1. If it reports that the partition table was changed but the kernel could not be informed, run sudo partx -u /dev/vda or reboot, then continue with Step 6.
The disk is larger than 2 TiB and uses MBR
An MBR (“dos”) partition table cannot address space beyond 2 TiB, so growpart stops there. Converting to GPT is possible but delicate on a boot disk. Take a full backup and consider asking for help.
Encrypted (LUKS) setups
If your PV lives inside a LUKS container, there is one extra layer between Steps 4 and 5: after growpart, run sudo cryptsetup resize <mapping-name> (the name from lsblk), then continue with pvresize.
Security and safety notes
- Snapshot first, always. Every command here is designed to be safe, but a typo in a device name is not. A snapshot turns a disaster into a ten minute rollback.
- Read the device names twice.
vdaandvdb, partition1and3, are one keystroke apart. Copy names from your ownlsblkoutput, never from memory. - Never shrink with these tools. XFS cannot be shrunk at all, and shrinking ext4 requires an unmounted filesystem and a precise order. If you need less space, migrate to a new disk instead.
- Keep backups off the server.
~/disk-before.txtis a record, not a backup. Real backups belong on another machine or storage. - Mind the swap file permissions. A swap file must be
chmod 600, otherwise other users could read memory pages written to it. - Leave headroom on LVM. Keeping a few GB free in the volume group lets you take LVM snapshots before risky changes in the future.
So, ready to use all that new space?
After an upgrade, extending a partition on Linux comes down to a predictable chain: confirm the disk, growpart the partition, pvresize and lvextend if you use LVM, then resize2fs or xfs_growfs. Record the layout before, compare it after, and you will never wonder which layer you forgot. The whole thing runs online, with no reinstall and usually no reboot.
If you need more room for your projects, you can grow a VPS with us in a few clicks and follow this guide afterwards. And if you would rather not touch partitions on a production server yourself, our server administration team can take care of the resize, swap layout and LVM tuning for you.
Frequently asked questions
Do I need to reboot after growing the partition?
No. growpart informs the kernel about the new partition end, and ext4, XFS and Btrfs can all be grown while mounted. A reboot only helps if the kernel did not notice the new disk size (Step 2) or could not re-read the partition table.
Can I use the same commands to shrink a disk?
No. These tools only grow. XFS cannot be shrunk at all, and shrinking ext4 must be done offline, in the reverse order, with a backup ready. In practice, moving data to a new, smaller disk is safer.
What if the extra space comes as a second disk?
If the upgrade added a new disk (for example /dev/vdb) instead of growing the existing one, there is nothing to extend. You create a filesystem on it, mount it and add it to /etc/fstab, or add it to your volume group as a new PV with pvcreate and vgextend. If an existing data disk with no partition table was enlarged, skip growpart and run resize2fs /dev/vdb (or xfs_growfs on its mount point) directly.
Is it safe to do this on a production server?
Growing is one of the lowest risk disk operations, it is done online and no data is moved. Still, take a snapshot, do it outside peak hours and run the dry run in Step 3 first. Most of the risk comes from typing the wrong device name, not from the tools themselves.








