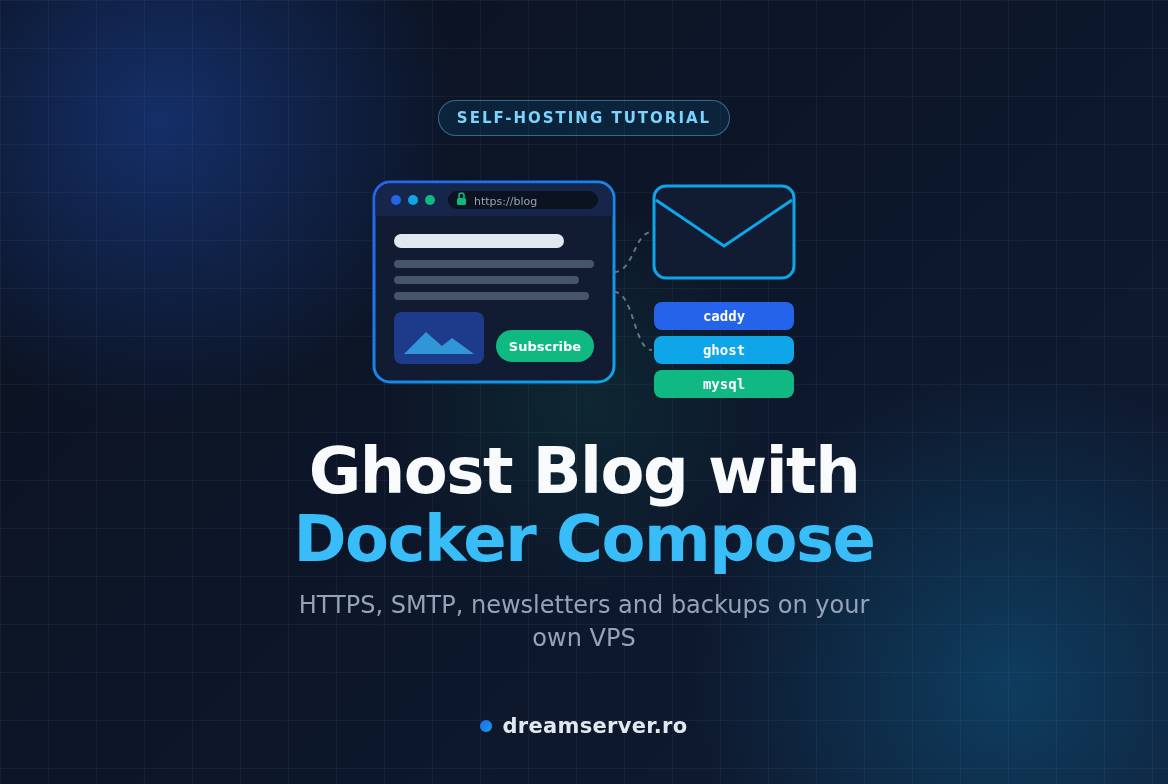
Ghost Docker Compose: Blog and Newsletters on Your VPS
Medium owns your audience, newsletter platforms take a cut of every paid subscription, and a WordPress site with a dozen plugins slowly turns into a maintenance hobby. Ghost sits in a very comfortable middle ground: a fast, modern publishing platform with a clean editor, built-in memberships and newsletters, and no plugin zoo to babysit. Run it on your own VPS and your posts, your member list and the email addresses of your readers stay with you, on a server you control. In this guide we set up Ghost with Docker Compose, MySQL and automatic HTTPS, wire up email for member logins and newsletters, and finish with a backup routine and a safe way to upgrade.
Ghost is open source under the MIT license, developed by the non-profit Ghost Foundation. The official site is ghost.org and the code lives at github.com/TryGhost/Ghost . We will use the Docker Official Image of Ghost, MySQL 8.4 as the database and Caddy as the HTTPS front door. Everything fits in one folder and one Compose file, which makes it easy to understand, back up and move to another server later.
What Ghost is, and why we run it with Docker Compose
Ghost is a Node.js application for publishing. You write posts in a block editor, pick or upload a theme, and readers can subscribe as free or paid members (paid subscriptions go through Stripe). Every post can also be sent as an email newsletter to your members. In production, Ghost needs a MySQL 8 database for posts, members and settings, plus a folder called content where it keeps uploaded images, themes and some internal files.
A few concepts before we start, because we will use them all the time:
- Container: an isolated process with its own filesystem, built from an image. Think of the image as a frozen, ready-to-run copy of an application with all its dependencies, and the container as a running instance of it.
- Docker Compose: a tool that reads a YAML file describing several containers (services), their settings and how they connect, and starts or stops them together with one command.
- Volume / bind mount: a folder on the host disk mapped into a container, so data survives when the container is deleted and recreated. This is what makes upgrades possible.
- Port: a numbered “door” on the server. Web traffic uses 80 (HTTP) and 443 (HTTPS), SSH uses 22, Ghost listens internally on 2368 and MySQL on 3306.
- Reverse proxy: a web server that receives visitors’ requests and forwards them to the right application behind it. Ours also handles TLS, the encryption behind the padlock in the browser.
The three containers in our stack
- caddy: the only container reachable from the internet. It obtains and renews a free Let’s Encrypt certificate automatically and forwards requests to Ghost.
- ghost: the blog itself, reachable only inside the private Docker network.
- db: MySQL 8.4, also private. Nobody outside the server can talk to it.
The important detail in this picture: Docker writes its own firewall rules, so a port published by a container is reachable from the internet even if ufw says otherwise. That is why our real protection is simple: Ghost and MySQL publish no ports at all. Only Caddy does, and Caddy only speaks HTTP and HTTPS.
What you need
- A DreamServer KVM VPS with Debian 13 or Ubuntu 24.04. For one blog, 1 vCPU, 2 GB RAM and 20 GB of disk are comfortable. 1 GB works with swap and a small MySQL tweak (see the RAM section below).
- A domain or subdomain you control, for example
blog.example.ro, with access to its DNS records. - A sudo user and SSH access to the server.
- An SMTP account for transactional email: a transactional email provider or a mailbox from your email hosting that allows SMTP submission on port 587 or 465.
- Optionally, a Mailgun account if you want to send newsletters to members (more on why in Step 6).
- About 30 to 45 minutes.
KVM or LXC?
Docker works best on a KVM VPS, where you get your own kernel. Inside an unprivileged LXC container, Docker only runs if nesting (and usually keyctl) is enabled on the container, and some things, like creating swap, are controlled by the host and will not work from inside. If you are on an LXC plan and Docker refuses to start, contact our support or choose a KVM VPS for this project.
The whole procedure at a glance
Step 1: Point your domain and prepare the VPS
Caddy can only get a certificate if your domain already points to the server, so we start with DNS. In your DNS provider, create an A record for blog.example.ro with the public IPv4 address of your VPS (and an AAAA record with the IPv6 address if your VPS has one). A low TTL, like 300 seconds, means changes propagate faster.
Check it from the server:
getent hosts blog.example.ro
ip -brief address
The first command should print your VPS address, and it should match one of the addresses shown by the second command. If it prints nothing, wait a few minutes and try again.
Now bring the system up to date:
sudo apt update && sudo apt full-upgrade -y
Do you need a reboot? On Ubuntu, the system creates a marker file when one is required:
[ -f /var/run/reboot-required ] && echo "Reboot needed" || echo "No reboot needed"
On Debian that file is not always created, so the rule is simple: if the upgrade installed a new linux-image package, reboot with sudo reboot.
Next, the host firewall. ufw is installed by default on Ubuntu, but usually not on Debian, so the install line below is harmless on Ubuntu and needed on Debian. Allow SSH before enabling the firewall, or you will lock yourself out. If your SSH listens on a custom port, allow that port number instead of OpenSSH.
sudo apt install -y ufw
sudo ufw allow OpenSSH
sudo ufw allow 80/tcp
sudo ufw allow 443/tcp
sudo ufw enable
sudo ufw status verbose
The status output should list OpenSSH, 80 and 443 as ALLOW IN. Remember what we said earlier: these 80/443 rules matter for services installed directly on the host. Docker-published ports skip ufw entirely, which is why we never publish Ghost or MySQL.
Step 2: Install Docker Engine and the Compose plugin
The Docker packages in the default Debian and Ubuntu repositories are often older, so we use Docker’s official repository, described in the current deb822 format. The $ID and codename variables come from /etc/os-release, so the same block works on both Debian 13 and Ubuntu 24.04.
sudo apt update
sudo apt install -y ca-certificates curl
sudo install -m 0755 -d /etc/apt/keyrings
. /etc/os-release
sudo curl -fsSL "https://download.docker.com/linux/$ID/gpg" -o /etc/apt/keyrings/docker.asc
sudo chmod a+r /etc/apt/keyrings/docker.asc
sudo tee /etc/apt/sources.list.d/docker.sources > /dev/null <<EOF
Types: deb
URIs: https://download.docker.com/linux/$ID
Suites: ${UBUNTU_CODENAME:-$VERSION_CODENAME}
Components: stable
Signed-By: /etc/apt/keyrings/docker.asc
EOF
sudo apt update
sudo apt install -y docker-ce docker-ce-cli containerd.io docker-buildx-plugin docker-compose-plugin
Verify the installation:
sudo docker run --rm hello-world
docker compose version
You should see a “Hello from Docker!” message and a Compose version starting with v2 or newer. In this guide we prefix Docker commands with sudo on purpose: adding your user to the docker group is convenient, but that group is effectively root on the machine.
Optional but recommended: Docker keeps container logs forever by default. To rotate them, put this in /etc/docker/daemon.json. If the file already exists, merge these keys into it instead of overwriting it.
{
  "log-driver": "local",
  "log-opts": { "max-size": "10m", "max-file": "3" }
}
Then run sudo systemctl restart docker. The setting applies to containers created after the restart.
Step 3: Create the project folder and the .env file
We keep everything in /opt/ghost: the Compose file, the Caddy config, the secrets, the data folders and the backups.
sudo mkdir -p /opt/ghost
sudo chown "$USER": /opt/ghost
mkdir -p /opt/ghost/backups
cd /opt/ghost
Generate two strong passwords, one for the MySQL root user and one for the Ghost database user. Hex output avoids special characters that could confuse YAML or shells.
openssl rand -hex 24
openssl rand -hex 24
Now create the .env file. Docker Compose reads it automatically from the project folder and substitutes the ${VARIABLE} references in the Compose file.
nano .env
# Public address of the blog, without https://
DOMAIN=blog.example.ro

# Database secrets (paste the two generated values)
MYSQL_ROOT_PASSWORD=paste-first-generated-value
MYSQL_PASSWORD=paste-second-generated-value

# SMTP for transactional email (member logins, staff invites)
SMTP_HOST=smtp.example.com
SMTP_PORT=587
SMTP_SECURE=false
SMTP_USER=postmaster@example.ro
SMTP_PASS=your-smtp-password
MAIL_FROM='My Blog <noreply@example.ro>'
Lock the file down, since it contains every secret of the stack:
chmod 600 .env
Two things to understand here. First, the MYSQL_* values are used by the MySQL image only the first time it starts with an empty data folder. Changing them later in .env does not change the real passwords (see Troubleshooting). Second, fill in the SMTP values now if you have them. Recent Ghost versions confirm new staff logins with a code sent by email, so working email is not a nice-to-have, it is how you get back into your own admin panel. Step 6 explains the port and SMTP_SECURE combinations.
Step 4: Write docker-compose.yml and the Caddyfile
Create the Compose file:
nano docker-compose.yml
services:
  caddy:
    image: caddy:2-alpine
    restart: unless-stopped
    ports:
      - "80:80"
      - "443:443"
      - "443:443/udp"
    volumes:
      - ./Caddyfile:/etc/caddy/Caddyfile:ro
      - caddy_data:/data
      - caddy_config:/config
    depends_on:
      - ghost

  ghost:
    image: ghost:6-alpine
    restart: unless-stopped
    environment:
      url: "https://${DOMAIN}"
      database__client: mysql
      database__connection__host: db
      database__connection__user: ghost
      database__connection__password: ${MYSQL_PASSWORD}
      database__connection__database: ghost
      mail__transport: SMTP
      mail__from: ${MAIL_FROM}
      mail__options__host: ${SMTP_HOST}
      mail__options__port: ${SMTP_PORT}
      mail__options__secure: ${SMTP_SECURE}
      mail__options__auth__user: ${SMTP_USER}
      mail__options__auth__pass: ${SMTP_PASS}
    volumes:
      - ./content:/var/lib/ghost/content
    depends_on:
      db:
        condition: service_healthy

  db:
    image: mysql:8.4
    restart: unless-stopped
    environment:
      MYSQL_ROOT_PASSWORD: ${MYSQL_ROOT_PASSWORD}
      MYSQL_DATABASE: ghost
      MYSQL_USER: ghost
      MYSQL_PASSWORD: ${MYSQL_PASSWORD}
    volumes:
      - ./mysql:/var/lib/mysql
    healthcheck:
      test: ["CMD", "mysqladmin", "ping", "-h", "127.0.0.1", "--silent"]
      interval: 10s
      timeout: 5s
      retries: 10
      start_period: 30s

volumes:
  caddy_data:
  caddy_config:
What each part does:
- No
version:key: current Docker Compose v2 does not need it. - caddy publishes 80 and 443 (plus 443/udp for HTTP/3). The
caddy_datavolume stores certificates, so they survive restarts and you do not hit Let’s Encrypt rate limits. - ghost has no
ports:section, so it is reachable only from other containers. Ghost reads its configuration from environment variables where double underscores mean nesting, sodatabase__connection__hostbecomesdatabase.connection.host. Theurlmust be exactly the public HTTPS address, otherwise you get broken links or redirect loops. - db creates the
ghostdatabase and user on first start. The healthcheck pings the server over TCP, which only succeeds once MySQL is fully ready, andcondition: service_healthymakes Ghost wait for it instead of crashing on the first boot. - Image tags:
ghost:6-alpinefollows the current Ghost 6 major,mysql:8.4is the MySQL long-term support line that Ghost supports, andcaddy:2-alpinefollows Caddy 2. Pinning the major meansdocker compose pullgets bug and security fixes, but never surprises you with a breaking major upgrade. Check the Ghost releases and Ghost’s documentation for the newest major and the supported MySQL versions before you start. Avoid:latestfor Ghost and MySQL: a silent jump to a new major can run one-way database migrations.
Now the Caddyfile. Replace the domain and the email (Let’s Encrypt uses it for expiry warnings):
nano Caddyfile
{
	email admin@example.ro
}

blog.example.ro {
	encode zstd gzip
	reverse_proxy ghost:2368
}
That is the entire HTTPS configuration. Caddy sees the domain, requests a certificate, redirects HTTP to HTTPS and forwards everything to the ghost container on port 2368, adding the X-Forwarded-Proto header so Ghost knows the visitor is on HTTPS.
Validate the Compose file without printing your secrets:
sudo docker compose config --quiet && echo "Compose file OK"
Step 5: Start the Ghost stack and claim the admin account
Start everything in the background:
cd /opt/ghost
sudo docker compose up -d
sudo docker compose ps
The first run downloads the images, which takes a minute. ps should show three services; db goes from starting to healthy, then Ghost starts. Follow Ghost’s log while it creates its tables:
sudo docker compose logs -f ghost
After 30 to 60 seconds you should see a line similar to Ghost booted in ...s along with your site URL. Press Ctrl+C to stop following the log (the containers keep running). Check Caddy too:
sudo docker compose logs caddy | grep -i certificate
You want to see a message saying the certificate was obtained successfully.
Now open https://blog.example.ro/ghost/ in your browser right away. The first person to reach this page creates the owner account, so do not leave a fresh install unclaimed. Enter the site title, your name, email and a long password. You land in Ghost Admin, and your public site is live at https://blog.example.ro.
A note on Ghost 6: some newer features, such as the social web (ActivityPub) network and the built-in web analytics, depend on extra services that are not part of this minimal stack. The editor, themes, memberships and newsletters work without them.
Step 6: Configure SMTP and newsletters
Two kinds of email in Ghost
Ghost sends two very different kinds of email, and it uses two different channels for them:
- Transactional email: the magic link a member clicks to sign in, signup confirmations, staff invitations, password resets and staff device verification codes. These go through the SMTP settings we put in
.env. Without them, members cannot log in at all, because Ghost member login is passwordless. - Bulk newsletters: when you publish a post and choose to email it to members. Ghost sends these only through the Mailgun API, not through SMTP. This is a Ghost design choice, and it also means newsletter sending does not depend on SMTP ports being open.
Transactional email via SMTP
The port and SMTP_SECURE must match:
- Port 587 with
SMTP_SECURE=false: the connection starts plain and upgrades with STARTTLS. This is the most common choice. - Port 465 with
SMTP_SECURE=true: TLS from the first byte.
Do not use port 25 for submission; many networks block it outbound and providers expect authenticated submission on 587 or 465. If you change .env later, apply it by recreating the container:
sudo docker compose up -d
To test, invite a staff user from Settings > Staff, or open your site in a private window and sign up as a member through the Portal button. The email should arrive within seconds. If not, look for mail errors:
sudo docker compose logs ghost | grep -iE "mail|smtp"
Newsletters via Mailgun
Create a Mailgun account and add a sending domain, ideally a subdomain such as mg.example.ro. Pick the EU region if your readers are in Europe, so the sending data stays in EU infrastructure. Mailgun shows the DNS records to add (SPF, DKIM and a tracking CNAME); add them and wait until Mailgun marks the domain as verified.
Then, in Ghost Admin, open Settings and type “Mailgun” in the settings search box. Choose the same region, enter the sending domain and the private API key, and save. From now on, when you click Publish on a post you can choose to publish and send it by email. Customize the design and sender name under the newsletter settings, and send yourself a test from the editor’s preview before your first real campaign. Check Mailgun’s current pricing and free tier; they change from time to time.
SPF, DKIM and DMARC
Deliverability is mostly DNS. Make sure the domain in MAIL_FROM is the one your SMTP provider authorized, add the SPF and DKIM records your SMTP provider gives you, and publish a DMARC record, starting with a monitoring policy such as v=DMARC1; p=none; rua=mailto:dmarc@example.ro. Mail from a domain without these records is likely to land in spam, or not arrive at all.
Step 7: Back up content and database
A Ghost backup has three parts: the database (posts, members, settings), the content folder (images, themes) and the configuration (.env, Compose file, Caddyfile). The database must be dumped with mysqldump, not copied as raw files while MySQL is running, otherwise the copy can be inconsistent.
A backup script
nano /opt/ghost/backup.sh
#!/usr/bin/env bash
# /opt/ghost/backup.sh: dump the Ghost database and archive content and config
set -euo pipefail
umask 077
cd /opt/ghost
mkdir -p backups
STAMP=$(date +%F-%H%M)

# Consistent SQL dump; the password is passed via MYSQL_PWD, not on the command line
docker compose exec -T db sh -c 'MYSQL_PWD="$MYSQL_ROOT_PASSWORD" exec mysqldump -uroot --single-transaction --routines --no-tablespaces ghost' \
  | gzip > "backups/ghost-db-$STAMP.sql.gz"

# Images, themes and other files Ghost keeps on disk
tar -czf "backups/ghost-content-$STAMP.tar.gz" content

# Configuration (contains secrets, keep it private)
tar -czf "backups/ghost-config-$STAMP.tar.gz" .env docker-compose.yml Caddyfile

# Keep 14 days of local backups
find backups -type f -mtime +14 -delete

echo "Backup finished: $STAMP"
Make it executable and run it once:
chmod +x /opt/ghost/backup.sh
sudo /opt/ghost/backup.sh
sudo ls -lh /opt/ghost/backups
You should see three files with the same timestamp, owned by root and readable only by root (-rw-------), because they contain member emails and passwords. The single quotes around the sh -c command matter: $MYSQL_ROOT_PASSWORD is expanded inside the database container, where that variable already exists, so the password never appears in your shell history or the process list.
Run it daily with cron
sudo crontab -e
Add this line to run the backup every night at 03:30:
30 3 * * * /opt/ghost/backup.sh >> /var/log/ghost-backup.log 2>&1
Copy backups off the server
A backup on the same disk does not survive the loss of that disk. Because the files are root-owned, give them to your user before copying them from your own computer:
sudo chown "$USER": /opt/ghost/backups/*
Then, from your laptop:
scp you@203.0.113.10:/opt/ghost/backups/ghost-db-2026-11-10-0330.sql.gz ./
For a hands-off setup, push the folder to a second server or to object storage with your preferred backup tool, encrypted, since member data is personal data under GDPR. As extra safety, Ghost Admin can also export content as JSON and members as CSV from the settings.
Restore into a fresh database
Never import a dump on top of the live, migrated database. Stop Ghost, recreate an empty database, import, then restore the content folder. Use a Ghost image that is the same version as the backup or newer, never older.
cd /opt/ghost
sudo docker compose stop ghost
sudo docker compose exec -T db sh -c 'MYSQL_PWD="$MYSQL_ROOT_PASSWORD" mysql -uroot -e "DROP DATABASE IF EXISTS ghost; CREATE DATABASE ghost CHARACTER SET utf8mb4;"'
gunzip -c backups/ghost-db-2026-11-10-0330.sql.gz | sudo docker compose exec -T db sh -c 'MYSQL_PWD="$MYSQL_ROOT_PASSWORD" mysql -uroot ghost'
sudo mv content content.before-restore
sudo tar -xzf backups/ghost-content-2026-11-10-0330.tar.gz -C /opt/ghost
sudo docker compose start ghost
sudo docker compose logs -f ghost
The ghost database user keeps its privileges after the database is recreated, so no extra grants are needed. On a brand new server, the “fresh database” is even simpler: copy back .env, docker-compose.yml and Caddyfile, run sudo docker compose up -d db so MySQL initializes an empty ghost database, import the dump, extract the content archive, then run sudo docker compose up -d.
Step 8: Upgrade Ghost safely
Ghost upgrades its database schema automatically when a newer version starts, and those migrations are one-way. That is the whole reason for the routine below: back up first, note the version, then upgrade.
Routine updates within the same major
cd /opt/ghost
sudo ./backup.sh
sudo docker compose exec ghost printenv GHOST_VERSION
sudo docker compose pull
sudo docker compose up -d
sudo docker compose logs -f ghost
Write down the version printed before the pull. pull downloads the newest images matching your tags (latest Ghost 6.x, latest MySQL 8.4.x, latest Caddy 2.x), and up -d recreates only the containers whose image changed. Wait for the boot line in the log, check the site and Ghost Admin, then clean up old images:
sudo docker compose exec ghost printenv GHOST_VERSION
sudo docker image prune -f
Read the release notes before updating, especially if you use a custom theme.
Moving to a new major version
When a new Ghost major comes out, first update to the latest release of your current major (the routine above), take a fresh backup, read the official upgrade notes for breaking changes and theme compatibility, and only then change the tag in docker-compose.yml, for example from ghost:6-alpine to the next major. Do the same kind of careful reading before moving MySQL to a new major; staying on the 8.4 LTS line is the calm choice until Ghost documents support for something newer.
If an upgrade goes wrong
Because migrations cannot be reversed, rolling back means restoring, not just changing the tag. Set the image to the exact version you noted (for example ghost:6.x.y-alpine, using the real numbers you wrote down), then follow the restore procedure from Step 7 with the backup taken right before the upgrade.
How much RAM does a Ghost stack use?
As the chart shows, MySQL is the largest consumer, not Ghost. The whole stack sits at roughly 600 MB at rest and can approach 800 MB while you edit and send a newsletter, which is why we recommend 2 GB of RAM: it leaves room for the operating system, the page cache and traffic spikes. See your own numbers with:
sudo docker stats --no-stream
On a 1 GB VPS, two things help. Add swap (on KVM; it does not work inside an LXC container):
sudo fallocate -l 2G /swapfile
sudo chmod 600 /swapfile
sudo mkswap /swapfile
sudo swapon /swapfile
echo '/swapfile none swap sw 0 0' | sudo tee -a /etc/fstab
And turn off MySQL’s performance schema, which saves on the order of 100 MB, by adding command: ["--performance-schema=OFF"] under the db service, then running sudo docker compose up -d.
Troubleshooting and common mistakes
- No certificate, browser shows a security error. DNS does not point to this server yet, or port 80 is not reachable (Let’s Encrypt validates over port 80). Check
sudo docker compose logs caddyandgetent hosts blog.example.ro. - “Port is already allocated” when starting. Something on the host already uses 80 or 443, often a preinstalled Apache or Nginx. Find it with
sudo ss -tlnp | grep -E ':80 |:443 'and stop or remove it. - Too many redirects. The
urlin the Compose file does not match how visitors arrive, for examplehttp://instead ofhttps://. If you use Cloudflare in front, set SSL mode to “Full (strict)”, never “Flexible”. - Ghost logs “Access denied for user ghost”. You changed
MYSQL_PASSWORDin.envafter the first start. MySQL only reads it on initialization. Either put the old value back, or change the real password: runsudo docker compose exec db mysql -uroot -p(it prompts for the root password), thenALTER USER 'ghost'@'%' IDENTIFIED BY 'new-password';and recreate Ghost withsudo docker compose up -d. - Ghost restarts in a loop with “ECONNREFUSED”. The database is not up. Check
sudo docker compose psandsudo docker compose logs db; on small servers, MySQL being killed for lack of memory is a classic (see the RAM section). - Login or signup emails never arrive. Test that the SMTP port is reachable from the VPS with
timeout 5 bash -c '</dev/tcp/smtp.example.com/587' && echo open. Then check the port andSMTP_SECUREpair, the credentials, and thatMAIL_FROMuses a domain your provider authorized. - Locked out because of the device verification code. Fix SMTP first. As a last resort only, you can add
security__staffDeviceVerification: "false"to Ghost’s environment, recreate the container, log in, fix email, and remove it again. - Permission errors on uploads. The Ghost image normally fixes ownership of
contentat start; if you copied files in by hand, runsudo chown -R 1000:1000 /opt/ghost/content.
Security notes
- Only Caddy publishes ports. Do not add
ports:toghostordb“just for testing”; Docker would expose them to the internet regardless ofufw. - Protect
.envand backups. They contain database passwords, SMTP credentials and, in the dumps, your members’ emails. Keepchmod 600, never commit.envto Git, and encrypt off-site copies. - Claim the admin account immediately after the first start, use a long unique password, and keep staff accounts to the people who really need them.
- Harden SSH. Use key-based login and disable password authentication once your key works.
- Keep everything patched. Enable
unattended-upgradesfor the host and run the Step 8 routine regularly so Ghost, MySQL and Caddy receive security fixes. - Treat the
dockergroup as root. We usedsudofor that reason; anyone in the group can take over the server.
So, should you self-host Ghost?
If you want a blog that looks professional out of the box, a newsletter that belongs to you rather than to a platform, and data that stays on a server in Romania under your control, Ghost with Docker Compose is one of the most pleasant self-hosted stacks you can run. The setup is a handful of files, backups are a single script, and upgrades are a three-command routine once you respect the “backup first” rule. The parts that need care are email deliverability and keeping on top of updates.
You can deploy this stack on a VPS with us in under an hour, or let our server administration team install Ghost, configure email and DNS, and take care of backups and upgrades for you.
FAQ
Can I run Ghost with SQLite instead of MySQL?
SQLite is supported only for local development. For a production site Ghost officially supports MySQL 8, which is why this guide uses mysql:8.4.
Can I host several Ghost blogs on one VPS?
Yes. Either create a second project folder with its own Compose file and database, or add another ghost and db pair to the same file. In both cases a single Caddy handles all domains, with one block per site in the Caddyfile, and only that Caddy publishes ports 80 and 443.
Do I really need Mailgun?
Only for bulk newsletters. Member signups, logins and staff emails work with any SMTP provider. If you just publish posts and do not email them, SMTP alone is enough.
Is the Docker setup slower than a classic install?
No measurable difference for a blog. The containers run on the same kernel as the host; the overhead is negligible compared to network latency and theme design.
Where is my data stored?
In /opt/ghost/mysql (database), /opt/ghost/content (images and themes) and the caddy_data volume (certificates). On a DreamServer VPS all of it stays in our data center in Romania.








