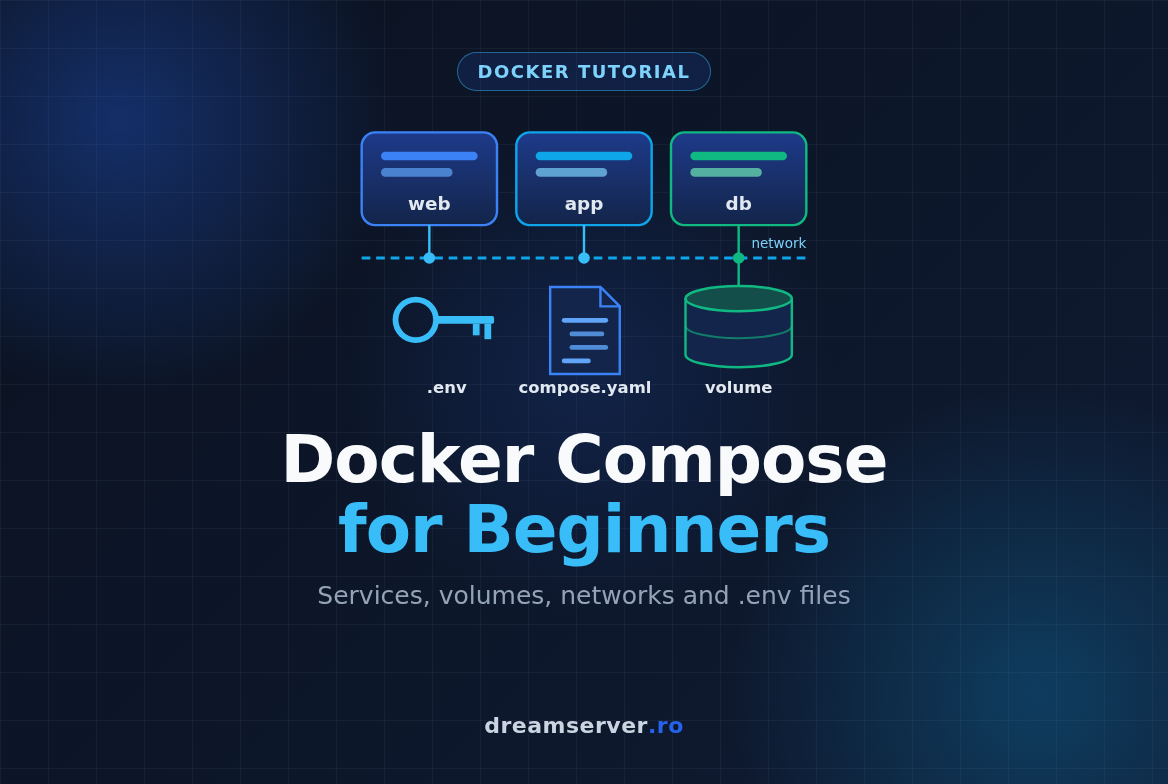
Docker Compose Tutorial for Beginners: Volumes, Networks, .env
Sooner or later every self-hosting guide hands you a block of YAML and says: “save this as compose.yaml and run docker compose up -d”. It works, and that is exactly the problem. The day you need to change a password, move your data, update an image or understand why a container restarts every ten seconds, the file you pasted without reading turns into a black box. In this docker compose tutorial we open the box. On a fresh VPS we build a small two-container stack, read compose.yaml line by line, keep the data in a volume that survives restarts and updates, move the passwords into a .env file, and practice the few commands you will use every week: start, inspect, read logs, update and clean up without losing anything.
Docker Compose is Docker’s official tool for describing multi-container applications in a single file. Its documentation lives at docs.docker.com/compose and the source code at github.com/docker/compose . Everything we do here applies directly to the apps you actually want to run later, from WordPress and Nextcloud to Gitea, Uptime Kuma or your own code: once you can read one compose file, you can read them all.
What you need
- A VPS running Debian 13 or Ubuntu 24.04. 1 GB of RAM and 10 GB of disk are plenty for this tutorial. A KVM VPS is the easiest option for Docker (see the LXC note in Step 1).
- A regular user with sudo rights and SSH access. We never work as root directly.
- A terminal on your own computer (Linux, macOS, or Windows 10/11 with the built-in OpenSSH client) for the SSH tunnel in Step 5.
- Basic comfort with
cd,lsand a text editor such asnano. That is all, we explain everything else along the way.
Docker Compose in plain words
Containers and images
A container is an isolated process on your server that brings everything it needs to run: its own files, libraries and settings, while sharing the kernel of the host. Think of it as a lightweight, disposable box for one program. An image is the read-only template a container is created from, for example postgres:17, published on Docker Hub. The part after the colon is the tag, a label that usually means a version.
The mental model that will save you a lot of trouble: containers are disposable, images are replaceable, and the only thing that matters long term is your data. Everything in this tutorial is built around that idea.
What Compose adds
With plain Docker you start each container with a long docker run command full of flags. That is fine for one container and painful for three. Docker Compose lets you describe the whole application (all containers, their settings, storage and connections) in one YAML file called compose.yaml. One command then creates or updates everything, and another removes it. The file becomes documentation you can read, version in Git and copy to another server.
You may still see the old docker-compose command with a hyphen. That was Compose v1, a separate Python program that reached end of life in 2023. Today Compose is a plugin of the Docker CLI and you type docker compose, with a space. Likewise, the version: line at the top of older files is obsolete and ignored, so we do not write it.
The building blocks: services, volumes, networks, ports and .env
- Service: one entry in compose.yaml that describes a container: which image, which settings, how to restart. Our stack has two services,
db(a PostgreSQL database) andadminer(a small web interface for databases). - Volume: storage managed by Docker that lives outside the container. When a container is deleted and recreated, the volume stays. This is where databases, uploads and configuration must live.
- Network: a private virtual network between containers. Containers on the same network reach each other by service name, so Adminer simply connects to the host name
db. - Port: a numbered door on an IP address where a program listens, like 22 for SSH or 443 for HTTPS. “Publishing” a port connects a port on the server to a port inside a container.
- .env file: a plain text file next to compose.yaml that holds variables such as passwords. Compose reads it automatically and substitutes the values into the YAML, so secrets stay out of the file you share.
Why PostgreSQL and Adminer? Because together they show every concept with almost no noise: a database that must keep its data, a web app that needs to find the database, a password that must stay secret and a port that should not face the internet. Swap them later for WordPress and MariaDB, or Nextcloud and Redis, and the structure stays exactly the same.
The plan: this docker compose tutorial in 8 steps
Step 1: Install Docker Engine and the Compose plugin
Both Debian and Ubuntu ship their own docker.io package, but it usually lags behind upstream and packages Compose separately. We use Docker’s official repository instead, so the commands match the official documentation. The block below works on both distributions: it reads /etc/os-release and uses $ID (debian or ubuntu) and $VERSION_CODENAME (trixie on Debian 13, noble on Ubuntu 24.04) to pick the right repository.
sudo apt update
sudo apt install -y ca-certificates curl
sudo install -m 0755 -d /etc/apt/keyrings
. /etc/os-release
sudo curl -fsSL "https://download.docker.com/linux/${ID}/gpg" -o /etc/apt/keyrings/docker.asc
sudo chmod a+r /etc/apt/keyrings/docker.asc
echo "deb [arch=$(dpkg --print-architecture) signed-by=/etc/apt/keyrings/docker.asc] https://download.docker.com/linux/${ID} ${VERSION_CODENAME} stable" | sudo tee /etc/apt/sources.list.d/docker.list > /dev/null
sudo apt update
sudo apt install -y docker-ce docker-ce-cli containerd.io docker-buildx-plugin docker-compose-plugin
What it does: installs the tools needed to download over HTTPS, saves Docker’s signing key in /etc/apt/keyrings so apt can verify the packages, adds the repository, then installs the engine (docker-ce), the command line client, the container runtime and the Compose plugin. Now check that everything works:
docker --version
docker compose version
sudo docker run --rm hello-world
You should see a version line for each tool (something like Docker Compose version v2.x.x) and a “Hello from Docker!” message from the test container, which is deleted right after thanks to --rm.
On Ubuntu, make sure you are not using the snap package of Docker: if which docker prints /snap/bin/docker, remove it with sudo snap remove docker before continuing, because the snap version is confined and behaves differently with files and volumes. Debian does not use snap, so this does not apply there.
To run Docker commands without typing sudo every time, add your user to the docker group, then log out and SSH back in so the change takes effect:
sudo usermod -aG docker "$USER"
exit
After reconnecting, groups should list docker. Be aware that membership in this group is equivalent to root on the server (more in the security section). If you prefer, skip this and prefix every docker command below with sudo.
LXC note: in an unprivileged LXC container, Docker needs the “nesting” feature (and often “keyctl”) enabled on the container, otherwise the service fails to start or containers cannot be created. On a DreamServer LXC VPS you can ask support to enable it, but for Docker workloads a KVM VPS is the simpler and more predictable choice.
Step 2: Create a project folder
mkdir -p ~/compose-demo
cd ~/compose-demo
Every Compose project lives in its own folder, and all docker compose commands are run from inside it. By default Compose uses the folder name as the project name and prefixes everything it creates with it. We will set the name explicitly in the file, so the containers will be called demo-db-1 and demo-adminer-1 regardless of the folder. One folder per application keeps a server tidy: ~/wordpress, ~/gitea and so on, each with its own compose.yaml and .env.
Step 3: Keep secrets in a .env file
Passwords do not belong inside compose.yaml. You will copy that file into notes, share it with a colleague or push it to Git, and secrets have a way of leaking from files that travel around. So we create a separate .env file and generate a strong random password directly into it:
cat > .env <<EOF
POSTGRES_USER=demo
POSTGRES_DB=demo
POSTGRES_PASSWORD=$(openssl rand -hex 24)
EOF
chmod 600 .env
echo ".env" >> .gitignore
cat .env
The $(openssl rand -hex 24) part is replaced by 48 random hexadecimal characters when the file is written. chmod 600 makes the file readable only by your user, and the .gitignore line stops Git from ever committing it if you version the folder later. The last command prints the file so you can see the generated password; you will need it once in Step 5.
A few rules about the .env format: one KEY=value per line, no spaces around =, no quotes needed for simple values, and lines starting with # are comments. Hexadecimal passwords avoid characters like $, # or quotes that would need special care.
An important distinction: Compose reads this .env file for variable substitution inside compose.yaml (the ${...} placeholders you will see in a moment). The values only reach a container if compose.yaml passes them in, which we do explicitly. That way the YAML always shows you exactly what each container receives.
Step 4: Write compose.yaml and understand every line
Open the editor with nano compose.yaml, paste the content below, then save with Ctrl+O, Enter, and exit with Ctrl+X.
name: demo

services:
  db:
    image: postgres:17
    restart: unless-stopped
    environment:
      POSTGRES_USER: ${POSTGRES_USER}
      POSTGRES_PASSWORD: ${POSTGRES_PASSWORD:?Set POSTGRES_PASSWORD in .env}
      POSTGRES_DB: ${POSTGRES_DB}
    volumes:
      - db_data:/var/lib/postgresql/data
    networks:
      - backend
    healthcheck:
      test: ["CMD-SHELL", "pg_isready -U ${POSTGRES_USER} -d ${POSTGRES_DB}"]
      interval: 10s
      timeout: 5s
      retries: 5
      start_period: 30s

  adminer:
    image: adminer:5
    restart: unless-stopped
    ports:
      - "127.0.0.1:8080:8080"
    environment:
      ADMINER_DEFAULT_SERVER: db
    depends_on:
      db:
        condition: service_healthy
    networks:
      - backend
      - web

volumes:
  db_data:

networks:
  backend:
    internal: true
  web:
YAML in two minutes
YAML expresses structure through indentation. A line key: value sets a value, a more deeply indented block belongs to the line above it, and lines starting with - are items in a list. Indent with spaces only, never tabs; two spaces per level is the convention. Most “Compose does not work” problems for beginners come down to one misaligned space, and in Step 5 we let Compose check the file for us.
The top level
name: demosets the project name. Containers, networks and volumes get thedemoprefix, so the volume becomesdemo_db_data.services:holds one block per container. The namesdbandadminerare your choice, and they double as host names on the network.volumes:declares the named volumedb_data. The empty value means “default settings”: Docker creates it under/var/lib/docker/volumes/the first time.networks:declares two networks.backendhasinternal: true, which means containers on it can talk to each other but have no route to the internet.webis a normal network.
The db service, line by line
image: postgres:17uses the official PostgreSQL image, major version 17. Pinning the major version meansdocker compose pullbrings bug fixes and security patches (17.x) but never a major upgrade that would require a data migration.:latestis convenient right until the day it silently jumps to a new major version and the database refuses to start on the old data.restart: unless-stoppedrestarts the container if it crashes and after a server reboot, unless you stopped it on purpose. Other options areno,alwaysandon-failure.environment:passes variables into the container. The PostgreSQL image reads them only on the first start, when the data folder is empty, and creates the user, password and database.${POSTGRES_USER}is filled in from .env. The:?syntax in${POSTGRES_PASSWORD:?...}makes the variable required: if it is missing, Compose stops with that message instead of starting a database with an empty password.volumes: - db_data:/var/lib/postgresql/datamounts the named volume at the folder where PostgreSQL 17 keeps its files. The format is alwayssource:destination inside the container. Without this line the data would live inside the container and disappear when the container is recreated.networks: - backendattaches the database only to the internal network. Notice thatdbhas noports:section at all: the database is reachable by other containers onbackendand by nobody else.healthcheck:tells Docker how to decide whether the service is actually ready, not just started.pg_isreadyis a small tool shipped in the image; Docker runs it every 10 seconds and marks the containerhealthyonce it succeeds.start_periodgives the database 30 seconds of grace on its first boot, while it initializes the data folder.
The adminer service, line by line
image: adminer:5is the official Adminer image, major version 5.ports: - "127.0.0.1:8080:8080"publishes the port. Read it ashost IP:host port:container port. Adminer listens on 8080 inside the container, and we make it available on port 8080 of the server, but only on127.0.0.1, the loopback address that is reachable from the server itself and not from the internet. Always quote port mappings: YAML can misread unquoted values such as22:22as base 60 numbers.ADMINER_DEFAULT_SERVER: dbpre-fills the server field of the login form.dbis the service name, resolved by Docker’s built-in DNS on the shared network.depends_onwithcondition: service_healthymakes Compose wait until the database passes its health check before starting Adminer. A plaindepends_onwithout a condition only controls start order, not readiness.networks: - backend - webputs Adminer on both networks:backendto reach the database, andwebbecause a published port only works through a network that is not internal.
Step 5: Validate and start the stack
First, let Compose read the file, substitute the .env values and check the syntax:
docker compose config --quiet
No output means the file is valid. If there is a mistake, you get an error with the line number. Run docker compose config without --quiet to see the fully resolved file, but keep in mind that it prints your password in clear text, so never paste that output anywhere public.
Now start everything in the background (-d stands for detached):
docker compose up -d
The first run downloads the images, which takes a minute or so depending on your connection. Then you see roughly this, with small check marks in your terminal:
[+] Running 5/5
 Network demo_backend      Created
 Network demo_web          Created
 Volume "demo_db_data"     Created
 Container demo-db-1       Healthy
 Container demo-adminer-1  Started
Notice the order: networks and volume first, then the database, and Adminer only after db reported Healthy. That is depends_on doing its job.
Open Adminer through an SSH tunnel
Adminer listens only on the loopback address of the server, so we bring that port to your laptop through SSH. Run this on your own computer, not on the VPS:
ssh -L 8080:127.0.0.1:8080 youruser@your-vps-ip
As long as that SSH session stays open, http://localhost:8080 in your browser travels through the encrypted tunnel to port 8080 on the VPS. In the login form choose PostgreSQL as the system, keep db as the server, type demo as the username and the database, and paste the password from .env. You are now looking at a database running in one container, managed by a web app in another container, connected over a private network, and none of it is exposed to the internet.
Step 6: Check status, logs and resources
Three commands answer most day-to-day questions:
docker compose ps
docker compose logs --tail=20
docker compose logs -f db
docker compose ps lists the containers of the project:
NAME             IMAGE         SERVICE   STATUS                    PORTS
demo-adminer-1   adminer:5     adminer   Up 2 minutes              127.0.0.1:8080->8080/tcp
demo-db-1        postgres:17   db        Up 2 minutes (healthy)    5432/tcp
The real output has a few more columns, such as the command and creation time. (healthy) is the result of the health check, and 5432/tcp without an address means the port exists inside the Docker network but is not published on the host.
docker compose logs --tail=20 shows the last 20 lines from every service, each prefixed with the container name. docker compose logs -f db follows the database log live, which is the first thing to watch when something misbehaves; press Ctrl+C to stop following (the container keeps running). A healthy PostgreSQL ends with database system is ready to accept connections.
You can also run commands inside a running container with exec, for example to open the PostgreSQL shell:
docker compose exec db psql -U demo -d demo
Type \l to list databases and \q to quit.
Prove that the data lives in the volume
Let us create a table, delete both containers and check that the data survived:
docker compose exec db psql -U demo -d demo -c "CREATE TABLE notes (id serial PRIMARY KEY, body text);"
docker compose exec db psql -U demo -d demo -c "INSERT INTO notes (body) VALUES ('hello from a volume');"
docker compose down
docker compose up -d
docker compose exec db psql -U demo -d demo -c "SELECT * FROM notes;"
docker compose down removes the containers and the networks, and up -d creates brand new ones. The final SELECT still returns hello from a volume, because the data was never in the container: it lives in the demo_db_data volume. You can see it with docker volume ls and find its location with docker volume inspect demo_db_data, which shows a Mountpoint under /var/lib/docker/volumes/. Look, but do not edit files there while the database is running.
Named volume or bind mount? Besides named volumes, Compose supports bind mounts like ./data:/var/lib/postgresql/data, which map a folder you choose on the host. Bind mounts are great for config files you edit by hand (for example ./nginx.conf:/etc/nginx/nginx.conf:ro, where :ro means read-only), while named volumes are the safer default for database files because Docker handles ownership and permissions for you.
How much does it cost in resources?
docker stats --no-stream --format "table {{.Name}}\t{{.CPUPerc}}\t{{.MemUsage}}"
This prints one line per container with its CPU and memory use at that moment. The Docker daemon itself does not appear here; systemctl status docker containerd shows its memory in the Memory: line.
Idle, the whole stack, Docker daemon included, fits in roughly 150 MB of RAM, so it runs comfortably on the smallest VPS. Real applications such as WordPress or Nextcloud need more, but the overhead of Docker and Compose themselves stays small.
Step 7: Update containers without losing data
Back up first
Before any update, take a logical dump of the database. It is a plain SQL file you can restore anywhere:
mkdir -p ~/backups
docker compose exec -T db sh -c 'pg_dump -U "$POSTGRES_USER" -d "$POSTGRES_DB"' > ~/backups/demo-$(date +%F).sql
ls -lh ~/backups
-T disables the pseudo-terminal so the output can be redirected cleanly into a file. The single quotes make the variables expand inside the container, where they are set, rather than on the host, where they are not. To restore later, feed the file back in (use your own file name):
docker compose exec -T db sh -c 'psql -U "$POSTGRES_USER" -d "$POSTGRES_DB"' < ~/backups/demo-2026-11-10.sql
A backup that only lives on the same VPS is a convenience, not a disaster recovery plan, so copy it off the server regularly.
Pull and recreate
docker compose pull
docker compose up -d
docker image prune -f
pull downloads newer images for the tags in the file, for example a new 17.x patch release. up -d compares what is running with what the file and images describe, and recreates only the containers that changed; the volume is reattached untouched. docker image prune -f deletes the old, now untagged images that would otherwise slowly fill your disk. Check docker compose ps and the logs afterwards to confirm everything came back healthy.
Changed .env or compose.yaml?
After editing either file, run docker compose up -d again. Do not rely on docker compose restart for this: it restarts the existing containers with their old configuration and ignores your changes.
Major version upgrades
Changing postgres:17 to postgres:18 is not an update, it is a migration. Data files from one major version cannot be opened by the next one, and the PostgreSQL 18 image also changed its default data path. The safe route: make a dump with the command above, start the new version with a new, empty volume, then restore the dump into it. The same caution applies to MariaDB, MySQL and most databases, so read the release notes before you touch a major tag.
Step 8: Stop, remove and clean up safely
Cleanup commands look similar but have very different consequences:
docker compose stop        # stop containers, keep everything
docker compose start       # start them again
docker compose down        # remove containers and networks, keep volumes
docker compose down -v     # ALSO deletes named volumes: your data is gone
docker system df           # how much disk space Docker uses
docker image prune -a      # remove all images not used by any container
docker system prune        # stopped containers, unused networks, dangling images, build cache
docker compose down is safe for your data and is what you use when you want to rebuild a stack from scratch. down -v is the one to respect: use it only when you really want to throw the data away, for example at the end of this tutorial, and preferably after a backup. docker system prune does not touch named volumes unless you add --volumes, and even then it only removes volumes that no container uses, so think twice before adding that flag on a production server.
When you are done experimenting and want the demo gone completely:
cd ~/compose-demo
docker compose down -v
docker image prune -a -f
Troubleshooting and common mistakes
- “permission denied while trying to connect to the Docker daemon socket”: your user is not in the
dockergroup yet, or you did not log out and back in after adding it. Reconnect, or usesudo. - “docker: ‘compose’ is not a docker command”: the Compose plugin is missing. Install
docker-compose-pluginfrom Docker’s repository as shown in Step 1. - “yaml: line 12: did not find expected key” or similar: an indentation problem, often a tab or one space too many.
docker compose config --quietpoints to the line. - “required variable POSTGRES_PASSWORD is missing a value”: Compose did not find .env. It must sit in the project folder next to compose.yaml, and you must run the commands from that folder (or pass
--project-directory). - “port is already allocated” or “address already in use”: something else uses port 8080 on the host. Change only the left side, for example
"127.0.0.1:8081:8080", and use 8081 in the SSH tunnel too. - Login fails after you changed the password in .env: the PostgreSQL image applies
POSTGRES_PASSWORDonly when the volume is empty. Change it inside the database (ALTER USER demo WITH PASSWORD 'new-password';in psql), then update .env to match, or start over withdown -vif the data does not matter. - A container keeps restarting:
docker compose psshowsRestarting. Readdocker compose logs db(or the relevant service); the reason is almost always in the last lines. - The disk fills up over time: old images and container logs are the usual suspects. Run
docker system df, prune unused images, and cap log size by creating/etc/docker/daemon.jsonwith the content{"log-driver": "local"}, then runsudo systemctl restart dockeranddocker compose up -d --force-recreate, because the setting only applies to newly created containers. Thelocaldriver rotates logs automatically. - Docker does not start on an LXC VPS: nesting is not enabled on the container, see the note in Step 1.
Security notes
- Published ports bypass ufw. Docker writes its own firewall rules, and a port published as
"8080:8080"is reachable from the internet even ifufwclaims it is blocked. This behaves the same on Debian and Ubuntu. That is why we bind to127.0.0.1and use an SSH tunnel. For public web apps, publish only a reverse proxy (Caddy, Nginx, Traefik) on ports 80 and 443 and keep everything else internal. - The docker group equals root. Anyone who can run Docker commands can mount the host’s filesystem into a container and change anything. Add only trusted administrators to it.
- Environment variables are not invisible. Anyone with Docker access can read them with
docker inspect. For stronger isolation, Compose supports secrets mounted as files, and the PostgreSQL image acceptsPOSTGRES_PASSWORD_FILE:
services:
  db:
    environment:
      POSTGRES_PASSWORD_FILE: /run/secrets/db_password
    secrets:
      - db_password

secrets:
  db_password:
    file: ./db_password.txt
- Keep databases on an internal network with no published ports, as we did here. Only services that must be reached from outside get a port.
- Do not leave admin tools running. Adminer is handy, but there is no reason for it to run all the time.
docker compose stop adminerstops only that service;docker compose start adminerbrings it back when you need it. - Use official or well maintained images, pin major versions and update regularly. An outdated image is an unpatched server, just in a smaller box.
So, is Docker Compose worth learning?
Absolutely, and you now have the full picture: compose.yaml describes the services, volumes keep the data, networks decide who talks to whom, ports decide what is visible, and .env keeps secrets out of the file. With up -d, ps, logs, pull and down you can run almost any self-hosted application, and when something breaks you know where to look instead of starting over. The natural next step is a reverse proxy with automatic HTTPS in front of your apps, so they can live on a real domain.
You can practice everything above on a VPS from our Romanian data center in a few minutes. And if you would rather have someone design, secure and maintain your Docker stacks for you, our server administration team can set it all up from scratch.
FAQ
What is the difference between docker-compose and docker compose?
docker-compose (with a hyphen) is the old Compose v1, a standalone Python tool that is no longer maintained. docker compose (with a space) is Compose v2, a plugin of the Docker CLI. The file format is essentially the same, but use v2 for everything new.
Should the file be called compose.yaml or docker-compose.yml?
Both work. compose.yaml is the name preferred by the current documentation, and Compose still finds docker-compose.yml in older projects. Just do not keep both in the same folder, or you will edit one while Compose reads the other.
Do I still need the version: line?
No. It is obsolete in Compose v2, it is ignored, and current versions print a warning when they see it. Start the file directly with services: (or with name: as we did).
Can I run several Compose projects on one VPS?
Yes. Give each one its own folder and project name, and make sure two projects never publish the same host port. Each project gets its own networks, so they are isolated from each other unless you connect them on purpose.
Where are my volumes stored, and how do I back them up?
Named volumes live under /var/lib/docker/volumes/<name>/_data. For databases, prefer a logical dump as in Step 7. For other volumes, such as uploaded files, stop the service and archive the volume with a throwaway container, for example docker run --rm -v myapp_uploads:/data -v "$PWD":/backup debian:13-slim tar czf /backup/uploads.tar.gz -C /data ., then copy the archive off the server.








