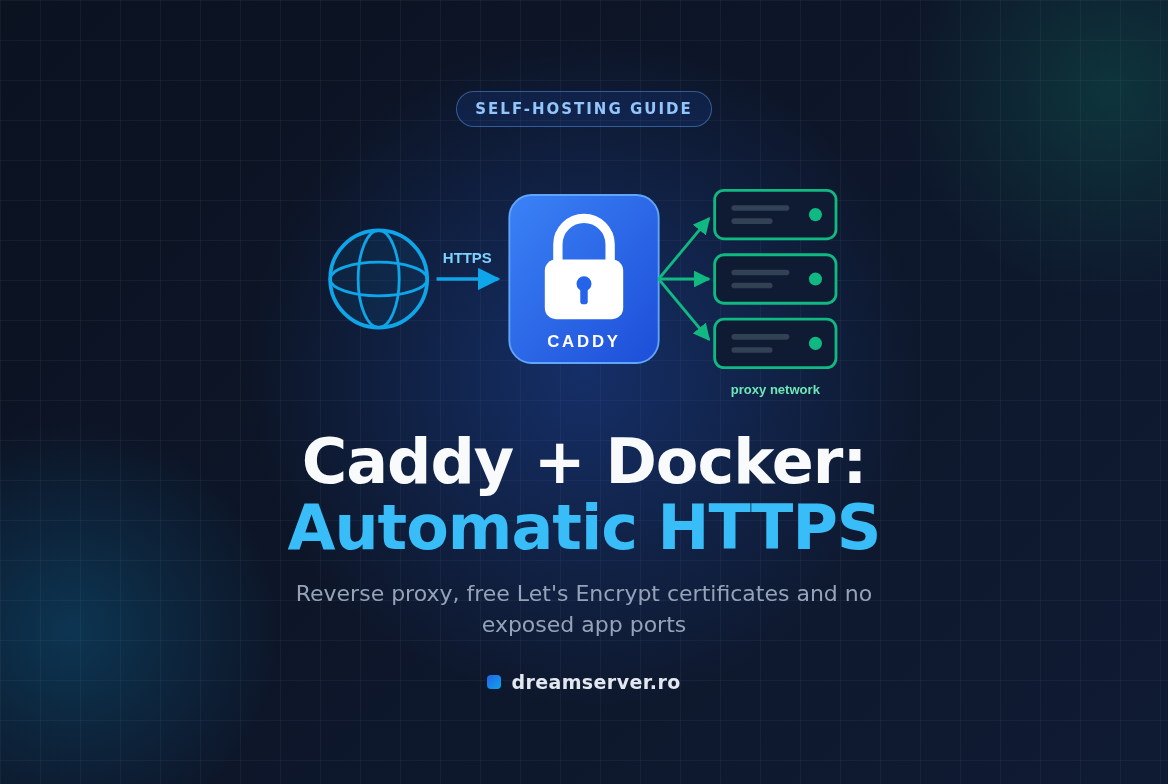
Caddy Reverse Proxy for Docker: Automatic HTTPS Guide
Every self-hosted app starts the same way: you run a container, it listens on some port like 3001 or 8080, and you open http://your-ip:3001 in the browser. It works, but it is not something you can hand to a customer, or even enjoy using yourself: no padlock, an odd number in the URL, and one more door open to the whole internet for every app you add. The fix is a reverse proxy, a single front door that answers on the standard web ports, handles HTTPS for every domain and quietly forwards each request to the right container. In this guide we build exactly that with Caddy, and the nicest part is that the certificates take care of themselves.
Caddy is an open source web server written in Go, released under the Apache 2.0 license, with its home at caddyserver.com and its code at github.com/caddyserver/caddy . Its signature feature is automatic HTTPS: you write a domain name in the config file and Caddy obtains a free certificate from Let’s Encrypt, installs it, redirects HTTP to HTTPS and renews it before it expires. No cron jobs, no Certbot, no copying key files around. By the end of this tutorial you will have your domains pointed at your VPS, two example apps running behind Caddy on a shared Docker network, valid certificates on both, and no application port reachable from the internet.
What a reverse proxy is, and why Caddy
Let’s define a few terms first, because everything else builds on them.
A port is a numbered “door” on a server. One machine has a single IP address, but many programs can listen on it at the same time, each on its own port. Browsers use port 80 for plain HTTP and port 443 for HTTPS by default, which is why you never type them. Your SSH session uses port 22.
A container is an isolated package that contains an app plus everything it needs to run (libraries, runtime, config). Docker runs containers, and Docker Compose lets you describe one or more containers in a compose.yaml file and start them with a single command.
A reverse proxy is a program that sits in front of your apps. It receives every request on ports 80 and 443, looks at the hostname the visitor asked for (for example status.example.com), and passes the request to the matching app behind it. The visitor only ever talks to the proxy. The apps never need to face the internet directly.
TLS is the encryption behind HTTPS. To use it, a site needs a certificate, a small signed file that proves to browsers that the server really owns that domain. Let’s Encrypt is a free, non-profit certificate authority, and ACME is the protocol programs use to request and renew certificates from it automatically.
Why Caddy instead of Nginx with Certbot
Nginx is excellent and we run plenty of it. But for a small VPS hosting a handful of Docker apps, the classic Nginx setup means writing a server block per site, installing Certbot, running it for each domain, making sure the renewal timer works and remembering to reload Nginx after every renewal. It is doable, but every step is a chance to forget something.
With Caddy, a complete HTTPS reverse proxy for one site is three lines of config. Certificate requests, HTTP to HTTPS redirects, OCSP stapling, HTTP/2 and HTTP/3 are all on by default. WebSockets, which many modern dashboards use for live updates, are proxied without any extra directive. For the “I just want my apps on proper HTTPS” use case, that simplicity is the whole point.
How automatic HTTPS works
When Caddy starts and finds a hostname in its config, it contacts Let’s Encrypt and asks for a certificate. Let’s Encrypt replies with a challenge: “prove you control this domain”. It then connects to your domain on port 80 (HTTP-01 challenge) or 443 (TLS-ALPN-01 challenge) and checks that the expected answer is there. Caddy answers the challenge itself, the certificate is issued and saved on disk. That is why two things are non-negotiable: the domain must point at your VPS, and ports 80 and 443 must be reachable from the internet.
Let’s Encrypt certificates are currently valid for 90 days and Caddy renews them roughly 30 days before expiry. The industry is moving toward shorter certificate lifetimes, which is exactly why automation matters: a renewal you do by hand is a renewal you will eventually forget.
The architecture we are building
Here is the whole picture. Only Caddy publishes ports to the internet. Every app joins a shared Docker network called proxy, where Caddy can reach it by container name. Certificates live in a Docker volume so they survive restarts and updates.
What you need
- A VPS running Debian 13 or Ubuntu 24.04, ideally a KVM one. Caddy itself is tiny, so the smallest plan is enough for the proxy plus a few light apps.
- A user with sudo rights, logged in over SSH.
- Docker Engine with the Compose plugin, installed from Docker’s official repository as described at docs.docker.com/engine/install
. Check it with
docker compose version; you should see something likeDocker Compose version v2.x. - Your user in the
dockergroup (sudo usermod -aG docker $USER, then log out and back in), otherwise prefix thedockercommands below withsudo. - A domain name where you can edit DNS records at your registrar or DNS provider.
- Nothing else listening on ports 80 and 443, such as a preinstalled Apache or Nginx.
Before starting, bring the system up to date:
sudo apt update && sudo apt upgrade -y
On Ubuntu, if the file /var/run/reboot-required exists after the upgrade, a new kernel or core library was installed and you should reboot with sudo reboot. Debian does not reliably create that file, so on Debian simply reboot if the upgrade installed a new linux-image package.
A note for LXC customers: Docker inside an unprivileged LXC container needs nesting enabled on the container, and ufw may not be able to load the kernel modules it wants. If Docker refuses to start or ufw enable throws errors, ask our support team or use a KVM VPS, which behaves like a normal server for everything in this guide.
Here is the procedure at a glance. Each number matches a “Step” heading below.
Step 1: Point your domains at the VPS
Certificates can only be issued for names that already resolve to your server, so DNS comes first. Find your VPS public IP in the client panel, or on the server itself:
ip -brief address
Look for the interface with a public address (often eth0 or ens3). In this guide we use 203.0.113.10 as a placeholder IP and example.com as the domain.
At your DNS provider, create one A record per app hostname, each pointing to the VPS IPv4 address:
hello->203.0.113.10status->203.0.113.10
Only add AAAA records (IPv6) if your VPS actually has a working IPv6 address. Let’s Encrypt prefers IPv6 when an AAAA record exists, so a stale or wrong AAAA record is one of the most common reasons certificate issuance fails.
Wait a few minutes, then check propagation from the VPS. The dig tool lives in the same package on both distributions:
sudo apt install -y bind9-dnsutils
dig +short hello.example.com A
dig +short status.example.com A
Each command should print exactly your VPS IP. If it prints nothing or an old address, wait and try again before moving on. If your DNS is hosted at a provider with a proxy feature (the “orange cloud” style), set those records to “DNS only” while you set things up; you can revisit that later.
Step 2: Open ports 80 and 443 in the firewall
We use ufw, a friendly front end for the Linux firewall. Ubuntu 24.04 ships with it installed but inactive; Debian 13 does not include it, so install it there first (the command is harmless on Ubuntu):
sudo apt install -y ufw
sudo ufw allow 22/tcp
sudo ufw allow 80/tcp
sudo ufw allow 443/tcp
sudo ufw allow 443/udp
sudo ufw enable
sudo ufw status verbose
Always allow SSH (port 22, or your custom SSH port) before running ufw enable, or you will lock yourself out. Port 80 is needed for the HTTP-01 challenge and for redirecting visitors to HTTPS, 443/tcp carries HTTPS, and 443/udp is for HTTP/3. The status output should list those four rules as ALLOW IN from Anywhere.
There is one Docker behavior every beginner should know: ports published by Docker bypass ufw. When a container uses ports: - "3001:3001", Docker writes its own firewall rules that are evaluated before ufw’s, so the port is open to the world even if ufw says otherwise. That is the main reason for this whole setup: only Caddy publishes ports, and the apps publish none at all.
Step 3: Create the shared Docker network
Containers on the same user-defined Docker network can reach each other by name, thanks to Docker’s built-in DNS. We create one network that Caddy and every app will join:
docker network create proxy
docker network ls
The first command prints a long network ID. The second lists networks, and you should see proxy with the bridge driver. We create it by hand, outside any Compose file, so that independent projects (the proxy, each app) can all attach to it without depending on each other.
Step 4: Write the Caddyfile
The Caddyfile is Caddy’s configuration file. We keep it in a conf folder and mount the whole folder into the container. Mounting a folder instead of a single file matters: some editors save by replacing the file, and a single-file mount would keep showing the container the old version.
mkdir -p ~/proxy/conf
cd ~/proxy
nano conf/Caddyfile
Paste this, replacing the email and hostnames with your own:
{
	email admin@example.com
}

hello.example.com {
	reverse_proxy hello-web:80
}

status.example.com {
	reverse_proxy uptime-kuma:3001
}
What each part does:
- The block in bare braces at the top holds global options.
emailis attached to your ACME account; Let’s Encrypt stopped sending expiry reminder emails in 2025, but the address is still useful for account matters and for the fallback certificate issuer Caddy can use. - Each site block starts with a hostname. That hostname alone is what triggers automatic HTTPS for it.
reverse_proxy hello-web:80sends traffic to the container namedhello-webon its internal port 80. Use the port the app listens on inside the container, not a host port.
Caddyfile indentation conventionally uses tabs. Save with Ctrl+O, Enter, and exit with Ctrl+X.
Step 5: Start Caddy with Docker Compose
Now the Compose file for Caddy itself:
nano ~/proxy/compose.yaml
services:
  caddy:
    image: caddy:2.10
    container_name: caddy
    restart: unless-stopped
    ports:
      - "80:80"
      - "443:443"
      - "443:443/udp"
    volumes:
      - ./conf:/etc/caddy
      - caddy_data:/data
      - caddy_config:/config
    networks:
      - proxy

volumes:
  caddy_data:
  caddy_config:

networks:
  proxy:
    external: true
A few choices worth explaining. We pin caddy:2.10 so updates stay within one minor release and nothing changes behind your back; check the official image page for the current version and bump it deliberately. caddy:2 would follow every 2.x release automatically, which is convenient but less predictable, and latest is the least predictable of all. The caddy_data volume holds certificates and private keys and must never be thrown away casually. external: true tells Compose to use the proxy network we created in Step 3 instead of making a new one.
Start it and watch the logs:
cd ~/proxy
docker compose up -d
docker compose ps
docker compose logs -f caddy
docker compose ps should show the caddy container as running. In the logs, within a few seconds, you should see JSON lines containing "msg":"certificate obtained successfully" with "identifier":"hello.example.com", and the same for status.example.com. Press Ctrl+C to stop following the logs; Caddy keeps running.
The apps do not exist yet, and that is fine. Caddy answers the ACME challenge itself, so it gets the certificates anyway; visitors would just see a 502 Bad Gateway until we start the apps.
Step 6: Connect your apps without publishing ports
Each app gets its own folder and Compose file, joins the proxy network and has no ports: section. We set container_name explicitly so the name in the Caddyfile is stable and does not collide with services from other projects.
A simple test site with Nginx:
mkdir -p ~/apps/hello && cd ~/apps/hello
nano compose.yaml
services:
  web:
    image: nginx:1.27-alpine
    container_name: hello-web
    restart: unless-stopped
    networks:
      - proxy

networks:
  proxy:
    external: true
docker compose up -d
And a real app, Uptime Kuma, a self-hosted uptime monitor:
mkdir -p ~/apps/uptime-kuma && cd ~/apps/uptime-kuma
nano compose.yaml
services:
  uptime-kuma:
    image: louislam/uptime-kuma:1
    container_name: uptime-kuma
    restart: unless-stopped
    volumes:
      - kuma_data:/app/data
    networks:
      - proxy

volumes:
  kuma_data:

networks:
  proxy:
    external: true
docker compose up -d
Uptime Kuma updates its dashboard through WebSockets, and Caddy proxies them out of the box, so there is nothing extra to configure.
For apps that come with a database, keep the database off the proxy network. Give the stack a private network of its own and only attach the web container to proxy:
services:
  app:
    image: example/app:1.0
    container_name: myapp
    networks:
      - proxy
      - internal
  db:
    image: postgres:17
    networks:
      - internal

networks:
  proxy:
    external: true
  internal:
This way Caddy can reach myapp, but nothing outside the stack can talk to PostgreSQL. (Image names here are illustrative; a real database also needs environment variables and a volume.)
Adding the next app later is always the same loop: start its container on proxy, add a site block to ~/proxy/conf/Caddyfile, create the DNS record, then format, validate and reload Caddy without downtime:
cd ~/proxy
docker compose exec -w /etc/caddy caddy caddy fmt --overwrite
docker compose exec -w /etc/caddy caddy caddy validate
docker compose exec -w /etc/caddy caddy caddy reload
fmt tidies indentation, validate should end with Valid configuration, and reload applies the new config gracefully, keeping existing connections alive.
Step 7: Verify HTTPS and automatic renewal
From the VPS or your own computer, request the site headers:
curl -I https://hello.example.com
Expect HTTP/2 200, a via: 1.1 Caddy header showing the request passed through the proxy, and an alt-svc: h3=":443" header advertising HTTP/3. Then check the automatic redirect:
curl -I http://hello.example.com
You should get HTTP/1.1 308 Permanent Redirect with Location: https://hello.example.com/. To see who issued the certificate and when it expires:
echo | openssl s_client -connect hello.example.com:443 -servername hello.example.com 2>/dev/null | openssl x509 -noout -issuer -dates
The issuer line should mention O = Let's Encrypt with an intermediate such as CN = R12 or CN = E7, and notAfter should be about 90 days away.
Finally, confirm that no app port is exposed:
docker ps --format 'table {{.Names}}\t{{.Ports}}'
Only caddy should show port mappings (0.0.0.0:80->80/tcp, 0.0.0.0:443->443/tcp and so on). hello-web should show 80/tcp and uptime-kuma 3001/tcp with no arrow, which means “open inside Docker only”. Renewal needs nothing from you: Caddy checks certificates periodically and renews them in the background, and you will see the event in docker compose logs caddy.
Useful Caddyfile patterns
Protecting a panel with basic auth
For tools that have no login of their own, Caddy can add a password prompt. Generate a bcrypt hash (you will be asked for the password twice):
cd ~/proxy
docker compose exec caddy caddy hash-password
Then use the hash in the site block:
tools.example.com {
	basic_auth {
		admin $2a$14$REPLACE_WITH_YOUR_HASH
	}
	reverse_proxy tools-app:8080
}
Since Caddy 2.8 the directive is called basic_auth; the older basicauth still works but logs a deprecation warning.
Security headers and compression with a snippet
Snippets let you define settings once and import them in every site:
(common) {
	encode zstd gzip
	header {
		Strict-Transport-Security "max-age=31536000"
		X-Content-Type-Options "nosniff"
		Referrer-Policy "strict-origin-when-cross-origin"
		-Server
	}
}

hello.example.com {
	import common
	reverse_proxy hello-web:80
}
Snippet definitions go after the global options block. encode compresses responses, and -Server removes the header that advertises the software behind your site.
Redirecting www to the bare domain
www.example.com {
	redir https://example.com{uri} permanent
}
Caddy gets a certificate for www.example.com too, so the redirect works over HTTPS without warnings.
Apps that need the real visitor IP
Caddy automatically sends X-Forwarded-For, X-Forwarded-Proto and X-Forwarded-Host headers. Many apps ignore them until you tell the app to trust the proxy. Find the network range with docker network inspect proxy (look for Subnet, often something like 172.18.0.0/16) and enter it in the app’s “trusted proxies” setting. Also set the app’s public base URL to https://..., or it may generate http:// links.
How much RAM does Caddy use?
Very little. On a small VPS the reverse proxy should be the cheapest part of your stack, and Caddy fits that well. The chart below shows approximate idle memory for common reverse proxy options serving a few sites; real numbers vary with traffic, modules and configuration.
Plain Nginx is leaner, but it does not manage certificates by itself, so you add Certbot on top. Caddy gives you that automation in one small binary.
Troubleshooting and common mistakes
The certificate is never issued. Run docker compose logs caddy and read the error. Almost always it is one of: the DNS record does not point at the VPS yet (recheck with dig), a wrong AAAA record, port 80 or 443 blocked by a firewall or by a DNS provider’s proxy, or a typo in the hostname. While you experiment, add acme_ca https://acme-staging-v02.api.letsencrypt.org/directory to the global options block: staging certificates are not trusted by browsers, but staging has much more generous rate limits. Remove the line once everything works and reload.
“address already in use” when starting Caddy. Something on the host already listens on port 80 or 443. Find it with:
sudo ss -tlnp | grep -E ':(80|443)\s'
If it is a preinstalled Apache or Nginx you do not need, stop and disable it, for example sudo systemctl disable --now apache2.
502 Bad Gateway. Caddy runs but cannot reach the app. Check that the app container is running, that it is attached to the proxy network (docker network inspect proxy), that the name in the Caddyfile matches its container_name, and that you used the internal port. You can test from inside Caddy:
docker compose exec caddy wget -qO- http://hello-web:80
If this prints HTML, the network path works and the problem is in the Caddyfile.
Changes to the Caddyfile are ignored. Caddy does not watch the file. Run the reload command from Step 6, and make sure you mounted the conf folder, not the single file.
Rate limit errors. Let’s Encrypt limits failed validations and duplicate certificates per week. The classic way to hit them is deleting the caddy_data volume repeatedly while testing, which forces fresh certificates every time. Keep the volume and use the staging CA for experiments.
Redirect loops behind a CDN. If you later enable a DNS provider’s proxy, set its SSL mode to full end-to-end encryption with certificate validation (often called “Full (strict)”), not a “flexible” mode that talks plain HTTP to your server.
Security notes
- Never publish app ports. Remember that Docker bypasses ufw. If you need temporary direct access for debugging, bind to localhost only, for example
"127.0.0.1:8080:80", and use an SSH tunnel. - The
dockergroup is root-equivalent. Anyone in it can control the host, so add only trusted admin accounts. - Do not expose Caddy’s admin API. It listens on
localhost:2019inside the container, which is whycaddy reloadworks. Never publish port 2019. - Protect and back up
caddy_data. It contains your certificates’ private keys. Include the volume in your backups and restrict who can read them. - Keep images updated. Every few weeks, run
docker compose pull && docker compose up -din each project folder, and read release notes before changing a pinned minor version. - Be careful with HSTS. Once browsers see
Strict-Transport-Security, they refuse plain HTTP for that domain for the wholemax-age. Start with a short value if you are unsure every subdomain will stay on HTTPS. - Use HTTPS-only passwords. Basic auth sends credentials with every request; Caddy’s automatic HTTPS makes this acceptable, but use long, unique passwords anyway.
So, is Caddy the right reverse proxy for you?
If you run a handful of self-hosted apps on a VPS and want each one on its own domain with valid HTTPS, Caddy is about the shortest path there: a short Caddyfile, a single container, certificates that renew themselves and a clean security model where only ports 80 and 443 face the internet. If you need very advanced load balancing or already have deep Nginx expertise in your team, Nginx remains a fine choice; if you prefer routing defined through container labels, look at Traefik. For most small setups, though, Caddy is the one you set up once and forget.
You can follow this guide on a VPS with us in under half an hour, or let our server administration team set up Caddy, Docker, DNS and your apps for you, including backups and updates.
FAQ
Does Caddy or Let’s Encrypt cost anything?
No. Caddy is open source under the Apache 2.0 license, and Let’s Encrypt certificates are free. You do not even need to create an account manually; Caddy registers one automatically on first start.
Can Caddy proxy to an app that runs directly on the host, outside Docker?
Yes. Add extra_hosts: - "host.docker.internal:host-gateway" to the Caddy service and use reverse_proxy host.docker.internal:8080. The app must listen on an address reachable from the Docker bridge (not only 127.0.0.1), and you may need a ufw rule allowing traffic from the Docker subnet to that port.
What happens if my VPS is offline when a certificate should renew?
Nothing dramatic. Caddy starts renewing about 30 days before expiry and keeps retrying, so a few hours or even days of downtime do not cause an expired certificate.
Can I get a wildcard certificate like *.example.com?
Yes, but wildcards require the DNS challenge, which needs a Caddy build with a plugin for your DNS provider. You build a custom image with the official caddy:2.10-builder image and xcaddy. For a few named subdomains, separate certificates as in this guide are simpler.
Does this work on an LXC VPS?
Often yes, provided nesting is enabled for Docker. In unprivileged LXC containers some firewall features may be limited, so if you hit errors, a KVM VPS is the easiest way to follow this tutorial exactly.








