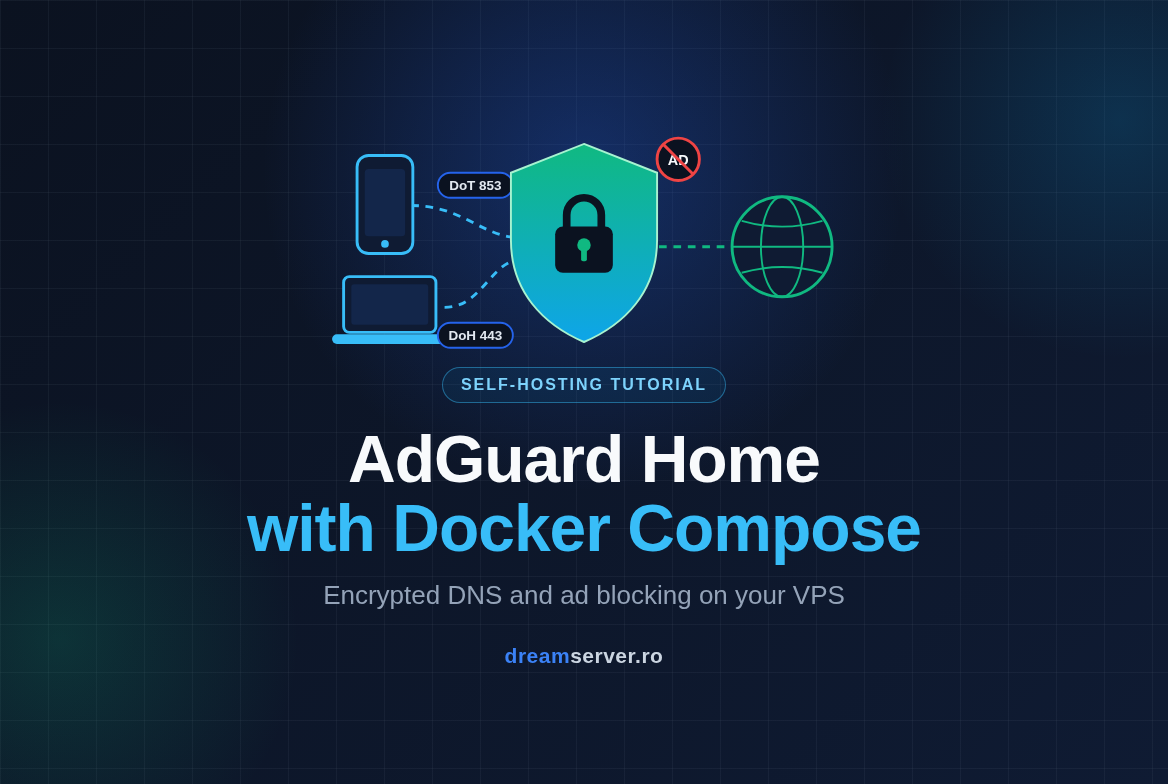
AdGuard Home with Docker Compose: Encrypted DNS on a VPS
Almost everything your phone does online starts with a DNS lookup: “where is this site?”, “where is this ad server?”, “where is this tracker?”. Whoever answers those questions sees a very honest list of what you do all day, and on mobile data, hotel Wi-Fi or a coffee shop network, that is somebody you never chose. In this tutorial we take that job back. We deploy AdGuard Home with Docker Compose on a VPS, give it a real TLS certificate, and switch on DNS-over-HTTPS and DNS-over-TLS, so your phone and laptop get private, ad-free, tracker-free DNS from anywhere in the world, without any app installed on them.
We explain every step, including the parts most guides skip: why you must never expose plain port 53 to the internet, why Docker ignores your firewall, and how to make sure only your own devices can use the server.
What AdGuard Home is, and what DNS has to do with ads
DNS (Domain Name System) is the internet’s phone book. When an app wants to talk to ads.example-tracker.com, it first asks a DNS resolver for that name’s IP address. Normally the resolver belongs to your mobile operator or your home ISP.
AdGuard Home is an open source DNS server written in Go, published by the AdGuard team at github.com/AdguardTeam/AdGuardHome
under the GPL-3.0 license. It sits between your devices and the rest of the internet’s DNS. For every lookup it checks a set of blocklists: if the name belongs to an ad or tracking network, it answers 0.0.0.0 (a dead end) and the ad simply never loads. Everything else is forwarded to an upstream resolver and cached. You manage it from a clean web dashboard with statistics, a query log, per-device settings and parental filters.
Because blocking happens at the DNS level, it works in every app on the device, not only in the browser. The trade-off is that it cannot remove ads served from the same domain as the content (YouTube video ads are the classic example).
Why encrypted DNS matters
Classic DNS travels in plain text over port 53 (a port is just a numbered “door” on a server, so one machine can offer many services). Anyone on the path can read it and even change the answers. Three newer protocols wrap DNS in TLS encryption, the same technology behind the padlock in your browser:
- DNS-over-TLS (DoT): DNS inside a TLS connection on port 853/tcp. This is what Android’s “Private DNS” setting uses.
- DNS-over-HTTPS (DoH): DNS inside normal HTTPS on port 443/tcp. It looks like ordinary web traffic, so it is hard to block. Browsers, Windows 11 and Apple devices support it.
- DNS-over-QUIC (DoQ): DNS over the QUIC protocol on port 853/udp. Fast on flaky mobile networks, supported by fewer clients.
AdGuard Home speaks all three, but only if you give it a valid certificate for a hostname you own. That is the heart of this tutorial.
Why a VPS and not a Raspberry Pi at home
A home box only protects you on your home network. A VPS has a fixed public IP, sits in a data center with redundant power and connectivity, and is reachable from anywhere, so your phone stays protected on 4G, 5G and every Wi-Fi you join. AdGuard Home is light: it runs comfortably next to other small services on an entry-level VPS.
What you need
- A fresh VPS with Debian 13 or Ubuntu 24.04, 1 vCPU and 1 GB of RAM is plenty. A KVM VPS is the easiest choice. In an unprivileged LXC container, Docker only works if nesting (and usually keyctl) is enabled for the container; if
docker run hello-worldfails there, ask support to enable it or pick KVM. - A sudo user with SSH access (we use
youruserand the IP203.0.113.10as placeholders). - A domain name where you can create DNS records. We use
dns.example.com; replace it everywhere with your own. - An email address for Let’s Encrypt expiry notices.
- About 45 minutes.
How the pieces fit together
Before typing anything, let’s look at the architecture. A container is an isolated package that holds an application plus everything it needs to run, sharing the host’s kernel but not its files. Docker Compose lets us describe that container (image, ports, storage) in one small YAML file, so the whole setup is reproducible. A volume or bind mount is a folder on the VPS that the container sees as its own disk, so configuration survives container updates.
One detail catches many people out: when Docker publishes a port (the ports: section in Compose), it writes its own firewall rules that are evaluated before ufw’s. So ufw deny 53 would not protect a port Docker publishes on all interfaces. That is why we decide exposure in the Compose file itself: encrypted ports (443 and 853) are public on purpose, while plain DNS (53) and the admin wizard (3000) are bound to 127.0.0.1, reachable only from the VPS itself. ufw still matters, but only for services running directly on the host: SSH and certbot’s port 80.
The plan: AdGuard Home with Docker Compose in eight steps
The procedure has eight steps. Steps 1 to 4 prepare the server, steps 5 to 8 configure AdGuard Home and your devices. Each step below has a heading with the same number as in the diagram.
Step 1: Point a hostname at your VPS
Encrypted DNS needs a name, because TLS certificates are issued for names, not bare IPs. In your domain’s DNS panel, create these records (replace the IP with your VPS address):
| Type | Name | Value |
|---|---|---|
| A | dns.example.com | 203.0.113.10 |
| AAAA | dns.example.com | your VPS IPv6 (optional) |
| A | *.dns.example.com | 203.0.113.10 |
The first record is the main hostname. The wildcard record (*) makes names like phone.dns.example.com and laptop.dns.example.com point to the same server. We will use those per-device names in step 7 to identify each device. A wildcard DNS record is free and needs no special certificate by itself.
Wait a few minutes, then check from any computer:
nslookup dns.example.com
nslookup phone.dns.example.com
Both should return your VPS IP. If they don’t, wait for propagation before moving on, because step 3 will fail otherwise.
Step 2: Install Docker and set up the firewall
First, bring the system up to date:
sudo apt update && sudo apt full-upgrade -y
On Ubuntu, if the upgrade needs a reboot, the file /var/run/reboot-required appears; check it with [ -f /var/run/reboot-required ] && echo "Reboot needed". Debian does not always create that file, so simply reboot if the upgrade installed a new linux-image package. Reboot with sudo reboot and log back in.
Now install Docker from Docker’s official repository. This block works on both distributions: it reads /etc/os-release to pick debian or ubuntu and the right release codename (trixie or noble), and writes the repository in the current deb822 format:
sudo apt install -y ca-certificates curl
. /etc/os-release
sudo install -m 0755 -d /etc/apt/keyrings
sudo curl -fsSL "https://download.docker.com/linux/${ID}/gpg" -o /etc/apt/keyrings/docker.asc
sudo chmod a+r /etc/apt/keyrings/docker.asc
sudo tee /etc/apt/sources.list.d/docker.sources > /dev/null <<EOF
Types: deb
URIs: https://download.docker.com/linux/${ID}
Suites: ${VERSION_CODENAME}
Components: stable
Signed-By: /etc/apt/keyrings/docker.asc
EOF
sudo apt update
sudo apt install -y docker-ce docker-ce-cli containerd.io docker-buildx-plugin docker-compose-plugin
Check that it works:
sudo docker run --rm hello-world
docker compose version
You should see “Hello from Docker!” and a Compose version starting with v2 or newer. If hello-world fails inside an unprivileged LXC container, nesting is not enabled (see “What you need”).
Next, install the tools we use later: the firewall, certbot (the Let’s Encrypt client), and two DNS testing tools (dig and kdig):
sudo apt install -y ufw certbot bind9-dnsutils knot-dnsutils
On Ubuntu ufw is usually already installed; on Debian it is not, the command covers both. Now configure it for the host services only:
sudo ufw allow 22/tcp
sudo ufw allow 80/tcp
sudo ufw enable
sudo ufw status verbose
Port 22 keeps your SSH session alive (change it if your SSH runs on another port, and always allow it before ufw enable). Port 80 is for certbot’s certificate validation. We deliberately do not add 443 or 853 here: Docker opens them itself when it publishes them, and ufw could not close them anyway.
Step 3: Get a TLS certificate for your DNS hostname
We use certbot in standalone mode: for a few seconds it starts its own tiny web server on port 80, Let’s Encrypt connects to it to verify that you control the name (the “HTTP-01 challenge”), and the certificate is issued. Nothing else listens on port 80, so there is no conflict.
Include the main name plus one name per device that will use DNS-over-TLS (Android Private DNS, Linux). Devices that use DoH do not need their own name:
sudo certbot certonly --standalone \
  -d dns.example.com \
  -d phone.dns.example.com \
  -d laptop.dns.example.com \
  -m you@example.com --agree-tos --no-eff-email
Expected output ends with something like:
Successfully received certificate.
Certificate is saved at: /etc/letsencrypt/live/dns.example.com/fullchain.pem
Key is saved at:         /etc/letsencrypt/live/dns.example.com/privkey.pem
Let’s Encrypt certificates last 90 days. The certbot package on both Debian and Ubuntu installs a systemd timer that renews them automatically. Verify it and do a test run:
systemctl list-timers | grep certbot
sudo certbot renew --dry-run
AdGuard Home must reload the new certificate after a renewal, so we add a deploy hook, a script certbot runs only when a certificate was actually renewed:
sudo tee /etc/letsencrypt/renewal-hooks/deploy/restart-adguardhome.sh > /dev/null <<'EOF'
#!/bin/sh
/usr/bin/docker restart adguardhome
EOF
sudo chmod +x /etc/letsencrypt/renewal-hooks/deploy/restart-adguardhome.sh
The container named adguardhome does not exist yet; that’s fine, the hook will only run at the first real renewal, weeks from now.
Adding a DoT device later means expanding the certificate with all old names plus the new one: sudo certbot certonly --standalone --expand -d dns.example.com -d phone.dns.example.com -d laptop.dns.example.com -d tablet.dns.example.com. If you prefer a wildcard certificate (*.dns.example.com), you need the DNS-01 challenge and a certbot plugin for your DNS provider; it works, but is beyond this tutorial.
Step 4: Write the AdGuard Home docker compose file
Create a home for the project and open the Compose file:
sudo mkdir -p /opt/adguardhome
cd /opt/adguardhome
sudo nano compose.yaml
Paste this content (Docker Compose also accepts the older name docker-compose.yml, but compose.yaml is the current default):
services:
  adguardhome:
    image: adguard/adguardhome:latest
    container_name: adguardhome
    restart: unless-stopped
    ports:
      # Plain DNS and the admin UI: reachable only from the VPS itself
      - "127.0.0.1:53:53/tcp"
      - "127.0.0.1:53:53/udp"
      - "127.0.0.1:3000:3000/tcp"
      # Encrypted DNS: reachable from the internet
      - "443:443/tcp"   # DNS-over-HTTPS
      - "853:853/tcp"   # DNS-over-TLS
      - "853:853/udp"   # DNS-over-QUIC
    volumes:
      - ./work:/opt/adguardhome/work
      - ./conf:/opt/adguardhome/conf
      - /etc/letsencrypt:/etc/letsencrypt:ro
Save with Ctrl+O, Enter, and exit with Ctrl+X. What each part does:
image: the official image. Thelatesttag always follows the newest stable release, which is convenient for a security-sensitive service, but an update can change behavior. If you prefer controlled upgrades, check the AdGuard Home releases page and pin the exact tag shown there (they look likevX.Y.Z). Either way, check that page from time to time for the newest version.restart: unless-stopped: the container starts again after a crash or a VPS reboot.ports: the format ishost_address:host_port:container_port. The127.0.0.1prefix keeps port 53 and the admin port off the internet. Lines without a prefix listen on all public addresses.volumes:confholds the configuration fileAdGuardHome.yaml,workholds the query log, statistics and downloaded filter lists./etc/letsencryptis mounted read-only (:ro) so AdGuard Home can read the certificate but never modify it. We mount the whole folder because thelivefiles are symlinks intoarchive.
Step 5: Start the container and run the setup wizard
Start AdGuard Home in the background (-d means detached) and check its status:
cd /opt/adguardhome
sudo docker compose up -d
sudo docker compose ps
sudo docker compose logs --tail 20
ps should show the container as running (or Up), and the logs should mention that the setup web interface is available on port 3000. If you see address already in use for port 53, jump to the troubleshooting section.
Port 3000 is bound to 127.0.0.1, so we reach it through an SSH tunnel: an encrypted pipe that forwards a port on your computer to a port on the VPS. Run this on your own computer (not on the VPS) and leave the window open:
ssh -N -L 3000:127.0.0.1:3000 youruser@203.0.113.10
Now open http://localhost:3000 in your browser. The wizard asks a few questions:
- Admin Web Interface: listen interface “All interfaces”, port 3000. Important: the wizard suggests port 80, but our Compose file maps 3000, so change it to 3000. “All interfaces” here means inside the container; Docker still limits it to
127.0.0.1on the host. - DNS server: “All interfaces”, port 53.
- Authentication: choose an admin username and a long, unique password. You will see why this matters in step 6.
- Ignore any hint about configuring a static IP: inside Docker it does not apply.
After the wizard finishes, log in at http://localhost:3000. Back on the VPS, test plain DNS locally:
dig @127.0.0.1 example.com +short
dig @127.0.0.1 doubleclick.net +short
The first command returns a real IP address. The second should return 0.0.0.0: the built-in “AdGuard DNS filter” list, enabled by default, just blocked an ad network. Your filtering server works.
Step 6: Enable DNS-over-HTTPS and DNS-over-TLS
In the dashboard go to Settings > Encryption settings and fill in:
- Enable Encryption: checked.
- Server name:
dns.example.com. This must be set; AdGuard Home uses it to recognise device names such asphone.dns.example.comin step 7. - Redirect to HTTPS automatically: leave unchecked, so the SSH tunnel to port 3000 keeps working.
- HTTPS port:
443. DNS-over-TLS port:853. DNS-over-QUIC port:853. - Certificates: choose “Set a certificates file path” and enter
/etc/letsencrypt/live/dns.example.com/fullchain.pem. - Private key: choose “Set a private key file” and enter
/etc/letsencrypt/live/dns.example.com/privkey.pem.
AdGuard Home validates the files immediately and should show a message that the certificate chain is valid, listing your names and the expiry date. Click Save configuration. The paths are the ones inside the container, which match the host paths thanks to our volume mount.
Good to know: AdGuard Home serves DoH and its web dashboard from the same HTTPS server, so from now on the login page is also reachable at https://dns.example.com. That is why the strong password from step 5 matters. If you only need DoT (for example only Android phones), you can remove the 443:443/tcp line from compose.yaml and run sudo docker compose up -d again; the dashboard then stays reachable only through the tunnel.
Now test from the VPS, or from any Linux machine with curl and kdig. DNS-over-HTTPS first: we ask curl to resolve example.com through your DoH server and print the HTTP status:
curl -sS --doh-url https://dns.example.com/dns-query https://example.com -o /dev/null -w "%{http_code}\n"
Expected output: 200. Then DNS-over-TLS:
kdig @dns.example.com +tls-ca +tls-hostname=dns.example.com example.com
The output starts with a ;; TLS session line (TLS1.3) and contains an ANSWER SECTION. +tls-ca makes kdig verify the certificate against the system’s trusted authorities, so a success here also proves the certificate is correct.
Step 7: Lock the server down with ClientIDs
Right now, anyone who discovers dns.example.com could use your server. That wastes your resources and fills your logs with strangers. AdGuard Home solves this with ClientIDs: short identifiers that each device includes in its connection. For DoH the ClientID goes at the end of the URL (/dns-query/laptop), for DoT and DoQ it is the first label of the hostname (phone.dns.example.com). ClientIDs may contain lowercase letters, digits and hyphens.
- Go to Settings > Client settings > Add client. Name:
Phone, identifier:phone. Save. Repeat forlaptop,iphone, and so on. - Go to Settings > DNS settings > Access settings. In Allowed clients, enter one ClientID per line:
phone
laptop
iphone
- Click Save.
From now on, every query that does not carry an allowed ClientID is refused. That includes the earlier dig @127.0.0.1 tests, which reach the container from the Docker bridge address. If you still want to test from the VPS, look in the Query log for the IP those tests came from (typically something like 172.18.0.1) and add it to Allowed clients too.
Test with ClientIDs:
curl -sS --doh-url https://dns.example.com/dns-query/laptop https://example.com -o /dev/null -w "%{http_code}\n"
kdig @phone.dns.example.com +tls-ca +tls-hostname=phone.dns.example.com +tls-sni=phone.dns.example.com example.com
Both should succeed, and the Query log should now show the requests under “Laptop” and “Phone”. The same curl command without /laptop should fail with “Could not resolve host”, which proves the lock works.
Step 8: Connect your devices
Android 9 or newer (DoT): Settings > Network & internet > Private DNS > “Private DNS provider hostname” and enter phone.dns.example.com. Android verifies the certificate, which is why that name had to be in step 3.
iPhone, iPad and Mac (DoH): Apple devices use a configuration profile. In the AdGuard Home dashboard open Setup guide > DNS Privacy, choose the iOS section, enter the ClientID (for example iphone) and download the .mobileconfig file. Open it on the device and install it from Settings > General > VPN & Device Management.
Windows 11 (DoH): Settings > Network & internet > your adapter > DNS server assignment > Edit > Manual. Turn on IPv4, enter 203.0.113.10 as preferred DNS, set “DNS over HTTPS” to “On (manual template)”, template https://dns.example.com/dns-query/laptop, and turn “Fallback to plaintext” off.
Browsers only: Firefox (Settings > Privacy & Security > DNS over HTTPS > Max Protection > Custom) and Chrome (Settings > Privacy and security > Security > Use secure DNS > custom provider) accept https://dns.example.com/dns-query/laptop.
Linux with systemd-resolved (DoT): create /etc/systemd/resolved.conf.d/adguard.conf:
[Resolve]
DNS=203.0.113.10#laptop.dns.example.com
DNSOverTLS=yes
Domains=~.
Then run sudo systemctl restart systemd-resolved. The part after # is the name sent in TLS, carrying your ClientID.
Open a few websites on each device and watch them appear in the dashboard’s Query log, with blocked requests in red.
Choosing blocklists and upstream resolvers
Under Settings > DNS settings > Upstream DNS servers, use encrypted upstreams so the path from your VPS onward is private too:
https://dns.quad9.net/dns-query
https://cloudflare-dns.com/dns-query
Choose “Load-balancing” or “Parallel requests”, put 9.9.9.9 and 1.1.1.1 in Bootstrap DNS servers (used only to resolve the upstream hostnames), enable DNSSEC, and click Test upstreams.
Under Filters > DNS blocklists > Add blocklist > Choose from the list you can add more lists from the built-in catalogue. More rules block more, but cost memory and raise the chance of breaking a site. The chart shows typical figures.
For a few personal devices, the default list plus one or two well-maintained extra lists is the sweet spot. Even the largest setup fits easily on a 1 GB VPS.
Updates and backups
AdGuard Home’s built-in “update” button does not apply in Docker; you update by pulling a newer image:
cd /opt/adguardhome
sudo docker compose pull
sudo docker compose up -d
sudo docker image prune -f
The configuration lives in conf/AdGuardHome.yaml. Back it up together with the Compose file:
cd /opt
sudo tar czf ~/adguardhome-backup-$(date +%F).tar.gz adguardhome/compose.yaml adguardhome/conf
sudo chown "$USER": ~/adguardhome-backup-*.tar.gz
Because tar ran with sudo, the archive was owned by root; the chown gives it back to you so you can copy it off the server, for example with scp youruser@203.0.113.10:adguardhome-backup-*.tar.gz . run on your computer. Add adguardhome/work too if you want to keep statistics and the query log.
Troubleshooting and common mistakes
address already in useon port 53: another program already listens on127.0.0.1:53. Find it withsudo ss -lntup | grep ':53 '. On Ubuntu, systemd-resolved listens on127.0.0.53and127.0.0.54, which do not collide with our127.0.0.1binding; it only collides if you change the mapping to53:53on all interfaces, which you should not do anyway. On Debian, a leftover dnsmasq or bind9 is the usual suspect.- Port 443 already in use: a web server (nginx, Apache, Caddy) already owns it. Either run AdGuard Home on a separate VPS, or drop DoH and keep only DoT and DoQ on 853.
- The dashboard disappeared after the wizard: you kept port 80 in the wizard. Edit
conf/AdGuardHome.yaml, set theaddressunderhttp:to0.0.0.0:3000, thensudo docker compose restart. - certbot fails with a timeout: port 80 is not allowed in ufw, or the DNS records from step 1 have not propagated yet.
- “Certificate file not found” in Encryption settings: you used a host path that does not exist in the container, or forgot the
/etc/letsencryptvolume. Recreate the container withsudo docker compose up -dafter fixingcompose.yaml. - Android says “Couldn’t connect”: the device name (for example
phone.dns.example.com) is missing from the certificate, the ClientID is not in Allowed clients, or the network blocks port 853 (some hotels and corporate Wi-Fi do). DoH on 443 is the fallback for such networks. - Everything is refused after step 7: the device is not sending a ClientID, or the identifier was typed differently in Client settings and Allowed clients.
- Docker will not start in an LXC VPS: the container lacks nesting; ask support to enable it or use a KVM VPS.
Security notes
- Never publish plain port 53 to the internet. An open resolver is abused for DNS amplification attacks within hours, and you would receive abuse complaints. Our Compose file binds it to
127.0.0.1for exactly this reason. - Remember that Docker bypasses ufw. Whatever you put in
ports:without127.0.0.1is public, no matter what ufw says. Review that section after every edit. - Protect the dashboard. With DoH enabled, the login page is public on 443. Use a long unique password; AdGuard Home blocks an IP for a while after repeated failed logins. Drop the 443 mapping if you do not need DoH.
- Keep the allowlist strict. Only ClientIDs you actually use should be in Allowed clients. Remove a device’s ID when you sell or lose it.
- Limit what you log. The query log is a detailed record of your browsing. Under Settings > General settings, shorten the query log and statistics retention (for example 24 hours), or enable anonymization of client IPs.
- Update regularly. Pull the image at least monthly and keep the host patched with
apt. - Treat backups as sensitive.
AdGuardHome.yamlcontains your admin password hash and client list.
So, is your own encrypted DNS worth it?
If you want every app on your phone to stop talking to ad and tracking networks, on every network you join, without installing anything on the device, then yes. With AdGuard Home in Docker Compose, a real certificate and ClientIDs, you get private DNS that only your devices can use, costs a few tens of megabytes of RAM and needs almost no maintenance after day one.
You can run this setup on a VPS from our Romanian data center in under an hour, or let our server administration team deploy, secure and keep it updated for you.
FAQ
Does AdGuard Home slow down browsing?
Usually the opposite. Cached answers come back in a millisecond or two, and blocked ads never load. The first lookup of a new name adds the round trip to your VPS, typically a few tens of milliseconds within Europe.
Can my home router use this server?
Only if the router supports DoT or DoH as an upstream. Pointing a router at plain port 53 on the VPS would require exposing 53 to the internet, which we strongly advise against.
Does it block YouTube or Facebook ads?
No. Those ads come from the same domains as the content, and DNS blocking cannot separate them without breaking the site. It does block most third-party ad networks and trackers in apps and on websites.
How much traffic does it use?
Very little. A heavy user generates a few thousand lookups per day, a handful of megabytes per month, far below any VPS traffic allowance.
Do I need a new certificate for every device?
Only for devices that use DoT or DoQ, because their ClientID travels in the hostname. DoH devices put the ClientID in the URL path and work with the main certificate.








